
How to Build a 12-Foot Farmhouse Table

Farmhouse tables are rustic, hold simplistic elegance and are large enough for a big family. Add to the primitive charm of the farmhouse table by making it yourself. The building project isn't difficult and can be accomplished in less than a weekend.
Some basic carpentry skills are all you need, and if you have aged wood to add to the character of your table, all the better.
Things You Will Need
- 10 1-by-6 boards, 12 feet long
- 2 1-by-4 boards, 6 feet long
- Pencil
- Measuring tape
- Carpenter's square
- Circular saw
- 200 2-1/2-inch wood screws
- 6 2-by-2-by-8 foot pieces of lumber
- 4 wooden table legs or posts
- Wood putty
- Sandpaper
- Tung oil or linseed oil
-
Cut the two 1-by-4 boards down to 40 inches each. Cut two of the 1-by-6-by-12-foot boards to a length of 136 inches.
-
Lay the four cut boards out to create the frame for the base of the tabletop. Put the two 40-inch boards to the inside of the two longer boards for the side of the frame. Stand them up on edge. Use the carpenter's square to make sure the joints are even at the corners. Screw in through the outer side boards and into the ends of the cross pieces using two wood screws per corner.
-
Cut 11 pieces of 2-by-2 to a length of 40 inches each. Set these inside the frame between the longer side pieces at 12-inch intervals. The last one will have a slightly shorter distance between the support and the end of the table frame. Screw in place by screwing from the outside through the side boards and into the end of each support. Use two screws for each end of each cross support.
-
Mark the point on both ends of the short sides of the frame that is the exact center. Place the first two tabletop boards alongside this center point, one to each side of the mark. The top boards are the remaining eight 12-foot boards. Align the boards so there is a 4-inch overhang on each end. Screw in place by placing three screws down through each board and into the end board of the frame. Set the screws about two inches apart across the boards. Sink the screws to the level of the wood surface or below; do not let them protrude above the wood.
-
Place the remaining boards by adding a board alongside each of the first two, and so on, until all eight of the tabletop boards have been put in place. Screw them in place the same as the first two, adding three wood screws down through the board at each end and into the end pieces of the frame.
-
Turn the tabletop over. Secure the tabletop boards to the cross supports by screwing through the supports and into the tabletop boards from the bottom. This secures the boards to the supports from the bottom and eliminates a tabletop full of screw heads to putty over.
-
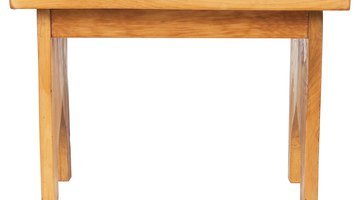
Secure the leg posts while the table is still upside-down. You can use table legs with a shaped design that can be purchased at a home supply store or just plain wood posts. Set the posts into the corners of the frame. Secure by screwing through the outer boards of the frame and into the posts. Use two screws to each side of the post or leg (four per leg).
-
Turn the table upright. Fill the screw head holes with wood putty, then sand. Seal the table with a good finishing oil such as tung oil or linseed oil.
The Drip Cap
- Farmhouse tables are rustic, hold simplistic elegance and are large enough for a big family.
- Add to the primitive charm of the farmhouse table by making it yourself.
- The building project isn't difficult and can be accomplished in less than a weekend.
- Cut the two 1-by-4 boards down to 40 inches each.
- Use two screws for each end of each cross support.
- Screw in place by placing three screws down through each board and into the end board of the frame.
- This secures the boards to the supports from the bottom and eliminates a tabletop full of screw heads to putty over.
References
Writer Bio
Caprice Castano recently left the field of construction management to operate her own contracting business and spend time developing her writing career. Current projects include freelance writing for Internet publications and working on novel-length fiction.
Photo Credits
- Hemera Technologies/PhotoObjects.net/Getty Images
- Hemera Technologies/PhotoObjects.net/Getty Images
More Articles