With over 70 percent of the Earth covered with water, it's important to know about the many different bodies of water found on the planet. This includes both freshwater and saltwater water types.
From a tiny, bubbling stream to the vast, deep ocean, water is everywhere and each water type and body of water has different features, sizes and organisms that call it home.
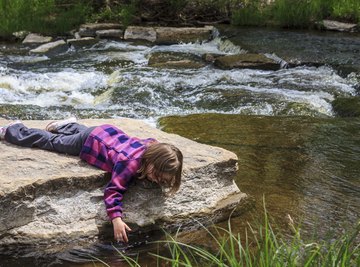
Running Rivers
Streams, also called "brooks" or "creeks," are generally free-flowing channels of water that follow the pull of gravity downhill. Streams run into other bodies of water, such as other streams, lakes or the ocean. The hills between them create watersheds.
The water within rivers comes from rain run off, underground springs or the region's water table. A stream is up to 99 miles long, while rivers are over 100 miles long. Rivers and streams are always surrounded by land. Nearly all streams are fresh water.
Abundant Aquifers
An aquifer is a sub-surface layer of rock or soil saturated with water; sometimes called an "underground river." Much of the United States gains its drinking water from underground wells drilled into aquifers.
Most rivers and streams are connected to aquifers at their source, as well as many lakes. Aquifers are generally freshwater but can also be made somewhat salty by the rocks surrounding them. They are refilled by rain water seeping through the earth.
Landlocked Lakes
Lakes or ponds are fully surrounded by land. They are often fed by streams or rivers and their source can also be a spring from an aquifer. Lakes, like rivers, can also supply drinking water to nearby cities.
Almost all lakes are freshwater bodies of water, with the most notable exception being the Great Salt Lake in Utah.
Guarded Gulfs
Gulfs are always within another water body such as a sea or lake, but more often the ocean. They are a smaller, sheltered area of shoreline where water gathers and slows, the opposite of a land peninsula. Coves and bays are very similar to gulfs, only smaller.
They are important places for commercial uses such as docks, harbors and fishing locations. The Gulf of Mexico is the largest gulf in the world. Gulfs, coves and bays can be either fresh or salt water, depending on the larger body of water. The water within a gulf comes from the larger body of water.
Salty Seas
Seas are harder to define because they can both be surrounded by land like a lake or part of the ocean like a gulf. Geographers have three classifications for seas: nearly enclosed seas, partly enclosed seas, and hypersaline lakes. All seas are salty.
Nearly enclosed seas divide stretches of land within continents and are connected to the ocean, such as the Mediterranean Sea. Partly enclosed seas are much more like gulfs and are open to the ocean, like the Weddell Sea of Antarctica. Hypersaline lakes are seas that are enclosed by land but are salty, such as the Dead Sea.
The Open Ocean
The ocean is the largest type of water body on Earth, having no boundaries. Although we do name different regions of the ocean -- Pacific, Atlantic, Arctic, Indian, Southern -- they are actually one continuous body of water.
All waters of the Earth are connected to oceans, making one huge, worldwide watershed. The ocean is composed of salt water and contains 97 percent of the water on Earth.
The open ocean is mostly barren to sea life. However, some whales, large fish and sharks venture out to these waters either for migration, mating or reasons related to feeding.
References
- Social Studies for Kids: The Names of Bodies of Water
- United States Geological Survey: Earth's Rivers
- World Atlas: Water Terms
- United States Geological Survey: Aquifers
- United States Geological Survey: Lakes and Reservoirs
- National Geographic: Gulf
- National Geographic: Sea
- National Geographic: Ocean
- Windows 2 the Universe: Life in the Open Ocean
About the Author
Maureen Wise has been writing in the environmental field since 2003. Wise currently writes sustainability articles for a number of websites including Tom's of Maine, Piccolo Universe, EcoWatch and Care.com. She has worked in stream restoration and currently works in higher education sustainability. Wise graduated from the University of Mount Union.
Photo Credits
Jim_Pintar/iStock/Getty Images