
How Do I Fix a Bathroom Sink Stopper?

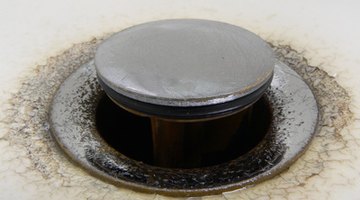
The pop-up stopper in a bathroom sink is a simple part with a simple task. It's easy to identify and fix problems with the stopper. You may notice foreign materials around the stopper, causing the sink to drain slowly; or, when you close it, the stopper may raise just enough to allow water to drain back out.
Another issue may be that the stopper won't move up or down. Either of these scenarios can be remedied with a bit of attention to the stopper itself, or to the stopper assembly beneath the sink.
-
Push down on the lift rod inserted down through the sink faucet. The pop-up stopper should raise up as you do this. Determine if hair or other foreign objects have become entangled around the stopper. Unscrew and remove the flat, circular top of the stopper. Remove the hair or other objects wrapped around the stopper, preventing water from flowing freely down the sink drain, by hand or using a screwdriver. Screw the top back on the stopper. Turn on the faucet to be certain that the blockage is cleared.
-
Pull up on the faucet lift rod. If the stopper does not hold its proper shut position, look beneath the sink. Locate the horizontal rod that goes into the back of the drain pipe under the sink. Tighten the pivot nut at the connection of the horizontal rod and the drain pipe to create the proper amount of friction on the pivot ball directly under the pivot nut, inside the drain. Do not overtighten the pivot nut. Pull up on and press down on the lift rod to ensure the stopper is functioning properly.
-
Examine the pop-up stopper assembly beneath the sink, if the stopper will not respond at all when you pull up and press down on the lift rod. Tighten the clevis screw that holds the lift rod in position, connected to the vertical strap. Reattach the clip that secures the horizontal rod's connection to the strap. Raise and lower the lift rod to check if the stopper is now responding properly. Adjust the strap hole the horizontal rod goes through, if the stopper is not fully raising and lowering. If the stopper does not respond at all, proceed to Step 4.
-
Unscrew the pivot nut on the back of the sink's drain pipe, using an adjustable wrench. Line the horizontal arm up properly with the hole in the bottom of the stopper. Shine a flashlight into the hole, if necessary, as a guide. Insert the horizontal pipe into the stopper hole. Tighten the pivot nut without overtightening. Pull the lift rod up and press the lift rod down to be certain the stopper raises and shuts properly.
Things You Will Need
- Screwdriver
- Adjustable wrench
- Flashlight
References
Writer Bio
Christopher John has been a freelance journalist since 2003. He has written for regional newspapers such as "The Metro Forum" and the "West Tennessee Examiner." John has a Bachelor of Arts in journalism from Memphis State University.
Photo Credits
- old ugly sink image by Tomasz Stelmach from Fotolia.com
- old ugly sink image by Tomasz Stelmach from Fotolia.com
More Articles