Things You'll Need
T-shirt
Measuring tape
Scissors
2 yards cording
Safety pin
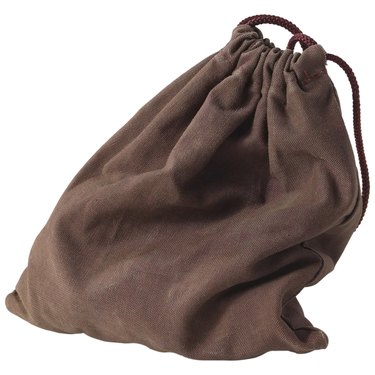
You can make backpacks out of old T-shirts without using a sewing machine. The jersey knit of T-shirt fabric does not fray when cut, allowing the edges to remain unfinished for recycling projects that do not require a needle and thread. A series of knotted fringe connects the edges of the backpack bag together and the already stitched hem of the T-shirt becomes the casing for the drawstring top. Use the backpack to tote essentials to the beach, pajamas for a sleepover or toys for a play date.
Step 1
Lay a T-shirt flat on your work space. The width of the shirt's body, and the length from the hem to under the arm, both need to measure at least 18 inches. Cutting through both layers, cut an 18-inch square with one edge of the square being the hem. You now have two 18-inch squares. The hem edges will be the top of the bag, so choose a T-shirt with no printing or design, or it will be upside down on the finished backpack.
Video of the Day
Step 2
Remove the excess T-shirt from your work surface. Keep the two squares stacked on top of each other and the hems on the same edge. Turn the squares with the hems at the top. Cutting through both layers, cut out two 2-inch squares from each bottom corner.
Step 3
Cut fringe strips 2 inches deep and spaced 1/2 inch apart on the side and bottom edges of the bag. Cut through both layers to get a matching fringe for each cut.
Step 4
Tie each matching fringe strip in a knot to secure the squares together. This creates the bag of the backpack.
Step 5
Lay the bag flat on your work surface with the hem casing at the top. Cut slits in the hem casing, on each side edge of the bag, right next to the fringe. Flip the bag over and cut slits in the hem casing in the same way as the other side. You now have four openings in the casing.
Step 6
Cut two 36-inch lengths of cording. Attach a safety pin to one end of one cord. Insert the safety pin in the casing opening on the left-front side of the bag. Guide the safety pin through the casing and pull it out the right-front casing opening. Flip the bag over. Insert the safety pin through the casing opening on the left-back side of the bag. Guide the pin through the casing and out the right-back opening. Remove the pin. The beginning and end of the cord are on the same side edge of the bag. Pull the cord to have an even amount extending from each opening.
Step 7
Thread the remaining cord through the casing in the same way, but start and end on the opposite side edge of the bag. Pull the cord to have an even amount extending from each opening. You now have two drawstring ends on each side edge.
Step 8
Lay the bag flat on your work surface with the casing at the top. Working with the two drawstring ends on one side edge, bring one end down to the bottom corner of the bag on the same edge. Thread the end under the fringe knot on the bottom corner. Bring the other drawstring down and match the ends. Tie the ends together in an overhand knot one inch from the end. This connects the drawstrings to the bag and creates one strap that will go over the shoulder. Repeat on the other side edge, with the remaining drawstring ends, to make the other strap.
Step 9
Pull the drawstrings at the top of the backpack to draw the bag closed. Place the drawstring straps over the shoulders to carry.
Video of the Day