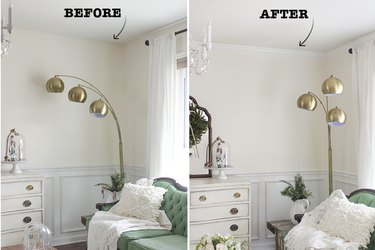
Adding trim and molding features to a room makes it feel complete by highlighting its best features. Not only does crown molding accentuate ceiling height and create architectural interest, it also adds value to one's home. The most difficult aspect of this project is getting the mitered corners fitted correctly, so take care to measure carefully and test-fit the corners using template pieces.
Video of the Day
Things You'll Need
Cordless drill (optional if removing curtains)
6-foot stepladder
Tape measure
Laser distance measurer (optional)
Stud finder
Protractor/angle finder
Miter saw
Electric or pneumatic nail gun
Nails, 3 inches long, 18-gauge
Acrylic latex caulk and caulk gun
Wet rag
White latex paint, satin finish
Paintbrush (angled sash brush, 2 inches wide)
Tip
To determine how much crown molding trim to purchase, measure the perimeter of the room and add 20 percent for possible mis-cuts and corner templates.
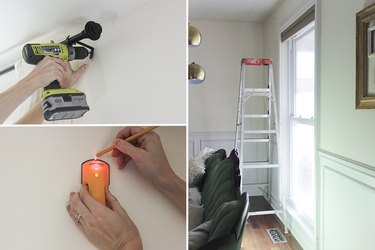
Step 1: Prep the Room
Remove curtain rods with a cordless drill and screw bit, and anything else from the walls that would get in the way of molding installation. Pull the furniture away from the walls, so there is enough room for a ladder to fit. Use a stud finder to mark the locations of the studs around the entire perimeter of the room, about 4-5 inches down from the ceiling.
Video of the Day
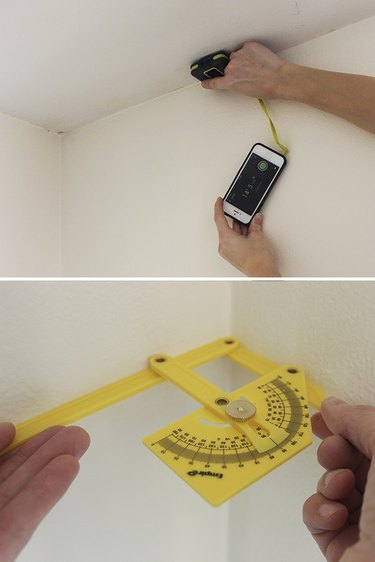
Step 2: Measure the Walls and Corners
Using a laser distance measurer, or with a helper securely holding the opposite end of a measuring tape, find the exact length of each wall (to the nearest 1/16th of an inch) and write it down. Use a protractor/angle finder to find the exact angle of each corner in the room and write it down. Divide each corner angle in half to determine the angle at which the miter saw needs to be set when cutting the molding.
Tip
Many homes, especially older homes, do not have exactly 90-degree angle corners, so make sure to get the exact angle for each one. If angles are off square even 2 degrees, and a 90-degree corner is assumed, it will likely cause lots of mis-cuts and frustration. This tutorial assumes the corners are perfectly 90 degrees square. Be sure to make any necessary adjustments to the angles for your own room if the corners are not perfect.
Step 3: Cut Templates for the Corners
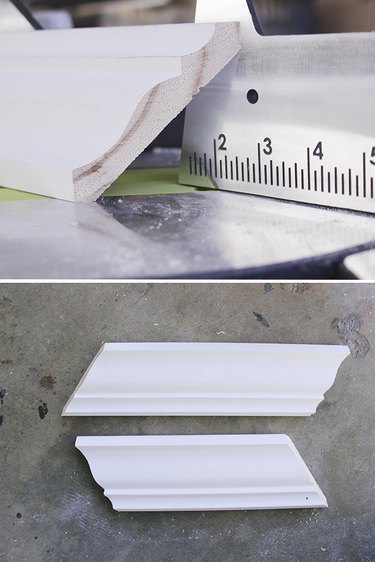
In order to get a nicely fit corner, templates should be made so you can know how to set your miter saw for each side of the crown molding that will fit in a corner, by simply holding them in place. To do this, set the miter saw to 45 degrees to the right. Before cutting, make sure to cut the molding with its bottom facing up, so the flat edges that will sit on the ceiling and wall are resting flat on the miter saw base and fence. Hold it securely with one hand and cut once, move the molding down about 1 foot, and cut again. This piece will be the first template. Move the miter saw to a 45-degree angle to the left and repeat the process to get another 1-foot template.
Step 4: Label the Corner Templates
To know which angle will be needed for inside and outside corners in the room, each side of the templates will need to be labeled. This will make it convenient to keep track of necessary angles of the actual molding that will be installed.
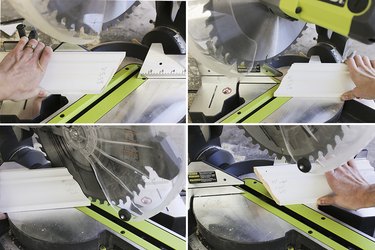
To do this, place one of the corner templates next to the saw blade, and ensure it butts up evenly against the blade. Label this end of the template, "45 Degrees Left, Left Side" (because the saw blade is 45 degrees to the left and the molding is sitting on the left side of the blade). The opposite end of this template should fit snugly against the other side of the blade, so label it, "45 degrees Left, Right Side."
Repeat the same process for the other template, with the saw blade moved to the right. One label should read, "45 Degrees Right, Left Side," and "45 Degrees Right, Right Side."
Step 5: Test Fit the Corners and Draw a Plan
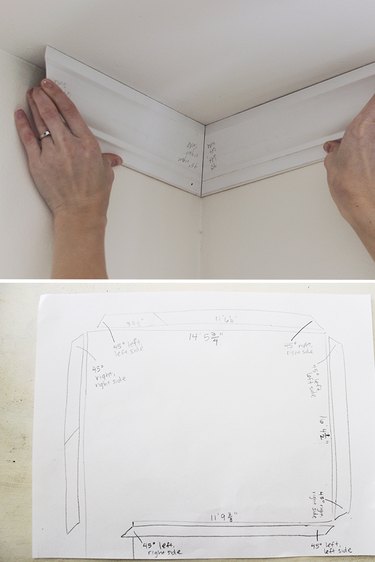
Use the templates to test-fit each corner you will cover. Draw an outline of the room where the molding is going to be installed and label it with the lengths of the walls and the angles that need to be cut. Mark each piece of molding with what type of angle will need to be cut (e.g., 45 Degrees Left, Left Side).
Tip
A "scarf joint" is how two pieces of molding join on a straight (not angled) surface. Because molding comes in set lengths, there will be places on the wall where the two pieces will need to meet and create a seam and therefore need to be joined at 30-degree angles and becomes less visible this way.
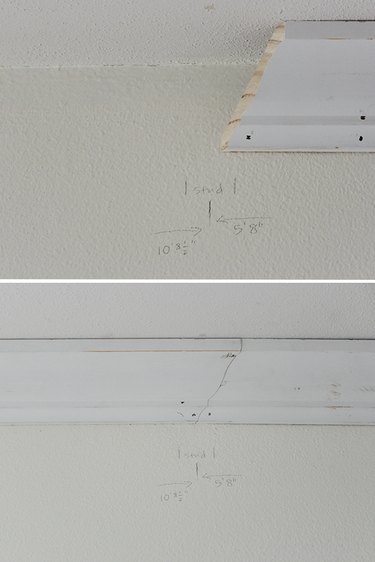
Step 6: Mark Locations of Scarf Joints
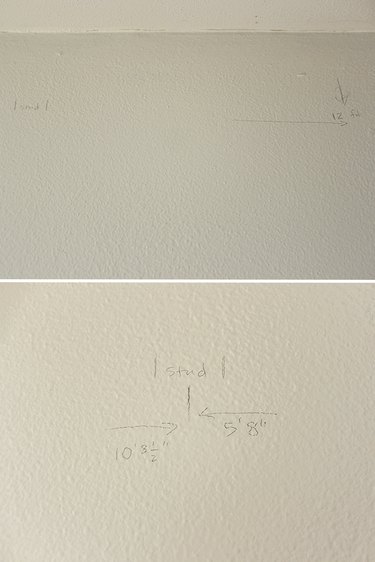
Because the total length of the wall will likely be longer than the lengths of the crown molding that you purchased (I used 12-foot lengths), scarf joints will be needed where two pieces of molding meet in the center of a wall. A scarf joint should always be over a stud so that each end piece can be securely nailed into the stud.
Determine where the scarf joint will fall along the wall. This will need to be over a wall stud location; and for most efficient use of molding, try to find a location closest to the 12-foot length of a stock molding length. Then measure the length of both pieces from the scarf joint out to the corners, and mark these measurements on the drawn plans from one side of the wall where the molding will go to. Find the center of the stud that is closest to this mark and determine its distance. Unless there is a stud at exactly 12 feet (or however long your molding pieces are) from one side of the wall, some amount of molding will need to be cut off. Measure the short side and make note of both these measurements on the drawn plans.
Step 7: Cut Molding and Nail Into Place
Using your drawn plan and double-checking all measurements, cut the molding the same way as described in Step 3, using your template pieces as a guide for setting the saw blade. Where the opposite end will butt another piece in a scarf joint, bevel-cut the ends at 30 degrees.
With a helper, hold the molding into place and nail it into the stud locations using the power nailer, starting at the middle of the piece and working out. The nails will be driven at the bottom of the molding and on the top lip, so the nails can actually reach into the stud and top plate. If the nails are driven in the center of the molding, they will not be able to reach the stud.

Step 8: Nail Scarf Joints Over Stud
At scarf joints, position the pieces so the side with the exposed grain facing outward is beneath the other. Secure the one beneath with one nail first and then the overlying piece with two nails.
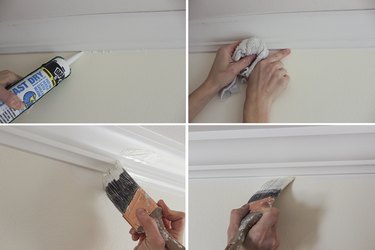
Step 9: Caulk the Seams & Paint
Using a caulk gun, apply caulk along the top and bottom seams of the entire perimeter of the crown molding. With a wet rag handy, use a damp finger to smooth out the bead of caulk after every 1 to 2 feet of application on the seams, or nail holes, wiping off the excess on a rag and keeping your finger clean. Fill indented nail heads with caulk, smoothing away excess with your finger.
When painting the crown molding, "cutting in" or painting horizontally is necessary along the top and bottom of the molding. The easiest way to do this, if you do not have years of experience painting horizontally, is to use a 2-inch angled sash brush to pull the brush 3 to 4 inches horizontally and then pull slightly in a downward direction as you lift the brush. Then re-dip the brush if needed, going back over the area where you started to pull down, brush horizontally 3 to 4 inches and then again pull downward as you lift the brush. This method of "cutting in" requires less time for one to hold their hand steady with the horizontal brush strokes (3 to 4 inches at a time). "Cut in" along the top lip of the molding (where it meets the ceiling).
The bottom lip of the molding will need to be painted, but it is very difficult to "cut in" when holding the brush from above, when you are positioned below the crown molding and reaching up. To remedy this, paint over the bottom lip, overlapping onto the wall. Apply two coats of paint to the molding and let it dry completely. Once it is dry, use paint the same color as the wall to "cut in" against the bottom of the molding.
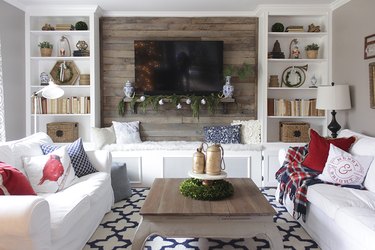
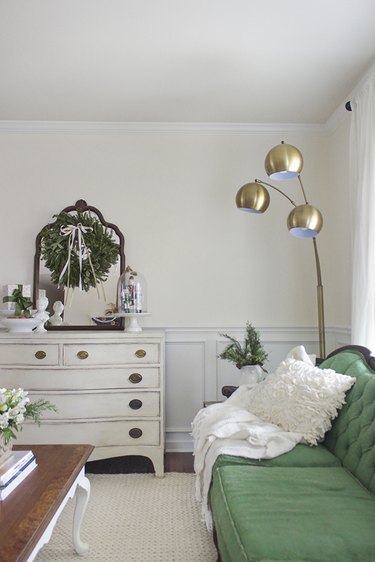
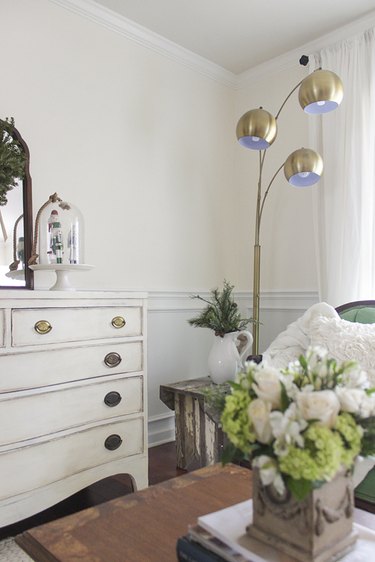
The finished product can be a subtle but classy addition when used with light-colored walls, as the tone-on-tone look adds texture and draws the eye upward.
It can also be a bolder statement with darker contrasting walls such as this pallet wood accent wall, clearly defining the edges and providing a custom look.