
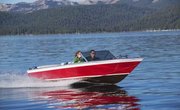

A bow mount trolling motor gives a fisherman the most control over his boat while fishing. It pulls the boat through the water and gives better control and maneuverability than one designed to mount on the transom. Any boat 14 feet or longer can accommodate a bow mount, though you may have to modify the bow if it doesn't have a front deck. You'll need a front deck large enough to secure the mounting base to it and to allow enough room to stow the entire shaft and motor head on the deck without hanging out over the bow.
Lay the mounting base on the front deck of the boat to determine the best position to mount it. See Step 4 if your boat doesn't have a bow deck. Don't install it directly over the point of the bow, but off to one side approximately a foot from the point. Position the motor in the "deployed" or down position to be sure it clears the outer edge of the boat and will lock into place and move in all directions without touching the boat's hull. When you're satisfied with the placement, mark the position of the mounting base with a pencil.
Leave the mounting base in place and pull the shaft up. Lay the motor down on the deck in the "stowed" position. Make sure the motor head is inside the perimeter of the boat so it won't be damaged when you dock the boat. You may have to experiment a bit to get the mounting base in the right spot to allow full movement of the motor when it's in the water and far enough back to keep the head from hanging over bow when it's stowed.
Consider whether you will use an electric foot control or a manual control to run the trolling motor. The advantage of the foot control is that you have hands free operation while you're fishing, so you don't have to take your hands off your rod. On the other hand, the manual control requires less wiring and gives you direct control of the motor. Either way, you'll also need to install a marine battery under the bow to provide power to the motor. All the wiring and connectors come with the motor assembly.
Install a plywood deck section over the top of an open bowed boat. You'll need a piece of plywood 3 feet long and slightly wider than the widest part of the bow it will cover (probably about 4 feet wide). Lay the plywood over the bow rails and outline the outside perimeter of the rails with a pencil on the underside of the plywood. Use a skill saw or jigsaw to cut the plywood along the pencil lines to match the triangle shape of the bow. Sand the edges to smooth them. Secure the deck to the rails by drilling 4 holes along each side of the bow through the plywood and all the way through the rub rails. Use a 1/4 inch bit for these holes. Insert a 1/4 inch by 4 inch galvanized or stainless bolt through each hole and secure them on the underside of the rails with oversized washers and lock nuts. When the deck is in place, follow Steps 1 through 3.
Tips
- Use 3/4 inch marine grade or pressure treated plywood if you have to make your own bow deck.
Tips
- Use 3/4 inch marine grade or pressure treated plywood if you have to make your own bow deck.