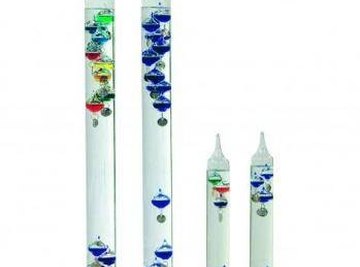
The Galilean thermometer was invented by Galileo Galilei (1564-1642). It operates on the principle that matter becomes more dense as it cools and less dense as it heats up. Specifically, liquids (such as water) are affected more by temperature change than solids. You can use this same principle to make your own Galilean thermometer at home.
- Measuring bowl
- Water
- 10 watertight film canisters
- Sand
- Pen/paper
- Mass scale
- Water density chart
- Permanent marker
- Tall glass vase (at least 10 inches tall)
If you would like more precise temperature readings with a smaller range, you can change the temperatures of each canister and modify the masses accordingly.
Since the thermometer is made with water, it will turn into ice if placed in temperatures below freezing.
Fill the measuring bowl half full of water and write down the current volume measurement. Fill one of the watertight film canisters with sand. Place it in the bowl and check the new volume measurement. The volume of the film canister is the new volume minus the original volume. Record the volume of the canister for later.
Use the water density chart (see Resources section) to find the density of water at 45, 50, 55, 60, 65, 70, 75, 80, 85 and 90 degrees F. Find the mass required to achieve each density, given the volume of the film canister recorded in Step 1.
Mark each one of the film canisters with one of the degree values, 45 to 90. Use the scale to measure the mass of the film canisters and to determine how much sand should be added to each film canister until it weighs exactly enough to achieve the density of its respective temperature value.
Fill the glass vase with water and put all of the film canisters in it, with the lowest-marked temperatures at the bottom.
Use your thermometer by placing it in the area where you want to measure the temperature. Once the canisters have stabilized, the temperature of the air is the temperature marked on whichever canister is floating in the middle of the vase. If there is no canister in the middle, use the lowest temperature from the canisters at the top of the vase.
Things You'll Need
Tips
Warnings
References
Tips
- If you would like more precise temperature readings with a smaller range, you can change the temperatures of each canister and modify the masses accordingly.
Warnings
- Since the thermometer is made with water, it will turn into ice if placed in temperatures below freezing.
About the Author
Joseph Eitel has written for a variety of respected online publications since 2006 including the Developer Shed Network and Huddle.net. He has dedicated his life to researching and writing about diet, nutrition and exercise. Eitel's health blog, PromoteHealth.info, has become an authority in the healthy-living niche. He graduated with honors from Kellogg Community College in 2010 with an Associate of Applied Science.
Photo Credits
Nauticalia.com