
Volleyball is one of the few sports that are both an Olympic event and an amateur mainstay, especially at summer beach parties and picnics. There is a reason professional volleyball players take good care of their arms -- the force on the hands, fingers, wrists and shoulders can be grueling. Anyone with aching shoulders, stinging forearms and throbbing hands after a volleyball game can feel their pain. However, you can minimize injury to your arms with warm-ups, stretching and support devices such as braces or kinesiology tape
Step 1
Warm up before you play. Cold muscles are more prone to injury. Hold your arms out straight on either side. Draw a circle in the air with your fingertips to perform arm circles. Do 30 repetitions of small circles and large circles, both clockwise and counterclockwise on each arm, to warm up the muscles of the arms and shoulders.
Step 2
Perform jumping jacks to warm up your arms and legs simultaneously. Stand with your legs greater than hip-width apart, arms by your sides. Jump to bring your legs together as you simultaneously lift your arms over your head and touch your palms together. Return to start and repeat for three sets of 25 to 30.
Step 3
Perform dynamic stretching specifically for your arms with arm swings. Stand with feet hip-width apart. Hold your arms parallel to the floor at about chest height. Cross your arms over your chest and then open them wide in a swinging motion, as though you were giving a hug. Continue crossing and opening your arms for 30 seconds to a minute. This exercise stretches your arms and chest at the same time.
Step 4
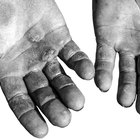
Wear wrist braces or guards to avoid pain and bruising after multiple serves, passes or digs. Look for a soft fabric brace without splints so that it will cushion the blow of the volleyball without limiting your range of motion.
Step 5
Keep your palm flat, fingers extended and thumb back during a serve or block. If you point your thumb or fingers forward toward the ball, you risk painfully jamming them, which can cause you to dislocate your fingers or chip the small bones in your fingers near the joints. Make contact with the flat inside of your fingers, not your fingertips, to avoid injury.
Step 6
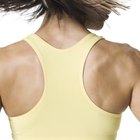
Use kinesiology tape to minimize shoulder pain due to overuse of the rotator cuff. Cut a strip of tape that reaches from the inside of your shoulder blade (acromioclavicular joint) to about two inches above your elbow along the outside of your upper arm. Round off the corners with a pair of sharps scissors to avoid peeling and smooth the tape against smooth, clean skin without stretching the tape. Cut a second piece of tape to reach from front of your shoulder around your armpit to the back of your shoulder. Stretch the tape about 50 to 75 percent in the center, but do not stretch the ends. Apply and smooth down to activate the adhesive.
Step 7
Stretch your arms after playing. Stretching cold muscles can damage them, but stretching warm muscles will prevent pain and injury.
Cross your right arm across your body at about shoulder height. With your left hand, gently press on your right wrist to stretch the muscles of your shoulders. Hold for 30 seconds to one minute. Repeat on the left arm. Bend your right elbow and point it toward the ceiling as you try to touch the back of your neck with your right hand. Use your left hand to apply gentle pressure to your left elbow to stretch the muscles of your upper arm. Repeat with your left arm.
Step 8
Stretch your wrists after playing to prevent soreness. Lift your right arm with your palm facing away from you, as though you're about to give a high five. Use your left hand to gently apply pressure to the fingers of your right hand and stretch your wrist. Drop the fingers of your right hand so that they are pointing to the ground and gently press on the back of your right hand. Repeat on the left wrist.
Related Articles
Differences Between Wide & Close Seated ...
Easy Exercises to Tighten Loose Skin

How to Prevent Tennis Racket Blisters
How to Have Nice Knees
Can You Do Neck Exercises to Prevent ...
How Does Prewrap Tape Help Gymnasts?

How to Wear Soccer Socks

How to Wrap a Scarf Over the Nose & ...
How to Remove a Stuck Ring With Dental ...
How to Get Rid of Blemishes on the Arm
How to Put On Seamless Pantyhose
How to Fix Thong Sandals
Callus From Pullups

Do Pumice Stones Work for the Knees?
Blisters After Golf

How to Measure Legs

Anti-Aging Face Exercises
How Men Wear a Bandanna

How to Break in Man-Made-Leather Shoes

How to Use Military Boot Blousers
References
Writer Bio
Lindsey Robinson Sanchez, from Bessemer, Ala., has written for the "Troy Messenger," "The Alabama Baptist" and "The Gainesville Times," where her work was featured on the AP wire. She has a Bachelor of Science in journalism from the University of Florida. She writes style, beauty, fitness, travel and culture.
Photo Credits
Digital Vision/Digital Vision/Getty Images