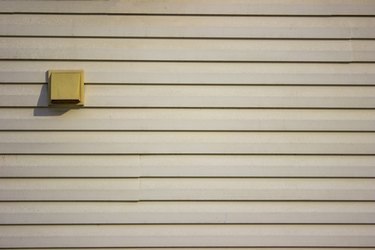
When you have a house with vinyl siding, you want the siding to look well cared for. If you need to replace all or part of your siding, the J-channel siding is a vital part of your trim work. With the J-channel, you can trim like the pros, making your vinyl siding work look seamless.
J-channels are used around windows and doors, on inside corners and where the siding meets the soffit or roof at an angle. Simply slide the siding panel into the folded J-channel. Well-done installation of the J-channel gives the vinyl siding a professional look in corners, doors, windows and other edges of your home. Proper installation is especially important because vinyl expands and contracts with changes in temperature.
Video of the Day
Video of the Day
Prepare
Use corrosion-resistant, galvanized, stainless steel or aluminum roofing type nails with a head diameter of three-eighths of an inch. The shank diameter should be one-eighth of an inch, and the shank should be long enough to penetrate a three-quarter inch base. Keep in mind that when you nail vinyl siding, you never nail it tightly. Always leave a little room for expansion.
Cut the vinyl siding with a utility knife by scoring the panel. Bend the vinyl back and forth until it snaps cleanly. You can also use a power saw with a fine-tooth blade with slow-cutting movements. Reverse the blade in the saw for extra smooth cutting through the vinyl.
Windows and Doors
Install the J-channel vinyl siding around all four sides of a window or three sides of a door. For the window, first position the J-channel against the window casing. Nail it to the wall, but remember not to nail it tightly. Leave at least one-sixteenth of an inch between the nail head and the vinyl to allow for expansion and contraction and to prevent dimpling.
To square the corner, cut and install the bottom J-channel flush with the sides of the window casing. Then, install the side J-channels flush with the lower face of the bottom J-channel and with the top of the window casing. Cut a tab in the bottom of the side J-channels and fold under.
For doors and windows, cut and install the top J-channel piece flush with the outer face of the side J-channels. Cut and bend the drain tab. For the doors, cut your side J-channel pieces similar to the way you did for the windows.
To miter window and door corners of the J-channel, install the bottom J-channel to extend past the side casing, making sure it's the width of the J-face on each end. Cut out a three-quarter inch notch in the bottom of the side J-channels and bend the tab. If you want, miter the bottom J-channel to give it a nice mitered appearance.
Soffit and Fascia
Nail lengths of the J-channel siding against the inner edge of the fascia board to hide the cut edges of the soffit lengths as they meet the fascia. All siding and soffit pieces have nail slots. Nail at the slot centers to allow for expansion. If your home has a box soffit or hip roof, nail a second band of J-channel along the soffit edge where it meets the house.
If your soffit wraps around a corner, as in a hip roof, you can nail two J-channels diagonally between the corners of the house and the roof. Then, cut the first soffit sections to fit this angle, and install subsequent sections in both directions.
The Walls
If you have to cut the top row of siding, use a J-channel at the top instead of utility trim. To keep the last cut row of siding from collapsing against the house, nail a three-inch strip of half-inch plywood against the J-channel to keep the siding away from the house. Install the rest of the siding as you normally would, cutting around the windows and doors and fitting the last piece of siding into the J-channels.
Siding pieces are usually 12 feet long and 10 to 12 inches high. Hook the bottom of each piece onto a lock molded into the top of the piece below. The top of each piece is loosely nailed into studs or wood sheathing.
Nailing too tight is the most common mistake. Another common error is to not pull up each row properly as you nail it. Your siding won't look right if you don't do this.
Other Obstructions
Nail a J-channel along the top of a deck, backed by a strip of half-inch plywood. You can use rigid foam backing, but plywood makes for a stronger support. Install the siding next to the deck conventionally and press the cut section into the overlapping J-channel.
Finishing Touches
Finally, caulk all J-channels where they meet the conduits, doors, windows and utilities. Then, make sure your vinyl siding looks straight and even, just like it was done by a professional.