
How to Remodel the Exterior of a Mobile Home

Mobile homes are often unfairly considered a low-class housing option. Many people picture run down structures, often referred to as "trailers." However, mobile homes that are well-maintained or renovated can be very attractive.
Since purchasing a mobile home is so affordable, you likely have some money left over to invest in remodeling the exterior of your mobile home. By making a few simple changes, you can greatly increase its curb appeal.
Things You Will Need
- Pressure washer
- TSP
- Primer
- Paint
- New trim
- New doors and windows
- Porch addition
- Plants
-
Pressure wash the exterior of your mobile home using TSP. You can quickly remove dirt and rust from the exterior siding so that you can see exactly where it is damaged or corroded. Make repairs as necessary.
-
Prime and repaint the siding. Choose a paint that is appropriate for the material, which will vary depending on whether your mobile home has vinyl or aluminum siding.
-
Replace your existing doors, windows and coordinating trim if they look old or dated. Purchase new parts from a mobile home manufacturer, or find them through a parts dealer. In some cases, you can purchase used parts through Craigslist or eBay.
-
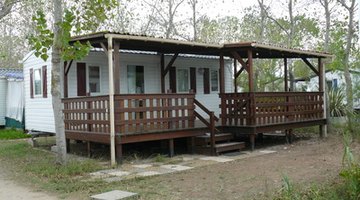
Build a porch addition onto your existing mobile home to gain outdoor space. It will help the structure blend into the landscape and look more stable and solid. Choose a warm wood material to contrast the cladding of your mobile home, or paint it to match.
-
Plant shrubs and flowers around the skirting of your mobile home to further integrate it into the landscape and improve its curb appeal.
Tip
A light colored paint will make the exterior of your mobile home look fresh, although it shows more dirt over the long-term. Choose a contrasting but complimentary color for the trim. If your budget allows, consider replacing your aluminum or vinyl siding with cedar siding.
The Drip Cap
- Mobile homes are often unfairly considered a low-class housing option.
- Pressure wash the exterior of your mobile home using TSP.
- You can quickly remove dirt and rust from the exterior siding so that you can see exactly where it is damaged or corroded.
- Make repairs as necessary.
Writer Bio
Dorian Gray has been a full-time freelance writer since 2009. She has written extensively on the topics of architecture and design for national magazines such as "Architectural Record" and regional publications such as "At Home in Arkansas." Gray also writes about the topics of beauty, health, nutrition and travel. She holds a Bachelor of Architecture from the University of Arkansas.
Photo Credits
- Camping – Mobilhome image by albillottet from Fotolia.com
- Camping – Mobilhome image by albillottet from Fotolia.com
More Articles