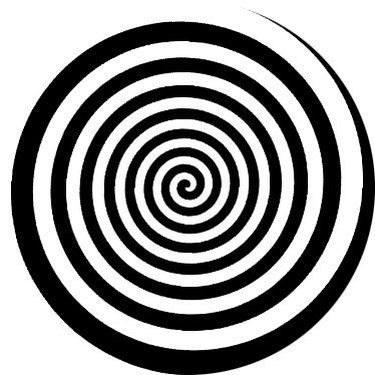
Although Photoshop does not have a brush or tool that automatically creates a spiral, using the twirl filter you can create an easy spiral effect quickly. This tutorial will teach you how to use the twirl filter to create a simple spiral. Once you understand the basics, you can use this same effect to create more advanced spiral designs.
Step 1
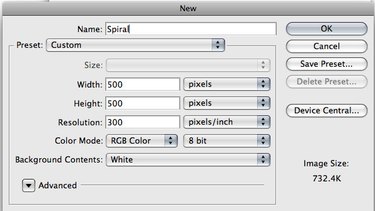
Open a new document in Photoshop that is square, for example 500 pixels by 500 pixels. The size does not matter, but it must be square if you want the spiral to be a perfect circle.
Video of the Day
Step 2
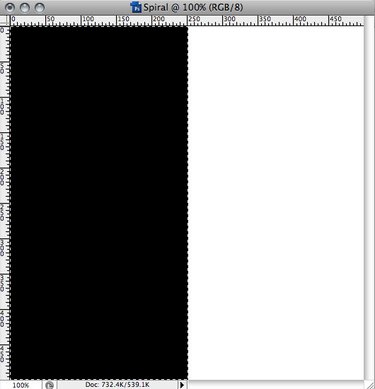
Using Rectangular Marquee tool, select half of the square. Fill the marquee with black. Deselect the selection by pressing "Command and D" on a Mac or "Control and D" on a PC.
Step 3
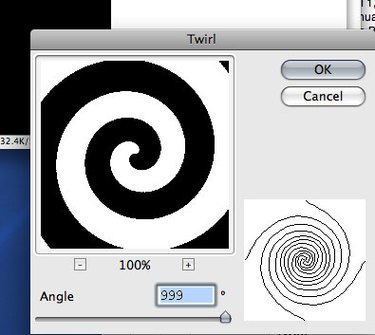
Select "Filter>Distort>Twirl..." Set the angle of the twirls by moving the slider up and down. Note: Negative numbers will cause the spiral to rotate counterclockwise.
Once you have the beginnings of a spiral, repeat the spiral by pressing "Command and F" or "Control and F" until you have the desired number of spirals on the inside. Ignore the outside of the spiral.
Step 4

Select the "Elliptical Marquee" tool. Click in the center of the circle. Hold down "Shift and Command" or "Shift and Control" and drag a perfect circle from the center to select the part of the spiral you want to keep. Copy or cut the spiral.
Step 5

Open a new document. The default size will be size of the spiral. Paste the spiral in the new document.
Video of the Day