
How to Check Power Supply Voltage

A power supply is an electronic assembly that supplies electrical voltage. If the power supply is part of a larger assembly, such as a computer, then the power supply is meant to provide the voltages necessary to power the rest of the electronics. One of the first steps in troubleshooting a malfunctioning electronic device is to check the voltages from the power supply. If the voltages are correct, the problem lies elsewhere. But if the voltages are not correct, then the power supply can be determined to be faulty or in need of adjustment.
-
Connect your multimeter probes to your multimeter and turn it on. Observe the correct polarity. The red probe is the positive one, and it is plugged into the red plug on the multimeter. The black probe is the negative or common probe, and is plugged into the black plug on the multimeter.
-
Set your multimeter function to measure either an alternating current (AC) or direct current (DC) voltage, depending on the output of your power supply. Most power supplies for commercial use produce a DC voltage.
-
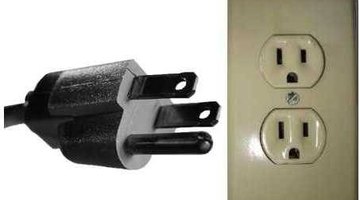
Turn on the power supply. Make sure it is plugged into the appropriate power source. Most power supplies operate by plugging into a typical 120 house circuit.
-
Connect the multimeter probes to the power supply output terminals by touching the probes to the metal contacts. Power supply outputs are usually marked with a positive (+) sign and a negative (-) sign. Observe the correct polarity with your probes by touching the red probe to the positive terminal and the black probe to the negative terminal.
-
Read the multimeter display for the output voltage of the power supply.
Tips
- If your power supply voltage is zero, your power supply might have a blown fuse or an open circuit breaker.
Warnings
- Some power supply voltages can be extremely dangerous. Make sure you touch the output only with the multimeter probes.
Writer Bio
Doug Hewitt has been writing for over 20 years and has a Master of Arts from University of North Carolina-Greensboro. He authored the book "The Practical Guide to Weekend Parenting," which includes health and fitness hints for parents. He and his wife, Robin, are coauthors of the "Free College Resource Book."
Photo Credits
- Wikimedia Commons
More Articles