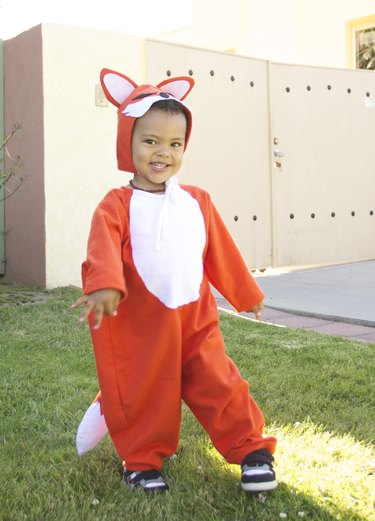
Sized for a 2- to 3-year-old, this sewn fox costume is the perfect project for an advanced beginner. Using hook-and-loop fasteners, it's an easy and quick sew as well.
Unless otherwise noted, a 1/2-inch seam allowance is used for the entire project. When pressing, use a medium heat setting.
Video of the Day
Video of the Day
Things You'll Need
Two yards red/orange flannel
1/8-yard white flannel
1 piece of black felt
1 piece of white felt
Scissors
Glue stick
Pins
Matching thread
Iron
Polyester stuffing
White yarn
Ruler
Glue gun
1/2-yard double-fold white bias tape
1/2-yard sew-in hook-and-loop fastener

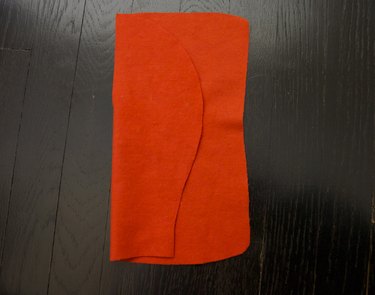
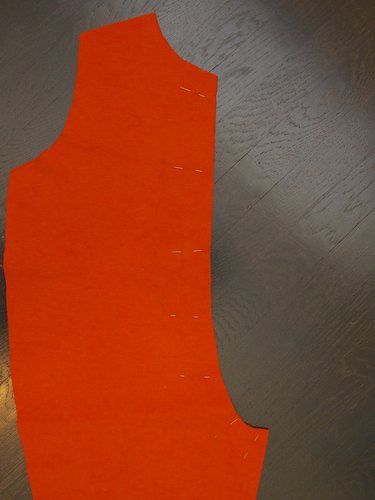
Step 1: Cut Out the Fabric
Cut out all your fabric. You will have:
- 2 front pieces
- 2 back pieces
- 2 sleeves
- 1 belly
- 2 orange color tail pieces
- 2 white tail color pieces
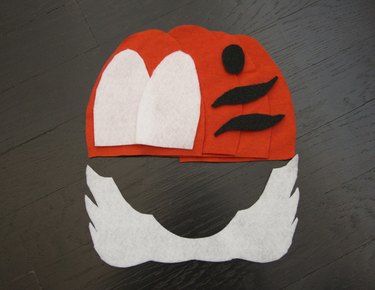
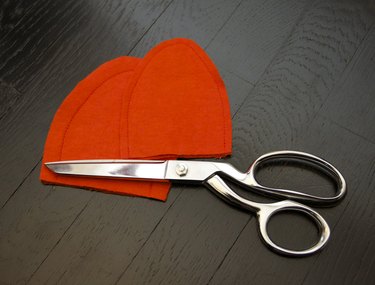
- 4 hood pieces
- 4 orange color ear pieces

Cut the white ear pieces, eyes, nose and whiskers out of the felt.
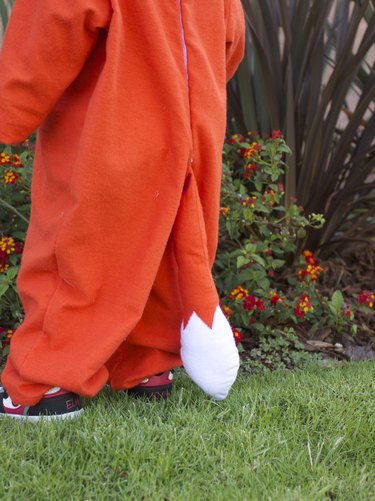
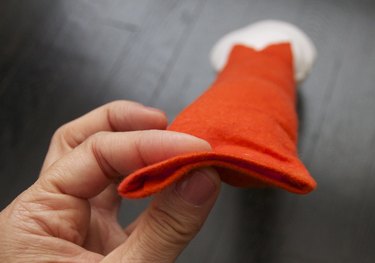
Step 2: Sew the Tail
Glue baste the white contrast pieces onto the bottom of each tail piece.
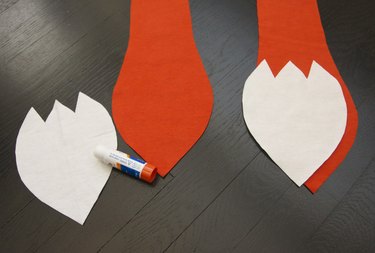
Zigzag stitch across the tops of each white piece, permanently attaching it to the main piece. Use a width of 4 mm and a length of 0.5 mm.
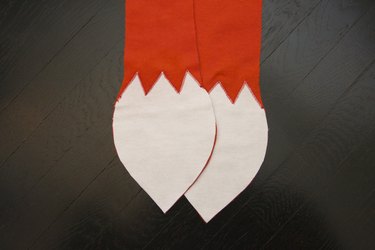
Place the tail pieces right sides together and sew together. Press the stitching, and then trim the seam allowance.
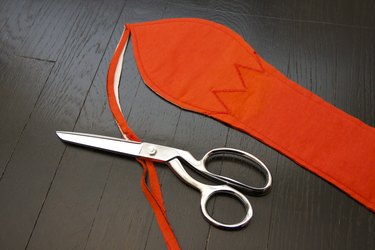
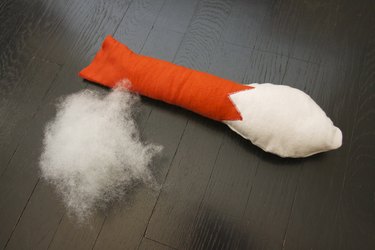
Turn right-side out and stuff with the polyester stuffing. Don't overstuff it.
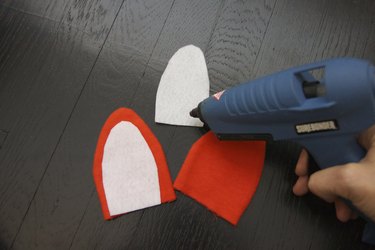
Step 3: Sew the Ears
Sew two main color ear pieces, right sides together. Repeat for the other two ear pieces. Press, trim seam allowance and turn to the right side.
On the right side, place the white contrast ear pieces on the ears, lining up the bottom edges. Using the hot glue gun, glue in place.
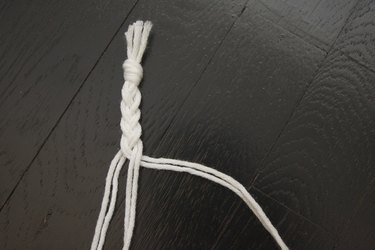
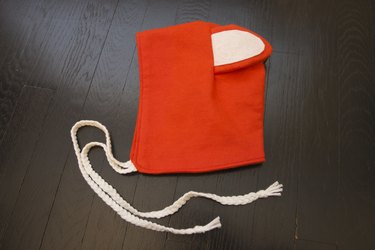
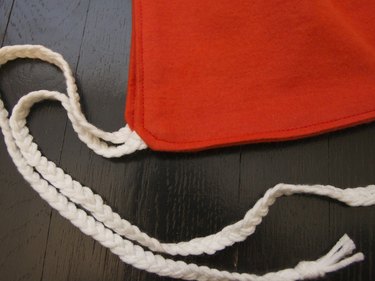
Step 4: Make the Straps
Cut 12 pieces of yarn the approximate length of your arm. Separate into two groups of six each and knot at the top.
Braid the yarn, holding it double stranded. Leave about 3 or 4 inches at the bottom and set aside.
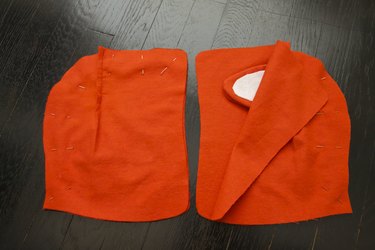
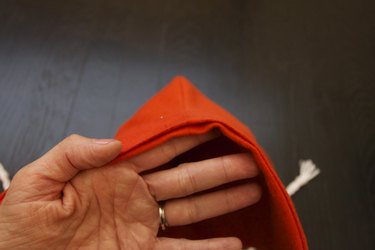
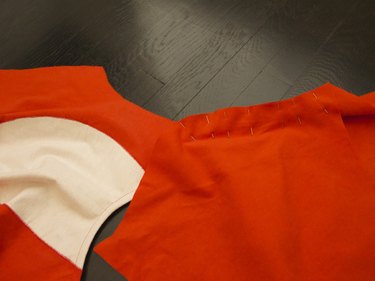
Step 5: Sewing the Ears Into the Hood
Place one of the hood pieces flat on your work surface. Just before it curves backward, mark a spot 4 inches down.

Make a cut straight down to the mark.
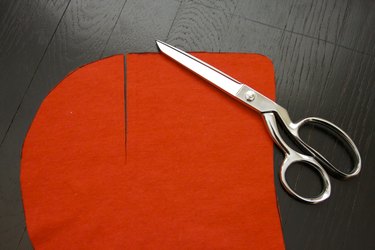
Fold the smaller side of the cut onto the larger side.
Fold the top part down and insert the ear, right-side down and hanging 1/8 inch over the edge of the slit. Then put the top part back over the inserted ear.

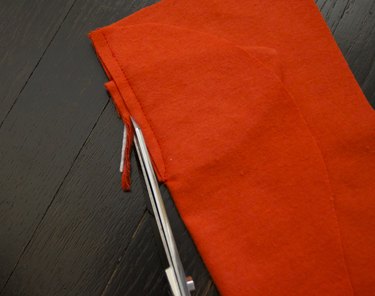
Pin and sew 1/4 inch from the edge of the slit. As you get closer to the bottom of the ear, curve back to the edge as you sew. You will sew off the edge of the fabric. Do not backstitch. Leave long threads and knot a couple times before clipping the threads.
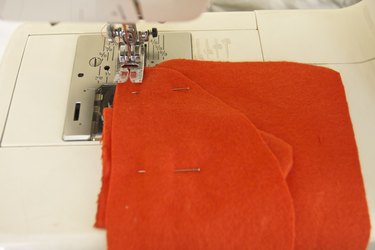
Trim the 1/8-inch overhang of the ear.

Repeat on the opposite hood piece.
Sew the remaining two hood pieces the same way, minus the ears.

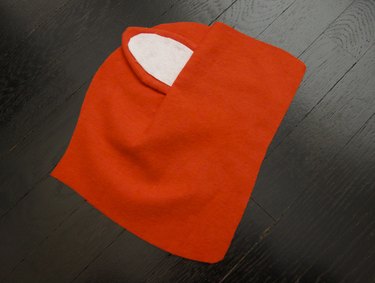
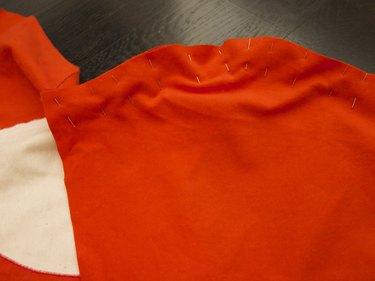
Step 6: Finish Sewing the Hood
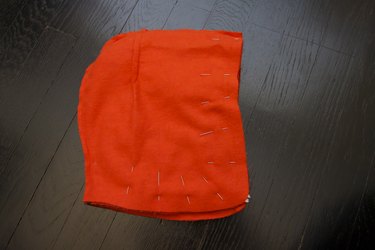
Pin the hood pieces with ears right sides together from forehead back down the neck. Tuck the ears in. Be careful not to sew over them. Repeat for the non-ear hood pieces.
Sew, press and trim the seam allowances.

On the outside, right-hand side of the hood piece with the ears, pin the straps, the loose end at the bottom right front of the hood, sitting diagonally, with the long end toward the back. Repeat for the other side of the hood.
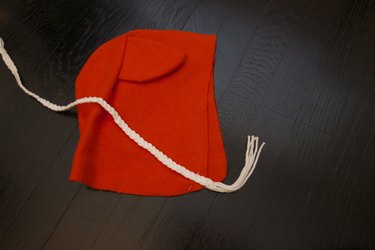
Sew in place with a 1/4-inch seam allowance. Sew over the yarn a couple times.
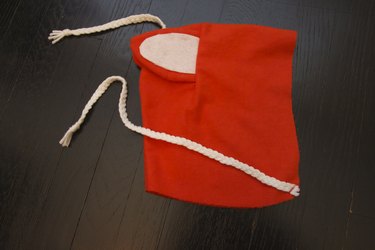
Next, tuck the piece with the ear (right-side out) inside the piece with no ears (wrong-side out) so their right sides are touching.
Pin around all the edges, leaving a 3- to 4-inch gap at the bottom back.
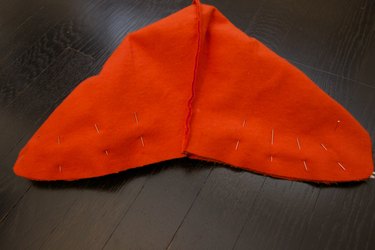
Match the seam lines of the hood pieces at the center front.
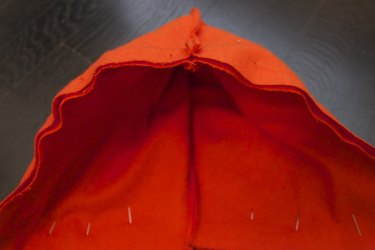
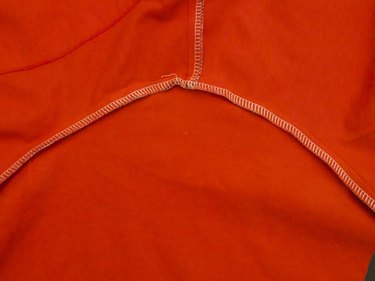
Sew all around, leaving the back gap unsewn, press, and then flip right side out at the gap. Press again, this time on the outside. Turn the seam allowance at the gap to the inside and press. Match up the seam lines at the bottom back.
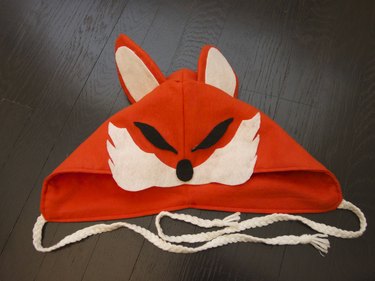
Sew closed with a 1/8-inch seam to close the gap. Continue all the way around the hood, topstitching.
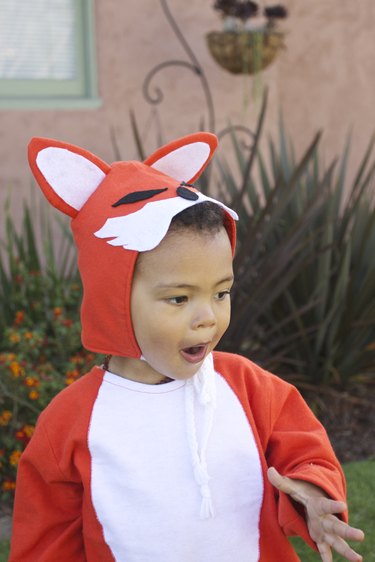
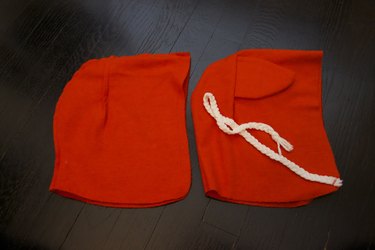
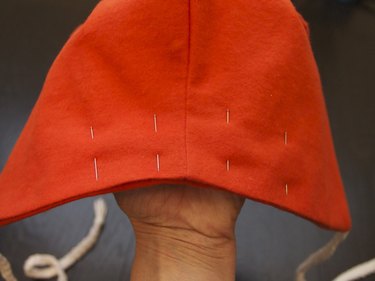
Step 7: Glue on the Fox Face
This is the easiest and most fun part of the project! Arrange the face pieces where you want them, placing everything symmetrically.

One by one, carefully apply glue to the back of each felt piece and put in place.
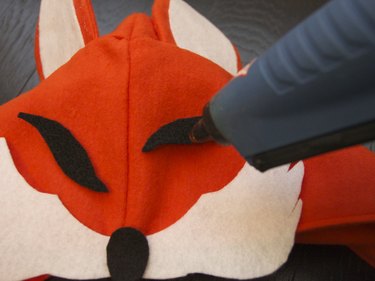
After you have all your pieces glued in place, you're officially done with the hood.
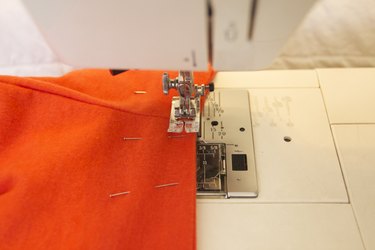
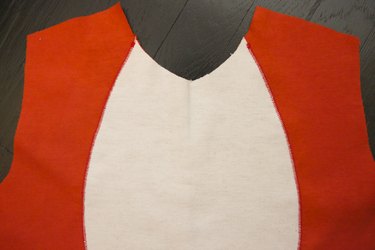
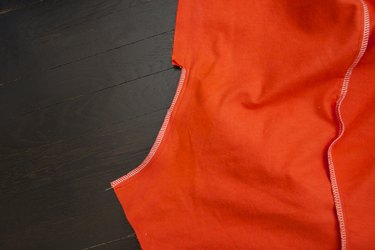
Step 8: Stitch the Front Sections Together
With right sides together, stitch the front center sections together. Press. Finish the seams.
Open the section and press the seam allowance to one side
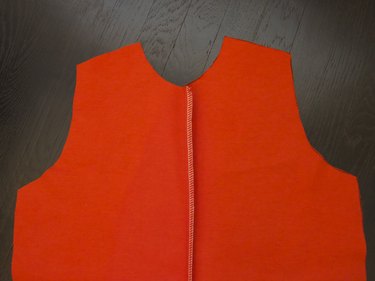
Tip
To finish the seams, if you have a serger, finish them by serging. If you do not have a serger, use your regular machine's overcast function or zigzag to prevent fraying.
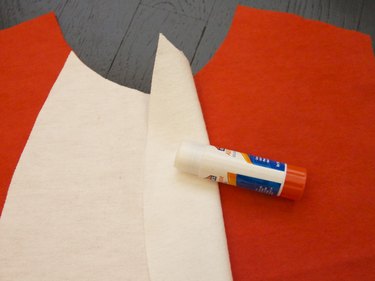
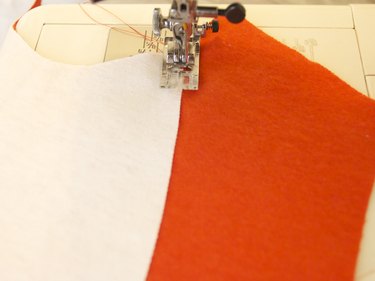
Step 9: Attach the Belly to the Front
Open the front and center the belly piece on the right side. Using the glue stick, glue around the edges of the wrong side of the belly piece and and press in place. Allow the glue to dry.
Set your machine to zigzag with a width of 4 and a length of 0.5 and stitch around the belly, attaching to the front. Press.
Step 10: Stitch the Shoulders
With right sides together, pin and sew the shoulders together. Finish the seams and press toward the back.
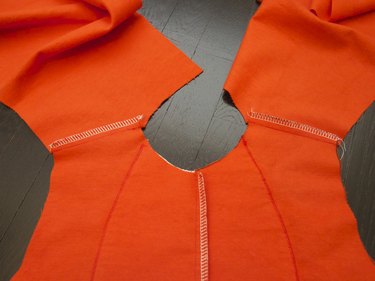
Step 11: Staystitch the Neck
To stabilize the neckline, stitch from each shoulder to the center at 1/4-inch from the edge.

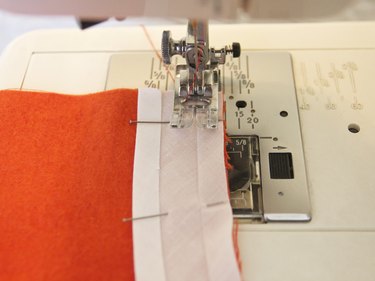
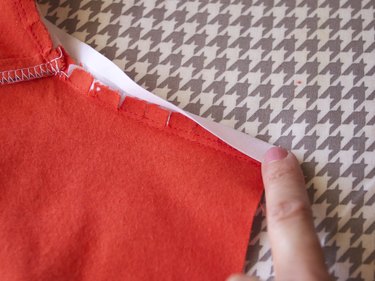
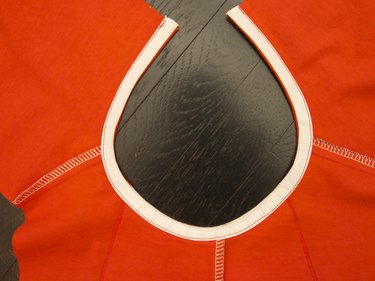
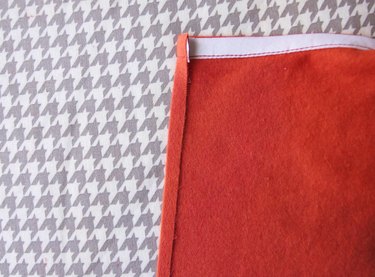
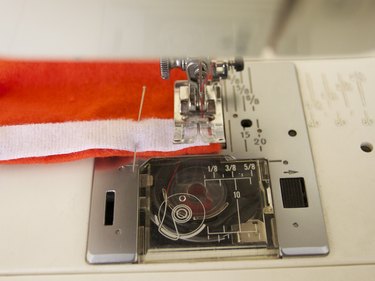
Step 12: Apply Bias Tape to the Neck
With right sides together, open up the bias tape and line up the edge of tape to the raw edge of the neckline. Pin in place.
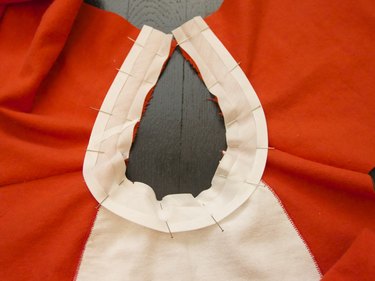
Sew in the fold line closest to the edge.
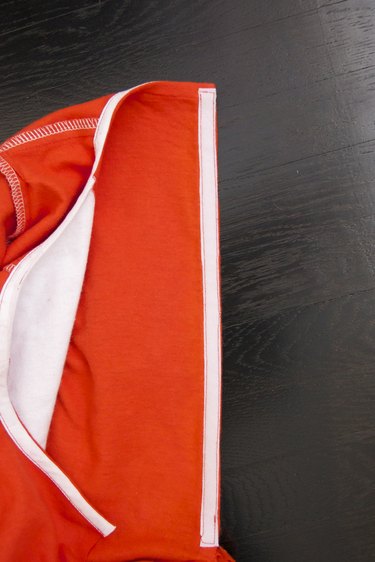
Clip into the seam allowance, approximately every 1/2 inch, being careful not to clip into the seam. This allows the bias tape to lay smoothly when folded over.
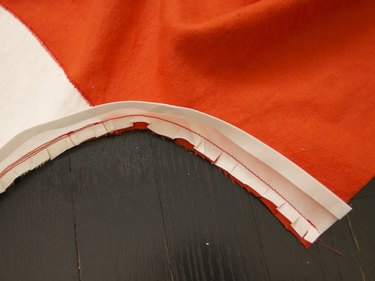
From the right side, press the bias tape toward the back.
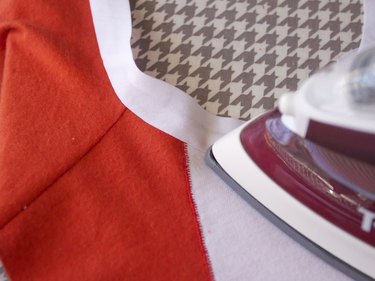
Fold the bias tape over the seam allowance toward the back.
Then fold under again and press.
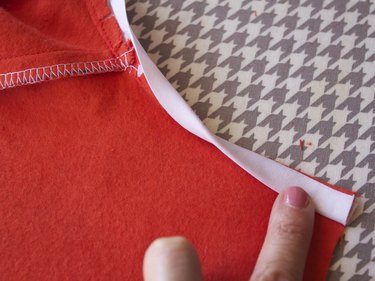
Pin in place.
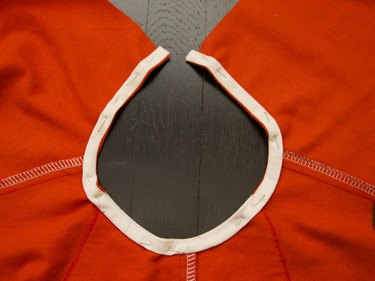
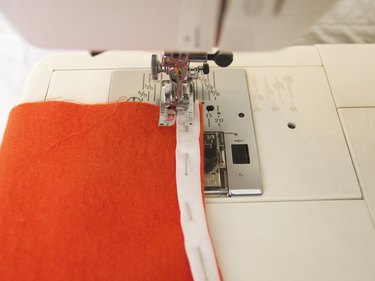
Sew close to the inside edge and then press the stitching.
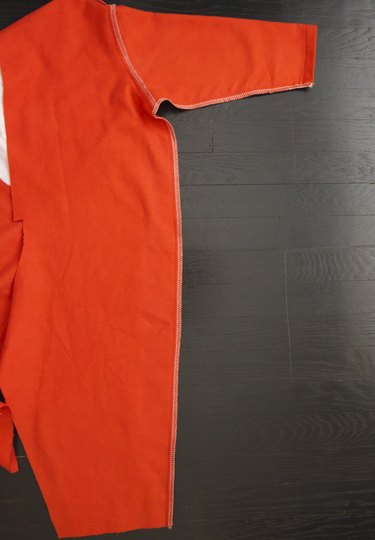
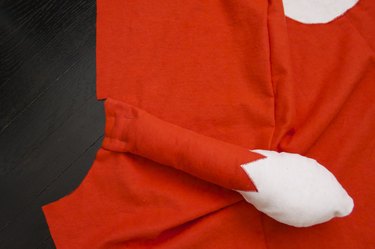
Step 13: Insert the Sleeves
Matching the center of the sleeve head to the center of the armhole (seam line), with right sides together, pin them together.
Sew and finish the seams. Press the seam toward the sleeve.
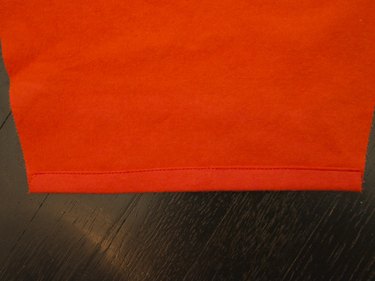
Step 14: Hem the Sleeves
On the wrong side, turn up the arms at the wrists 1/2 inch and press. Turn up another 1/2 inch, press and pin.
Sew close to the inside edge and then press.
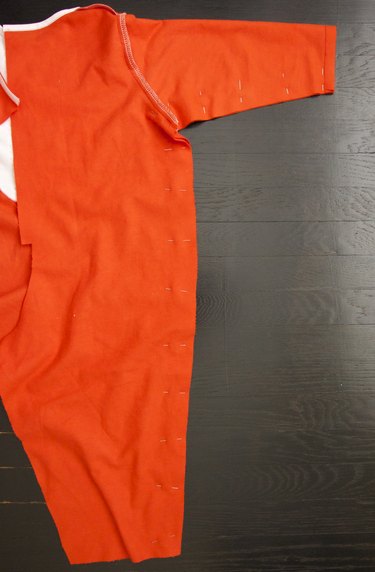
Step 15: Sew Up the Sides
With right sides together, pin the side seams from the foot to the wrist. Sew, finish the seams and press. Repeat on the opposite side.
Step 16: Attach the Tail
Take the open end of the tail and turn in the seam allowance to the inside. Press.
Pin the tail to the edge on the right-hand side of the fabric on the right, just below the extended edge.
Tip
Make sure the stuffing isn't in the seam line.
With the right sides together, pin the center back together, stopping at the extended edge. Sew at a 1/2-inch seam allowance, stopping at the extended edge. Finish the seam and press.
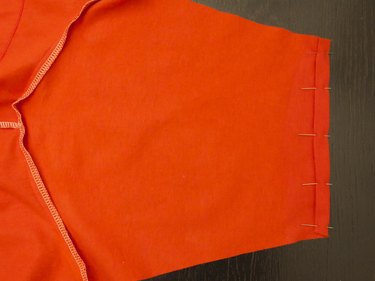
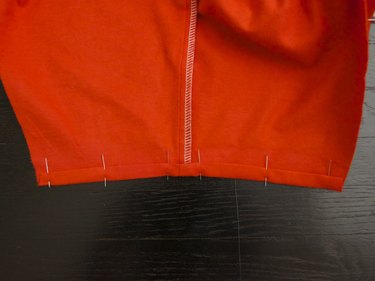
Step 17: Hem the Legs
Turn up the hem 1/2 inch and press. Turn up another 1/2 inch, press and pin.
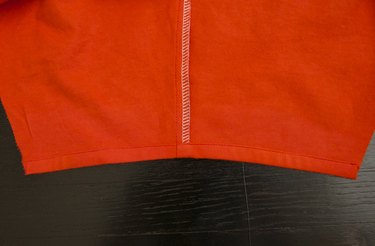
Step 18: Sew the Inner Leg Seams
Pin up the inner leg seams and sew with a 1/2-inch seam allowance. Finish the seams and press.

Step 19: Apply Closure
On the wrong side, take the right back edge and fold back 1/4 inch. Press. Then fold that back a 1/2 inch and press.
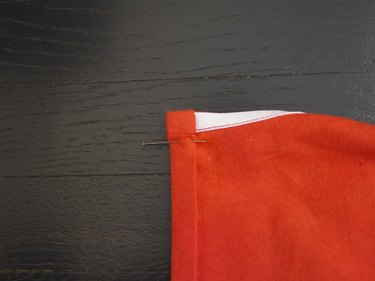
On the right side of the fabric (underneath the just folded-over portion), lay the loop strip (the soft fuzzy strip) from the top to the bottom of the back opening, pinning in place.

At the bottom, cut the strip just above the opening.
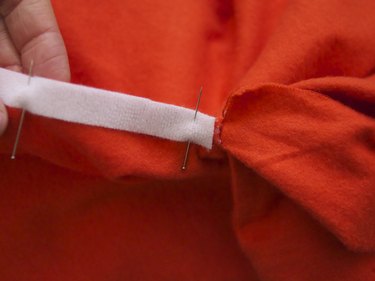
Sew from the top, down the strip and around back up. Press on the wrong side.
Repeat on the opposite side of the opening with the hook tape.
Costume Complete
Get ready for year-round dress up, because your little fox will pounce in excitement all over the place in this costume.