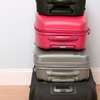
How to Make a Camera Case
The digital camera is getting better every day, whether it's through improvements in picture quality, ease-of-use, web-readiness and portability. If you want to be prepared to take digital pics whenever you see a good shot, you will want to carry your camera everywhere. You can make your own unique camera case that expresses your personality and creativity for a fraction of the cost of a purchased one.
Things You'll Need
- 1/2 yard of thin foam (no more than 1 inch in thickness)
- 1/2 yard of smooth, soft fabric
- 1/2 yard of thick, sturdy fabric
- Sewing machine or needle and thread
- Small strip of Velcro
- Decorative elements like appliques, colored strips of fabric, etc...
- Scissors
Instructions
-
-
1
Select the material. You may want to choose two different fabrics. You'll need soft and smooth fabric for the inside to protect your camera from scratches. The fabric for the case's exterior should be thick and sturdy.
-
2
Lay your camera flat on the piece of foam. You will be creating a foam template that will be used to mark and cut the fabric. The same foam pieces will be used to stuff and protect the bag.
Make a mark on the foam about 1/2 inch from the top of the camera. Then make a mark on the foam about 1/2 inch from each side of the camera. -
-
3
Fold the foam over from the back to the front of the camera, and turn the camera over. Now make a mark on this side of the foam about 1/2 inch from the top of the camera.
-
4
Cut the foam along the marks. You should now have a piece of foam that is a little more than double the length of the camera and a bit wider than the width of the camera.
-
5
Lay one piece of fabric on top of the other.
-
6
Place the foam piece on top of the fabric panels. Mark the fabric at the bottom of the foam piece.
When you make the top mark, make it 2 to 3 inches above the top of the foam piece. This extra fabric will act as the top flap of the case.
When you mark the sides, add about 2 to 3 inches to allow room for the fabric to cover the sides of the camera. -
7
Cut both pieces of material to this template. You should now have one piece of foam and two pieces of fabric.
-
8
Lay the piece of fabric together with the right side facing inward. Sew the pieces together on both sides and on the bottom, with a 1/2-inch seam allowance all around. Leave the top open.
You can use a sewing machine, but you can also sew by hand. Just make sure it's a sturdy stitch. -
9
Turn the tube you've created right side out so the right side of the fabric is now showing.
-
10
Slide the foam into the open top of the fabric. Make sure the foam is centered inside the tube of fabric and pushed down to the bottom. There should be flaps of fabric with no foam on both the sides and the top of the case.
-
11
Sew the top closed by machine or by hand.
-
12
Fold the fabric-covered foam in half so that the bottom edge meets the top edge. Sew the sides together. Now you have a basic case.
-
13
Add any decorative embellishments you like. You can sew stripes of a different fabric onto the case, embroider an image, add sequins or appliques--whatever you like.
-
14
Affix one side of the Velcro strip to the edge of the top flap and the other side of the strip to where the flat meets the front of the case. Slip your camera into the case, and you're all set.
-
1