
Understanding Dresser Dimensions

Dressers sold in matching bedroom suites may fit your needs and your space -- or not. You can easily find just the right dresser -- whether low and wide or tall and narrow, with varying depths and numbers of drawers -- if you understand your options.
Whether antique or modern, dressers have similar dimensions, and understanding these should help you in your search.
Height Ranges
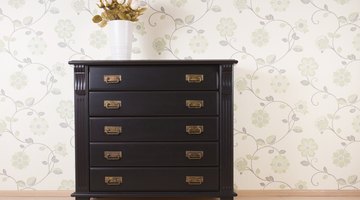
People who desire to store their personal clothing in a dresser typically fall into one of two camps: those who want a dresser that's waist-high and those who prefer a tall dresser known as a chest of drawers. The height range for a waist-high dresser is approximately 32 to 40 inches, while that for a chest- or shoulder-high vertical dresser is 44 to 55 inches or more. A dresser of the shorter variety allows a large mirror to be attached or hung above it. A chest 50 inches or taller is sometimes called a gentleman's chest.
Width Ranges
A waist-high dresser typically has three or four drawers; the widest dressers may have double or triple that number, or may feature a section with a door. A vertical chest of drawers is typically 30 to 39 inches wide and contains four or more drawers of varying heights. The depth of any dresser is approximately 16 to 22 inches. The greater depth provides more stability needed in taller chests or dressers with mirrors attached to them. Drawers pull out 10 to 12 inches for use, so add that measurement to the depth when planning where to place your dresser.
The Drip Cap
- Dressers sold in matching bedroom suites may fit your needs and your space -- or not.
- You can easily find just the right dresser -- whether low and wide or tall and narrow, with varying depths and numbers of drawers -- if you understand your options.
- A vertical chest of drawers is typically 30 to 39 inches wide and contains four or more drawers of varying heights.
References
Writer Bio
Cynthia T. Toney, a former newspaper designer, began writing in 1999 for a newsletter devoted to decorating with salvage. As advertising and marketing director for an educational publisher, she wrote copy for its website, catalogs and mailings. Toney also has been an interior decorator and is the author of a teen novel, "Bird Face." She holds a Bachelor of Arts in art education.
Photo Credits
- indukas/iStock/Getty Images
- indukas/iStock/Getty Images
More Articles