A weather station enables you to measure weather events, such as temperature change, rain and wind speed. Making a weather station can be a fun and easy activity for the whole family. All you need are a few simple materials, and you will be able to anticipate the next weather activity just like a meteorologist.
- Journal
- Thermometer
- Rain gauge
- Barometer
- Weather vane
- Hygrometer
- Anemometer
Get a journal in which you can record all the measurements taken from your weather devices. Record the information at the same time each day so you can record patterns.
Measure temperature with a thermometer, which you have to buy.
Measure rainfall with a rain gauge. Make a rain gauge by taping a ruler to the side of a jar or cup. You can also use a large measuring cup with the measurements already printed on it. Make sure the rain gauge is sheltered from the wind.
Measure air pressure with a barometer. Make a barometer with a clear glass, a drinking straw, a ruler and some gum. Fill the glass halfway with water. Tape the ruler to the inside of the glass. Next, tape the straw to the ruler about ½ inch from the bottom of the glass. Chew the gum, then suck water halfway up the straw. You can hold the water in place by sealing the top of the straw with the softened gum. Mark the top of the water level on the straw with permanent marker. The water in the tube will rise and fall due to air pressure on the water in the glass. As the weight of the atmosphere increases on the water in the glass, more water is pushed into the tube, causing the water level to rise. The movement of the water level in the straw can be measured.
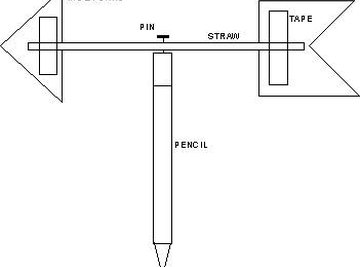
Measure wind direction with a weather vane, which you can buy or make. To make a weather vane, cut the shapes of an arrow point and tail out of construction paper, then tape them to the ends of a straw. Push a pin through the middle of the straw from the top and stick that pin into the eraser of a pencil. Make sure the straw can move freely with the pin. Set the pencil tip in clay so it will stand upright.
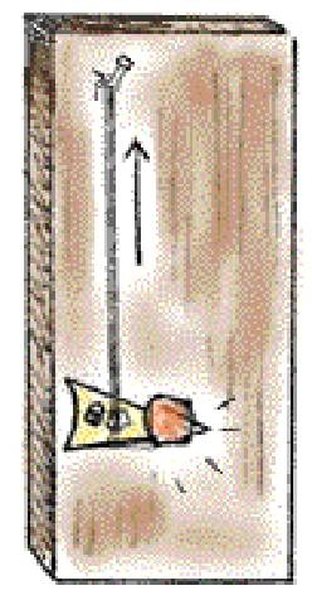
Measure moisture in the air (humidity) with a hygrometer. Cut a piece of plastic into a triangle. Tape a dime to it, near the pointer. Poke a nail through it, near the base. Wiggle the nail so the pointer moves loosely around it. Glue a strand of hair between the dime and the nail hole. Place the pointer on a piece of wood about three-quarters of the way down. Attach the nail to the wood, ensuring that the pointer can turn easily around the nail. Attach a second nail to the base 1 inch from the top, lining it up with the pointer. Pull the hair strand tight so the pointer is parallel with the ground. Now, glue the end of the hair to the nail. When the air is dry, the hair will shorten, making the pointer point up. To calibrate the hygrometer, place a teaspoon of salt in a small glass jar and add enough water to dampen the salt. Place that container in a large zip-lock bag along with the hygrometer. Let it sit for 6 hours and check the reading without opening the bag. It should be at 75 percent to be accurate.
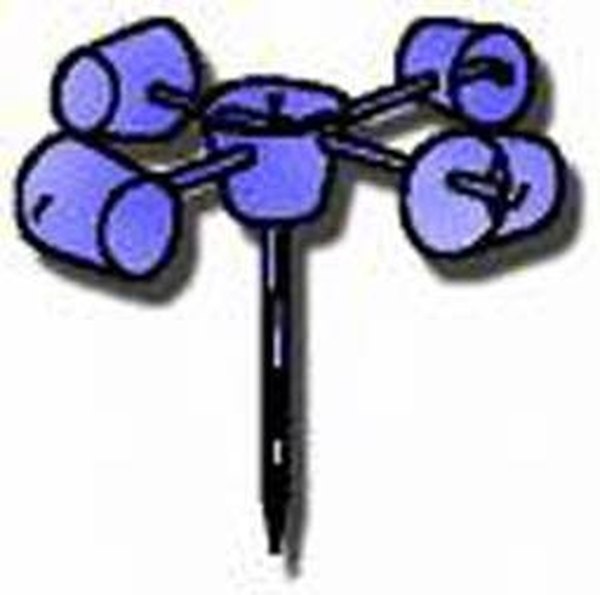
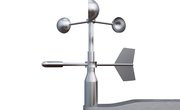
Measure wind speed with an anemometer. Get five plastic cups and poke a straw-size hole through four of them, ensuring that the holes line up. Poke a pencil through the bottom of the fifth cup, in the center. Glue a straw through two cups at a time, making two pairs. Those straws will also cross through the fifth cup in the center. Place the bottom of the pencil in clay or something sturdy to hold it up.
Place your weather station outside in an area with limited sunlight. You do not want the thermometer in direct sunlight or exposed to other weather conditions. Ensure that you are able to see each device to record your measurements. Place all devices together, in an area that does not see much activity.
Things You'll Need
About the Author
This article was written by the CareerTrend team, copy edited and fact checked through a multi-point auditing system, in efforts to ensure our readers only receive the best information. To submit your questions or ideas, or to simply learn more about CareerTrend, contact us [here](http://careertrend.com/about-us).