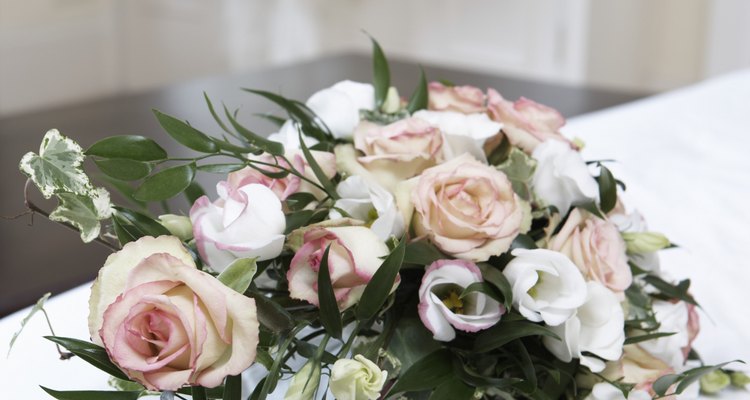
Cascade bouquets will mimic the flow and drape of a bride's wedding dress and veil. The flowing greenery and draping flowers will create a focal point to draw guest's eyes to the beautiful bride. These bouquets are assembled on a bouquet holder that consists of a round piece of floral foam attached to a handle. You can arrange your own cascade bouquet to incorporate the desired colors and types of greenery and flowers into the design.
Set a vase on a flat work surface. Place a bouquet holder with a slanted handle in the vase. Position the bouquet holder so that the handle is anchored inside the vase with the rounded portion outside of the vase.
Cut an ivy garland into 6- to 8-inch long pieces with scissors. Stick the ends of the ivy stems into the bottom front of the floral foam in the bouquet holder. Position two of the stems side by side at the very bottom and a third stem just above the two stems.
Cut two pieces of ivy garland into 4- to 5-inch long pieces. Stick the ends of these ivy stems into the floral foam, one on either side of the first three ivy stems. Make adjustments as needed until the trailing ivy stems are positioned as desired.
Cut the remaining ivy garlands into 4- to 5-inch pieces. Stick the ivy stems into the floral foam around the bouquet holder to make a rounded shape. Insert more ivy stems throughout the center of the bouquet holder to create a mounded frame for the bouquet.
Cut apart two sprays of maiden hair fern. Stick the individual stems into the bouquet holder at various points, mixing them in with the ivy stems.
Cut the stems of nine large flowers to 4 inches in length. Use larger flowers such as roses, gerbera daisies and lilies. Insert the stems of the flowers in a cluster into the center of the bouquet holder. Add three flowers around the top edge of the bouquet. Add two flowers to the right of the center flowers and one to the lower left of the center flowers.
Cut the stems of three additional large flowers to 6 inches, 5 inches and 4 inches in length. Insert the 6-inch long stem in the bottom center of the bouquet just above the center cascading ivy stem. Position the stem so that the flower is hanging down. Insert the 5-inch stem to the right of the 6-inch stem. Insert the 4-inch stem to the left of the 6-inch stem.
Trim the stems of six to seven medium flowers to 4 or 5 inches in length. Choose flowers such as daisies, carnations, floribunda roses or calla lilies. Insert the stems individually throughout the bouquet to fill up spaces between the larger flowers.
Cut apart the stems of three sprays of filler flowers such as baby's breath, statice, Queen Anne's lace or freesia. Insert the stems into the bouquet holder to fill in any gaps between the existing flowers.
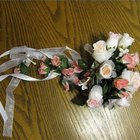
Cut three to five pieces of ribbon 6 to 8 inches in length. Cut a 6-inch piece of floral wire with a pair of wire cutters. Poke the wire through the center of the top end of each ribbon. Push the wire through the ribbons to its halfway point. Fold the wire halves upward and together with the ribbons hanging downward. Twist the sides of the wire together. Wrap over the wire with floral tape. Insert the wire into the bouquet holder among the trailing ivy stems.
Cut nine pieces of ribbon, each 6 inches in length. Gather three of the ribbons together and fold their ends together to create loops. Poke a 4- to 6-inch piece of floral wire through the ends of the ribbon loops and twist the wire's ends together to secure. Repeat this for the remaining six ribbons. Wrap each of the wires individually with floral tape. Tuck the three-ribbon loop embellishments in throughout the bouquet, pushing the tips of the wires into the bouquet holder. Push the wires in far enough that only the ribbon loops are visible.
Related Articles

How to Make a Cascading Orchid Bridal ...
How to Make Bows for Wedding Bouquets

How to Arrange Church Altar Flowers

How to Make a Bridal Cascading Bouquet ...

How to Design a Crescent Floral ...

How to Make Artificial Bouquets

How to Make Long-Stemmed Rose Bridal ...

How to Make Indian Wedding Garlands

How to Make a Presentation Bouquet

How to Make Wedding Bouquets With ...
How to Make a Silk Calla Lily ...

How to Make a Corsage for a Man

How to Make a Wedding Flower ...

How to Make a Large Wedding Altar ...

How to Make Wedding Corsages With Silk ...

Christian Decorating Ideas for Table ...

How to Make Renaissance Headpieces
How to Decorate a Wedding Car with ...
How to Decorate Bridal Bouquets With ...

How to Make Your Own Funeral Flower ...
References
Photo Credits
Michael Blann/Digital Vision/Getty Images