Whether you have an ATM card or debit card linked to a bank account, or if you're working with a prepaid debit or gift card, you'll likely want to know the remaining balance you have. Luckily, ATM and debit card issuers make checking your balance pretty straightforward.
Prepaid, Debit or ATM Balance Inquiry
Video of the Day
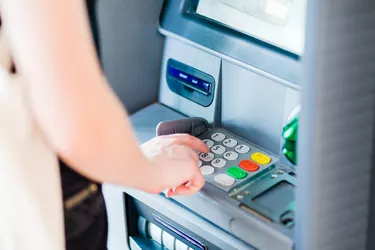
If you have an ATM card or debit card, it's very easy to use an ATM to check the balance. Locate an ATM that's affiliated with your bank (your bank's website will typically have a list or locator) and insert the card into the indicated slot for an ATM balance inquiry. The interface will prompt you to enter your PIN. Once you have correctly entered the PIN, the machine will present you with options appropriate to your card and account type, among which should be the option to check the balance in the account or accounts linked to your card.
Video of the Day
Upon selecting this option, the balance will typically display on the screen, but there may also be an option to print it on receipt paper. Once you've finished your transaction, be sure to secure your card, making sure you've taken it out of the machine. Many ATM and debit card issuers also make it possible to check your balance at unaffiliated ATMs, though there may be fees.
Other Options to Check a Balance
The U.S. Consumer Financial Protection Bureau also lays out some options for checking the balance on a prepaid card. Most prepaid cards will have a phone number that you can call for either automated or live customer service for checking your balance. There may also be texting or mobile app options.
Companies like Visa also provide websites for checking balances on their prepaid cards. Many issuers of prepaid cards have such websites where you can check the balance that remains on your card.
Most of these options are also available for ATM and debit cards, especially going to the bank's website to check your balances.
ATM, Debit and Prepaid Card Basics
Many people want a more secure alternative to carrying cash or simply aren't comfortable using credit cards where they could run up a balance and affect their credit rating. In these circumstances, you might prefer to have an ATM card or debit card. Both ATM cards and debit cards are connected to an account at a bank. This could be a savings or checking account. ATM cards are used to withdraw cash from the linked account at automatic teller machines (the titular ATMs).
ATM cards allow easy access to cash without actually carrying it with you all the time. Debit cards can also be used for this purpose, but, in addition, they can be used to make purchases at stores just like credit cards. Both types of cards are protected by a PIN. This PIN is entered at the time of the transaction or when accessing the linked account. Therefore, possession of the physical card is not sufficient to access the linked funds.
Additional Cash Alternatives
One other cash alternative is a prepaid card or gift card. These cards look just like ATM, debit or credit cards but neither have a PIN for security nor let you run up a bill like a credit card. These cards are not linked to a bank account, and instead have a balance of funds tracked by the card issuer. The card can be used just like a credit card at retailers, up until the balance on it runs out. Some prepaid cards will have your name printed on them as a form of security and vendors may check this against your ID. However, typically prepaid cards are not very secure.
For all three types of cards (ATM, debit and prepaid) any withdrawals or purchases made with the card are deducted from the account balance immediately. This is in contrast with credit cards, which keep a running tally and present a bill at the end of each cycle.
Consider also: How to Use a Visa Gift Card With PayPal