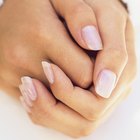
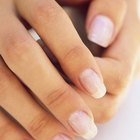
Artificial nails create that flawless manicure style without the hassle of growing out, polishing and painting the perfect nail lacquer. Glue-on nails are also great for those who have difficulty growing out long nails or if you need a quick fix before an elegant evening out. Most artificial nail sets are made of acrylic and will include not only a full set of nails but also the quick-setting nail glue that makes artificial nails so fast. This manicure style should only be used sparingly to retain the vitality of your natural nails since the powerful glue can strip natural nails if used too often.
Step 1
Apply a small amount of acetone nail polish remover to a cotton pad. Sweep the cotton pad over all of your natural nails to remove any oils, residues or leftover nail polish. You want a completely clean nail bed before applying any nail glue. Wash your hands in warm water with a gentle soap to remove any excess acetone.
Step 2
Trim the tips of your fingernails using a pair of nail clippers. File down any uneven edges so that your nails are smooth and short on top. This step helps produce a smooth, even application of the acrylic nail.
Step 3
Buff the body of all of your nails with a nail buffer. This tool helps remove any uneven ridges or bumps on the nail bed that could affect the adhesive quality of the glue.
Step 4
Push back any protruding cuticles to the edge of the nail bed with a cuticle pusher. Be sure to use gentle pressure so that you don't damage the cuticle tissues. This step helps make the nail bed clear so that the artificial nail can sit evenly on your nail.
Step 5
Lay out all ten of the artificial nails in the order so that the pinky, ring, middle, index and thumb nails for each hand are easily accessible and it's clear which nail will go on which finger.
Step 6
Lay a piece of paper towel over the surface you will be working on in case any nail glue drips onto the surface.
Step 7
Pick up the artificial thumb nail for your dominant hand. Test out how well the nail will fit your thumb nail by pressing the glue-free nail to the nail bed. Make note of where the artificial nail extends beyond your natural nail. You will only want to put glue on the area that actually sits on your natural nail.
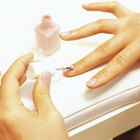
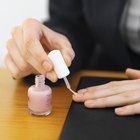
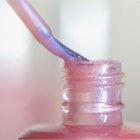
Step 8
Open up the artificial nail glue. Swirl the tip of the nail glue applicator on the back of the artificial nail using a small swirling motion to evenly apply the glue across the back of the nail on the area that will sit on your nail.
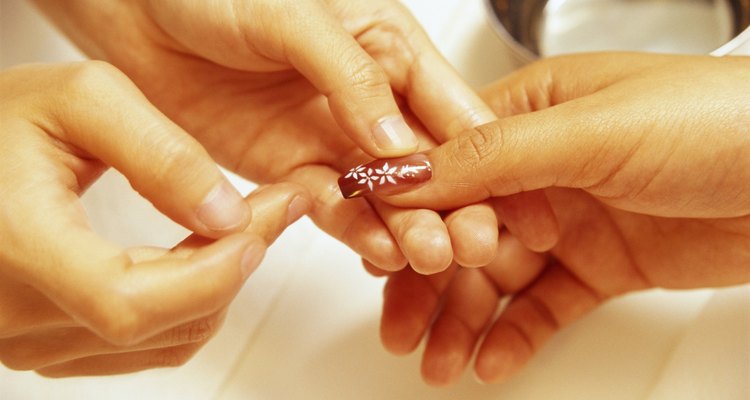
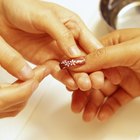
Step 9
Press the right edge of the artificial nail onto the right edge of your real nail so that the base of the artificial nail is as close to the cuticle as possible. Gently roll the rest of the nail onto the nail bed using soft pressure to remove any air bubbles. Press down on the applied nail for about 15 seconds to encourage the nail to stay in place. Avoid moving the nail. Sweep a cotton swab around the edge of the nail if any nail glue has touched your skin.
Step 10
Repeat the gluing and pressing process on the rest of the nails on your dominant hand. Allow the glue to set on the first hand for about 30 minutes. After the glue has set completely, apply the artificial nails to your nondominant hand.
Step 11
File the artificial nails with a nail file to reshape any areas you desire. For example, if you want a slightly tapered nail for your thumb or pinky nails, use quick, gentle strokes with a regular nail file to gently reshape the nail.
Related Articles
How to Put an Acrylic Nail Back on ...
How to Apply Nail Polish Without Streaks
How to Get Shiny Acrylic Nails at Home
How to Get Nail Stickers to Stick Well
How to Get Acrylic Off of Cuticles
How to Soak Acrylic Nails off in Nail ...
How to Paint Nails Light Pink

Can Sweet Almond Oil Be Used to Soften ...
How to Get Nail Glue Off
How to Remove Acrylics With Acetone and ...
How to Whiten Natural Nails
How to Remove Nail Tips
How to Use a Nailene Acrylic Sculpture ...
How to Keep False Eyelashes From Lifting

How to Fill in Nails
How to Get Acrylic Nails Off at Home ...

How to Round Your Nails
How to Remove Acrylic Nails Without ...
How to Get Natural-Looking Acrylic Nails

How to Put on Beautiful Bottom Lashes
References
Tips
- Read all of the manufacturer instructions before applying any artificial nails.
- Remove artificial nails with an artificial nail glue solution. Refrain from trying to yank the nails off of your nail bed without the help of a nail glue solvent.
Writer Bio
Sarah Vrba has been a writer and editor since 2006. She has contributed to "Seed," "AND Magazine," Care2 Causes and "202 Magazine," among other outlets, focusing on fashion, pop culture, style and identity. Vrba holds an M.A. in history with an emphasis on gender and fashion in the 19th century.
Photo Credits
Creatas/Creatas/Getty Images