For centuries, grading was done precisely without heavy equipment. So, don't think that it takes a massive tractor or motor grader to accomplish this project. You only need to be able to operate a bobcat or back hoe. Anyone can learn to drive one of these machines with a day of practice. The following steps provide a guideline to help you set your grade and use the machines to shape the earth.
Step 1
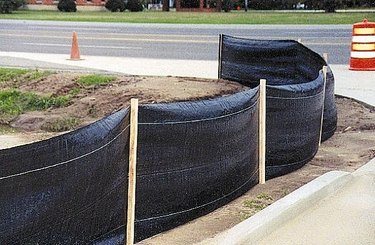
Site preparation. Typically, most local municipalities will require that you erect silt fencing around the perimeter of your grading operation. This is normally a 3'-0" high fence built with small wooden posts or metal stakes. A silt fence fabric, such as Geotex, is applied to one side of the fence. Leave some slack fabric at the bottom of the fence, pull the slack into the grading area and build a small berm of dirt over it.
Video of the Day
Step 2
Clearing and grubbing. Your site may just have grass and weeds or it may have large rocks, thick brush and trees. Most of the clearing work can be done with hand held equipment, if you're dealing plant material only. Large rocks, brush and trees require heavy machinery to remove. A mini excavator, bulldozer or back hoe will do the job.
Step 3
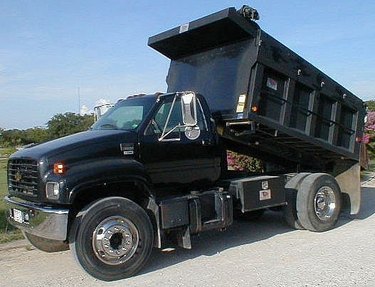
Arrange for trucking. Shaping the earth typically creates a massive pile of spoils, also called surplus dirt, that has to be removed from the site. If you are doing a small area, such as a yard for a single family home, a 10 yard dump truck service will suit your purposes for both clearing and grading.
Alternately, your site may require the addition, or import, of many tons of soil to raise the grade and fill in low spots. Calculate what you need and arrange for import soil delivery. It's very important that you backfill and raise the grade with engineered fill that can compact properly. If you simply order top soil, you are going to have an unstable grade. Allow top soil to be just that, the top 2-8" or your grade. Minimum amount of top soil required for grass is 2" and 8" for flower beds.
Step 4

Call Underground Dig Alert prior to any grading or digging operation. Mark your area of work with white chalk or white spray paint. Utility companies will come by and mark locations of their underground lines, if any exist.
Step 5
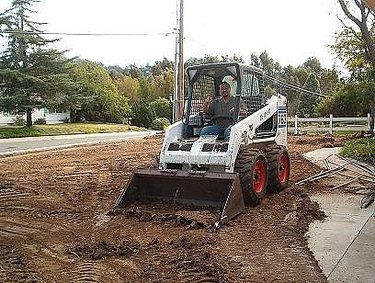
Cutting the grade. Use a bobcat or back hoe. A back hoe is best if you have a lot of backfill and compaction work to do. The back hoe offers a much larger bucket, huge tires and heavy weight which will effectively compact the soil as your grade.
At first you can eyeball the grade as you work and begin to shave bumps and irregularities. Start in a level spot that is close to the desired grade. Shift the bucket so the bottom is parallel to the ground and then lower the bucket down until it is a couple of inches off the dirt. Drive forward slowly and begin to cut into the high spots. Your machine will commonly bog down as it hits a really high spot. Just back up, raise the bucket and move forward again. Repeat until the high spot is shave down suffiently.
Step 6
Create a spoils pile in an area that easily accessible to the dump truck and will provide you with enough room to load it. You will be going back and forth to this pile constantly as you cut the earth.
Step 7
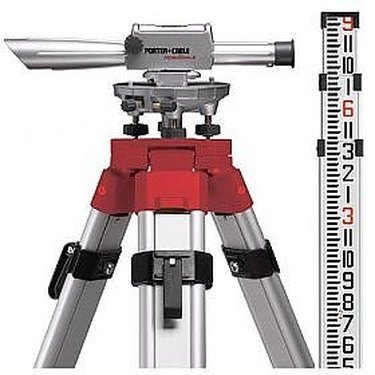
Once you have cleared the site and rough cut the grade, it's time shoot grade elevations and install some grade stakes in the ground to guide you through the rest of the grading process. Use a builder's transit and a leveling rod. Many builders use laser transits, but they require a little more experience. The only difficulty with a builder's transit is in the need for an assistant to hold the leveling rod while you look through the scope.
Step 8
Establish a benchmark. This can be the floor inside the house, top of the foundation, top of patio and etc. Your finished grade will either be above, at or below the benchmark measurement. Once you set it up, you can shoot grades throughout your work area to determine accurately where soil needs to be added and taken away.
Step 9
Have your assistant hold the leveling rod on top of the bench mark, focus on it through the builder's transit and record the measurement. Then have your assistant walk the grading area and hold the leveling rod for you as you take more measurements. If soil needs to be added, the measurement will be greater than the benchmark and if the soil needs to be cut down the measurement will be less than the benchmark. Mark the difference in inches on a stake and drive it into the ground where the leveling rod was held.
For example, if your benchmark measurement is 2'-6" on the leveling rod and your grade needs to be 6" below that, then your benchmark grade measurement is 3'-0". Any area of the grade measured above 3'-0" requires soil to be added, any measurement below 3'-0" indicated grade that needs to be cut.
Step 10
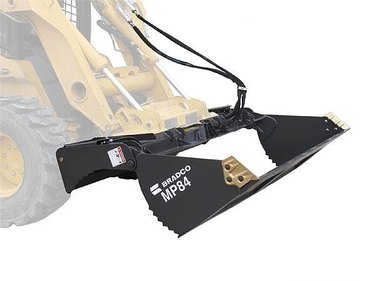
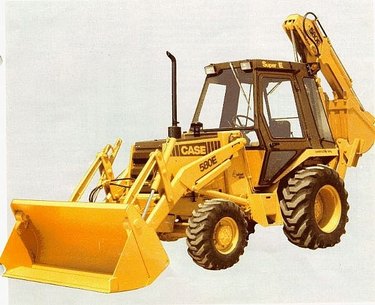
Most bobcats and back hoes have four in one buckets. This makes it easier to get to final grade. Open the bucket as shown in the picture and slight the front of the bucket slightly higher than the rear. This will allow you to scrape the grade with the back blade. Using the bucket in this manner allows you to plane the grade and have a good view of what you are doing. Move forward slowly and slightly adjust the bucket as necessary. You can reverse with the bucket in this position as well to spread soil and scrape.
Video of the Day