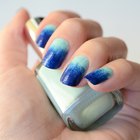
Nail art has come a long way from the days of stick-on designs, with intricate patterns taking over even the most glam red-carpet events. The most eye-catching nail art often features simple clean lines for a modern look. While the thought of creating designs on such a small canvas might be daunting, it doesn’t have to be with the right tools. Use a toothpick to create thin lines on your nails, for a design that will rival the stars, even if you’re only headed to class.
Dip a cotton pad in nail polish remover and wipe each of your nails with it. Nail polish remover will dissolve any remaining polish, dirt or oil, allowing the polish to adhere for longer. Do this even if your nails are free of polish to remove oil and surface dirt.
Dip a cotton swab in petroleum jelly and gently drag it over your cuticle, and over the skin on all sides of your nail. Repeat on every nail, keeping the nails free of the jelly. This will prevent polish from smudging onto your skin.
Sit at a desk or table, and place your hand flat on the table while keeping it relaxed. Paint your dominant hand first, when you have the most focus. Position the elbow of your non-dominant arm on the table for more control as you paint.
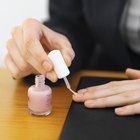
Position the brush of a base coat at your cuticle in the center, and slowly drag it to the tip of your nail. Repeat on the left and right side of your nail if the nail is wide. Base coats provide a smooth surface for polish while protecting nails from discoloration. Repeat on every nail and allow to dry completely.
Apply a base color if desired, by dragging the brush from cuticle to tip first in the center, then on the left and right sides. Use a base color that contrasts the design color you will be using. For example, choose black if the line will be neon, or select a pastel if the line will be a bold shade. Allow the base color to dry completely for a smooth finish.
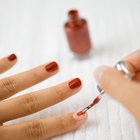
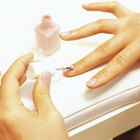
Dip the tip of a toothpick 1/8 inch into the color you are using for the line. Position it at the left edge for a horizontal line across the nail, or at the center of the cuticle for a vertical line from cuticle to tip. Slowly drag it across your nail, with gentle pressure, until you reach the other edge, to create a line. Avoid digging the toothpick into your nail, as this could damage the base coat.
Repeat on every nail, dipping the toothpick into the polish once before each new line. Make every line the same, or alternate between creating vertical and horizontal designs. Allow the polish to dry completely.
Place the top coat brush at the base of your nail, gently drag it to the tip and along either side, to protect the design for a long-lasting manicure.
Related Articles
How to Get Shiny Acrylic Nails at Home
How to Do Your Nails to Look Like You ...

How to Round Your Nails
How to Apply Nail Polish Without Streaks

How to Do Two-Tone Nails

How to Do the Sharp Nail
How to Change Polish on Acrylic Nails
How to Get Nail Stickers to Stick Well
Homemade Nail Decals
How to Protect Nail Polish While You ...

How to Clean Out Acrylic Nail Brushes

How to Use Sanding Blocks for Nails
How to Mix Two Nail Polishes

How to Hide Missing Eyelashes

How to Take Off No-Chip Nails
How to Do Fading Nail Polish

How to Apply "Tip and Dip" Nails ...
How to Get a Smooth Surface When ...
How to Keep Your Pink & White Nails ...

How to Stop a Running Split Fingernail
References
Writer Bio
Grace Phan is a trained hairstylist and aesthetician with a penchant for natural and DIY beauty. At the age of six she was skimming from her parents avocado supply to whip up face masks, and hasn't looked back. A graduate of the Atlanta Institute of Aesthetics, she loves working with all hair textures and skin types to create routines that can be practiced at home.