There are a few different ways to scale or rotate layers in Adobe Photoshop CC. Once you learn the different methods, you will be able to choose the option that works best for you in different projects.
Transform Options
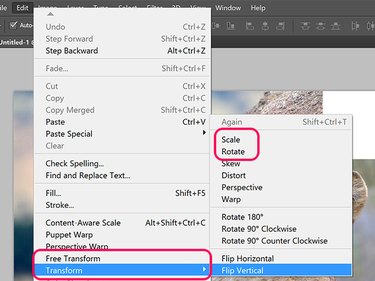
From the Edit menu, select the Free Transform option to resize and rotate a layer. Alternatively, click Transform to select either Scale or Rotate.
Video of the Day
Video of the Day
Using the Move Tool
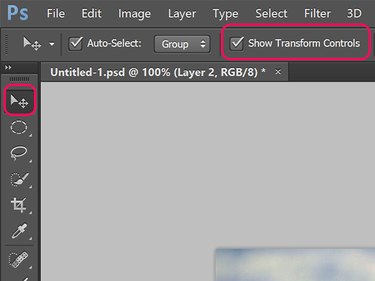
When the Move Tool is selected in the Toolbox, click the Show Transform Controls option in the Toolbox. While this option is selected, you can rotate or scale the image just as if you had clicked Free Transform under the Edit menu.
Rotating a Layer
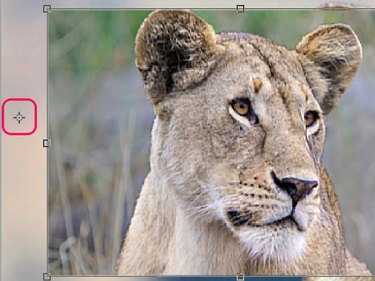
To rotate a selected unlocked layer, or a selected object in a layer, hover the cursor on the outside of any corner. Once the cursor changes into a curved double-sided arrow, simply drag the cursor to rotate the object. To restrict the rotation to 15-degree increments, hold down the Shift key.
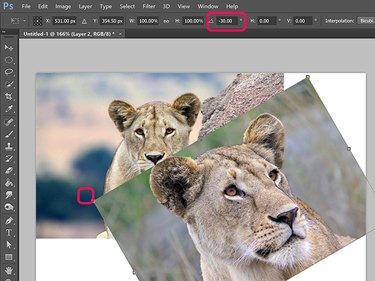
Alternatively, type the rotation angle in the Rotate menu in the Options bar. Positive values rotate the object to the right, while negative values rotate it to the left.
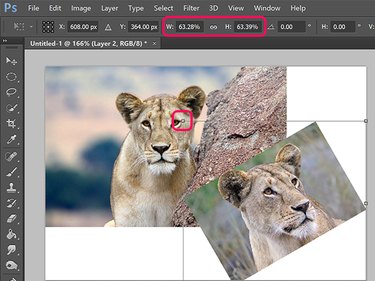
Resizing a Layer
To resize a layer, drag any handle in the bounding box around the object's layer, or type a percentage value in the Horizontal Scale and Vertical Scale menus in the Options bar. To lock the aspect ratio so the image isn't distorted, hold the Shift key while dragging any corner Anchor.
Tips
- Ctrl-click multiple layers in the Layers panel to rotate or resize them at once.
- Instantly create a duplicate copy of a transformed layer by holding down the Option key when you click the Edit menu and select a transform option.
- If you scale down a layer, it will lose definition should you later want to increase it again, unless it's a text layer, a Smart Object layer, or a vector layer like that created with the Pen Tools.
- When you're scaling an object, vary the amount of scaling on each side by dragging the Reference Point from the center of the object to an edge or even off of the selected object. If the reference point is on the left and you increase the horizontal scale, the object will scale more on the right and less on the left.