Learning about electricity by building electrical circuits is the best way to show kids how electricity works. Students need to understand that electrons jump through the air to a positively charged atom and have to wait until there is bridge between the negative and positive areas to complete the cycle. This bridge is called a circuit. When students learn how to make a connection or bridge through an experiment or science project, they learn how electricity travels through a circuit so it can be used for everyday needs and activities.
Brighter Light Bulb
In this experiment, you will need a circuit that has a battery compartment, a switch and a light bulb receptacle. Most science teachers and classroom teachers have these types of simple circuits available in the classroom. Help students write their hypothesis to reflect what they think will happen to the brightness of the light bulb when they use batteries with a stronger voltage. Begin with a 1.5-volt battery by placing it into the battery compartment on your circuit. Have students record observations about the brightness of the light bulb in their science journal. Now switch to a 3-volt battery and compare the light bulb’s brightness to that of the 1.5-volt battery. Draw conclusions about using batteries with even higher voltages based on the findings. Have students record their results in a science journal.
Circuit Experiment
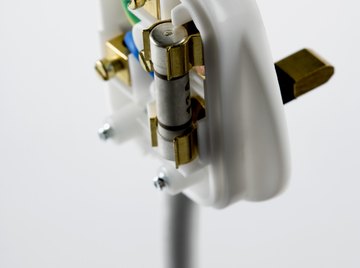
Building a simple circuit is the way Thomas Edison would have made his discoveries about electricity. In this experiment, you can build a circuit similar to the one Edison would have used in his laboratories. For this project, you will need a penlight bulb, flashlight battery, two, 6-inch pieces of wire, tape to keep the wire on the end of the battery, a small piece of flat metal, two thumbtacks and a small block of wood. For the switch, use the block of wood and stick one thumbtack in. Push the other thumbtack through the thin piece of metal and then push the thumbtack into the piece of wood. Be sure that the piece of metal is touching the first thumbtack you pushed in. Connect the first piece of wire to the thumbtack on the piece of metal. Place the light bulb in the center of this piece of wire. Tape the end of the first piece of wire to the end of the battery. Tape the second piece of wire to the other end of the battery. Attach the end of the second piece of wire to the opposite end of the battery and attach the other end of the second piece of wire to the other thumbtack. Your circuit is complete. When you press the thin piece of metal to the thumbtack, you complete the circuit and the light bulb will light.
Series and Parallel Circuits
Series and parallel circuits conduct electricity but do so in two different ways. For this experiment, you will need two light bulb holders and two light bulbs, one D-cell battery and battery holder, six pieces of insulated wire about 25 to 30 centimeters long and a science journal. Study how to make a circuit with basic components and how to make a light bulb light with the fewest number of wires possible. Have students draw a diagram of their circuit design in their science journal and label it "circuit A." Now create a circuit that lights two bulbs using the fewest number of wires possible. Have students draw a diagram of this circuit in their science journal and label it "circuit B." Now predict what will happen when one of the bulbs is unscrewed and have students write their prediction in their science journal. Test the prediction and record the results. Now experiment with possible ways to make a circuit that will let one bulb stay lit while the other is removed. Once you know this circuit works, have students draw a diagram in their science journal and label it "diagram C." Finally, experiment with the brightness of the bulbs by unscrewing one lamp and comparing the brightness to when both lamps are connected. Have students record their observations.
Parts of a Circuit
The purpose of this project is to build a simple circuit and identify its parts. To do this, you will need a half-meter copper wire cut into three equal pieces, a battery, a small flashlight bulb with a socket, a switch, electrical tape and scissors. Take the three pieces of copper wire and remove about 1/2 centimeter of the wire insulation at both ends. Attach one of the wires to the positive end of the battery and tape it down. Attach the other end of the wire to the right side of the light bulb. Attach another piece of wire to the negative side of the battery and tape it down. Attach the other end to the left side of the switch and tape it down. Take the last piece of wire and wind it to the right side of the switch. Finally, attach the other end of the wire to the left side of the bulb. Observe what happens when you open and close the circuit by loosening or tightening the bulb. Have students draw a diagram of their circuit in their science journal and label each part appropriately: source, connecting wires, switch and device (battery, wires, switch and light bulb). Ask them to describe what each part does and what happens to the circuit when even one of the parts is missing.
References
About the Author
Patti Richards has been a writer since 1990. She writes children’s books and articles on parenting, women's health and education. Her credits include San Diego Family Magazine, Metro Parent Magazine, Boys' Quest Magazine and many others. Richards has a Bachelor of Science in English/secondary education from Welch College.
Photo Credits
Jupiterimages/Polka Dot/Getty Images