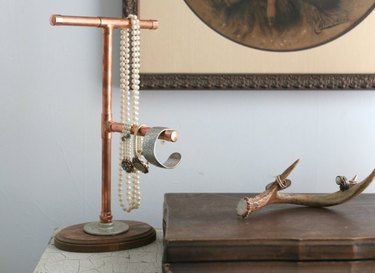
Make an eye-catching jewelry stand from standard plumber's copper pipes and fittings to organize and neatly display favorite pieces of jewelry. You can create these stands to decorate a vanity, to give as a unique gift, or to help display pieces in a boutique setting or an upcoming event.
Things You'll Need
Video of the Day
- 3-by-6-inch copper pipe, ½-inch round
- 2-by-3-inch copper pipe, ½-inch round
- Pipe cutter
- 2 copper T-fittings, ½-inch round
- 3 copper end caps, ½-inch round
- Copper fitting adapter (male), ½-inch round
- Floor flange, ½-inch round
- 4 wood screws, ¾-inch, #6
- Oval wood plaque
- Wood stain, color of your choice
- Paintbrush
- Spray paint
- Clear craft adhesive glue
Video of the Day
Assemble It

Standard copper pipes come in standard lengths of 2, 5 and 10 feet. Cut the pipe down to the listed material sizes using a round pipe cutter. Most hardware stores will cut the pipe to size free of charge if you purchase it in store.
- Tip: Look for copper pipes and fittings at your local Restore, Craigslist or even FreeCycle to cut down on overall costs.
Stain the Wooden Plaque
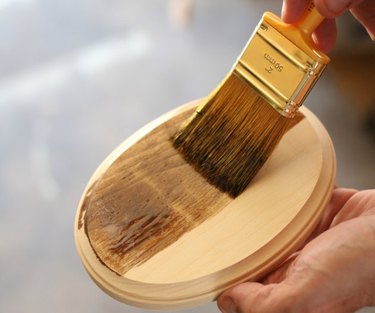
Stain the wood plaque with your choice of wood stain.
Finish the Flange
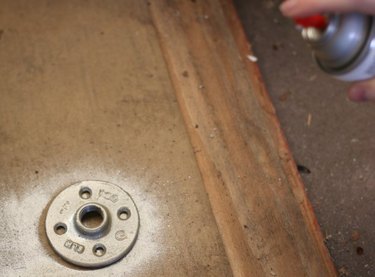
For a more delicate feel to the finished piece, apply a metallic finish to the floor flange with thin, even coats of spray paint.
Securing the Flange
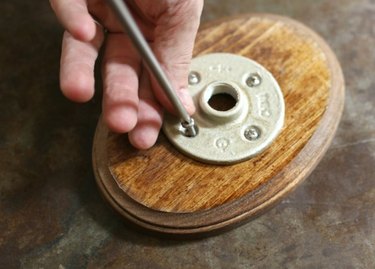
Screw the floor flange securely into the center of the plaque using the four wood screws, after the wooden plaque and floor flange have fully dried.
Secure the Adapter
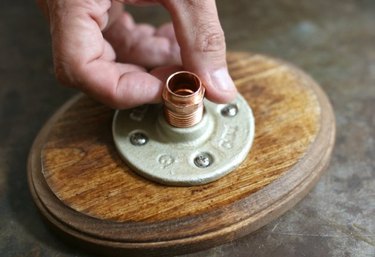
Twist the fitting adapter into the floor flange until tightly secure.
Attaching the 6-inch Pipe
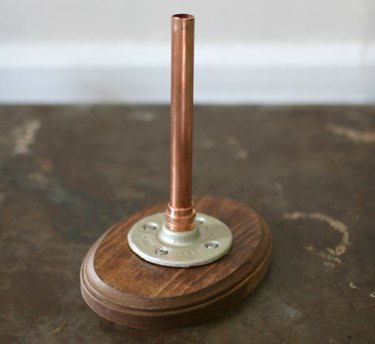
Apply a thin layer of glue inside the rim of the fitting adapter and press one of the 6-inch pipes into the adapter opening.
Applying Glue to T-Fittings
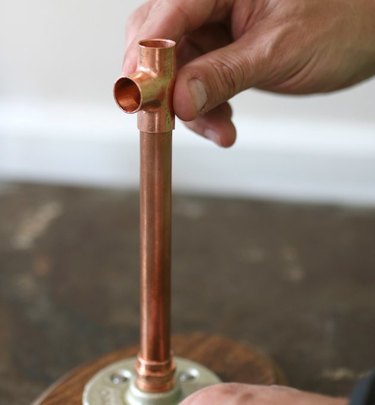
Apply a thin layer of glue inside the rim of one T-fitting and gently slide it onto the exposed side of the 6-inch pipe. Position the "T" in a vertical position, so a single arm is exposed to the side, with the other facing upward.
Attach More Pipe
Apply a thin layer of glue inside the upward-facing rim of the same T-fitting; then gently press another 6-inch pipe into the fitting opening.
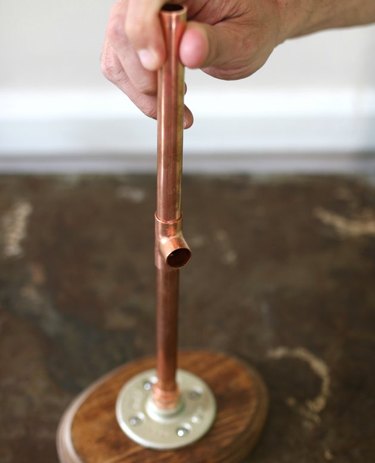
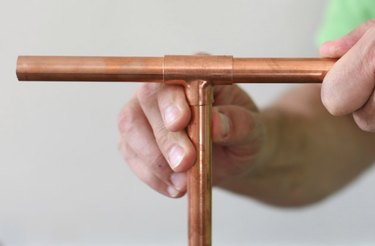
Connect the Ts

Apply a thin layer of glue inside the rim of the remaining T-fitting and gently slide it onto the exposed side of the 6-inch pipe. Position this "T" in a horizontal position and perpendicular to the original T-fitting so both remaining arms extend sideways.
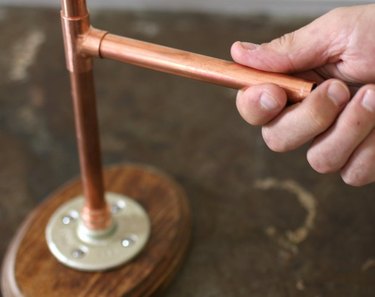
Join the 3-inch Pipes
Apply a thin layer of glue inside the rim of each exposed "T" arms and gently press the 3-inch pipes into each fitting opening.
More Fittings
Apply a thin layer of glue inside the rim of the remaining "T" arm at the center of the stand and gently press the remaining 6-inch pipe into the fitting opening.
Ending It All
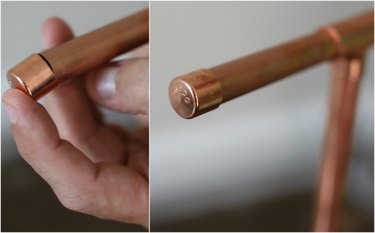
Finish the open pipe ends by applying a thin layer of glue inside the rim of three end caps and gently pressing them in place to cover the exposed pipes.
Hang It!
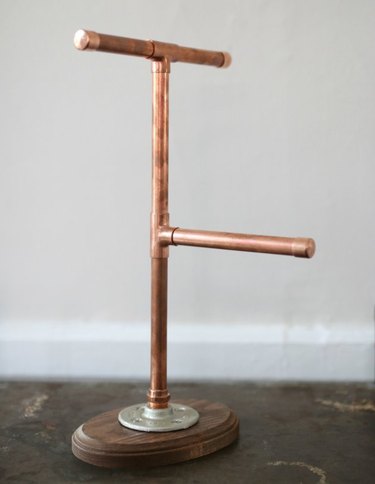
Arrange jewelry on the stand for easy access and an eye-catching display. Use the upper arms of the rack to hang necklaces and the center arm for holding bracelets and bangles.