Finding free solar panels for your home is not easy but it is possible with dedicated searching and research. Donated panels are ideal but you may also find programs offering tax rebates and other renewable energy credit options to secure free solar panels for your home. Building out a solar system requires some planning, but free panels can significantly reduce the overall costs of installing an array.
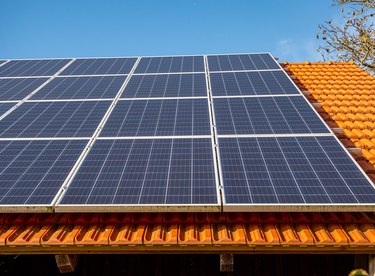
How Solar Systems Function
Video of the Day
Solar panels generate energy by capturing sunlight, but that energy requires a system for delivery. A home system often uses multiple panels in an array. Those panels are wired together and the energy output is managed by either delivering power to batteries for storage or to the electrical grid where it's essentially sold back to the power company, negating or even canceling the cost of powering the home.
Video of the Day
The panels pay for themselves by reducing grid consumption and lowering or eliminating the power bill. In some cases, producing an excess or more than the home uses can even result in credits or payments from the power company. Storing energy in batteries makes it possible to function off the grid but high-quality battery systems are very expensive.
Free solar panels can significantly reduce the cost of building an array and they will supply free energy once installed. Finding those panels is the difficult part of the equation.
Finding Free Solar Panels
Solar panels are not often given away by owners. Once installed, they continue working for a very long time and the need to remove them is rare. That said, panels are sometimes purchased or acquired for installation and plans change. This can create an unwanted surplus of panels in storage.
The first step in locating these panels is through local classifieds. Scour Craigslist, newspaper listings and any other classified ads in your region. Occasionally, free panels will appear in the free sections and you might score a used or even brand new set. Look daily because panels rarely last for long in the free section.
Garage sales and estate sales may also have panels for sale. Garage sales are not the most likely place but you might get lucky and negotiate the panels to a low price or get them for free by making a case for yourself. Calling ahead to an estate sale is a great way to save time and know if panels are available. Some sales will list items in the advertisement but they will rarely negotiate the price down to a free or nearly free price point. You can save money, however, by paying much less than the retail cost.
Tax Breaks and Subsidies
Tax breaks for using solar systems are sometimes available on federal, state and local levels. The tax code on using renewable energy changes frequently and consulting a CPA before counting on a rebate or credit is advisable. Installing and using solar in the home when credits are available can lead to significant credits, which means a portion of the panels are essentially free.
Many solar companies advertise free panels. Many of these companies know the tax code and can communicate savings on that end but the panels are never really free when coming directly from an install company. The business model involves a lease system where they install the panels and you pay a monthly fee for the usage. The company, however, either retains ownership while you pay a reduced power bill or the panels are financed and you pay them off at a monthly rate.
The leased or financed option is a good way to obtain a solar system without the high upfront costs but the panels are not actually free.