
Copper sheets are manufactured by which process, and how exactly are they made? Sheet metal can be made of a variety of materials, including copper, aluminum, steel and titanium. There are four basic stages in the process of making sheet metal: melting, pouring, pickling and lastly, rolling and annealing. Sheet metal is made for a wide range of purposes, from automotive parts to rain gutters to medical equipment and building components. The type of metal used is specific to the intended application, but the process of making sheet metal is the same regardless of the metal or alloys used in the manufacturing process.
Sheet Metal Manufacturing
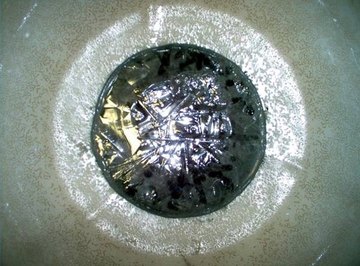
The process begins with melting the metal that will be pressed into sheets. By heating the metal to its melting point, it becomes liquified for the next step, which is the pouring stage.
Hot liquid metal is poured from a crucible, which is a container for heating metals at high temperatures, into a rectangular mold. The metal is cooled in this mold to produce an ingot, which is a uniform block of metal.
Next, the ingot is pickled. During the pickling stage, the ingot is treated with a chemical mixture to clean it and prepare it for processing; pickling removes impurities like rust, stains and contaminants.
The last step of the process is the rolling and annealing stage. The pickled ingot is run through successive pairs of rollers to smooth and flatten it. Typically, as the ingot becomes flattened, the rollers move closer together, producing a thinner and thinner sheet of metal.
However, the metal becomes harder each time it is run through rollers, so at certain points in the process, it must be annealed in order to make it roll easier. During annealing, the sheet is heated and pickled again, making it more pliable for rolling again.
What's Sheet Metal Made of?
So, what's sheet metal made of? Sheet metal can be made of many different types of metals, such as aluminum, carbon steel, copper, galvanized steel, high strength steel and stainless steel. Certain metals are best for specific purposes, due to characteristics like their cost, ease of fabrication, hardness, strength and durability.
For instance, aluminum is relatively light and low cost. It is also is known for its high electrical and thermal conductivity, corrosion resistance and high recyclability. Since it is non-toxic, it is often used for cooking vessels. Its conductivity makes it suitable for electrical devices.
Copper is much more expensive than aluminum, but it also has higher electrical and thermal conductivity. For this reason, it is often used for heat sinks, roofs and doors.
Stainless steel is another metal that is used in the sheet metal manufacturing process. Resistant to corrosion, fire and heat, stainless steel sheet metal is regularly used in kitchen vessels, chemical storage tanks and food processing machinery.
Various other metals are used for making sheet metal, such as titanium. Its metallurgical characteristics, like its biocompatibility, make it suitable for many purposes in the medical equipment industry.
Other Sheet Metal Facts
Used in industrial, commercial and residential sectors, sheet metal is a versatile product with many applications. It is made of many different metals, and it is also available in different grades and thicknesses. Many sheet metals are also treated with a finish to make them suitable for specific applications.
For instance, sheet metal that is used in food cans is coated with tin, a process called tinning. Sheet metal may be texturized through the process of tempering, which uses special rollers to make the metal harder and add textures. Some sheet metal is galvanized, which is the process of zinc coating that makes the metal resistant to corrosion.
With its adaptability and ability to be treated and shaped for specific purposes, sheet metal is a material that is essential to many of the objects and structures we rely on every day.
References
About the Author
Meg Schader is a freelance writer and copyeditor. She holds a Bachelor of Science in agriculture from Cornell University and a Master of Professional Studies in environmental studies from SUNY College of Environmental Science and Forestry. Along with freelancing, she also runs a small farm with her family in Central New York.