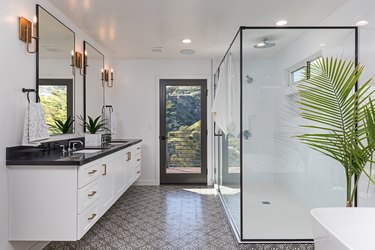
A shower pan is the bottom layer of a shower floor underneath the tile. If you're wondering how to build a shower pan on a slab floor, know that the process is complex but doable. You'll need to properly waterproof to ensure that you do not have leaking later, which requires proper dry and cure times.
Anatomy of a Shower Pan
Video of the Day
The role of a shower pan is to create a sloped, waterproof seal between the shower and the flooring underneath since tile, grout and mortar are not entirely waterproof. Building a shower pan on a concrete slab floor is in many ways ideal. Tile showers are quite heavy considering the weight of the tiles plus the mortar and cement board backing. Some types of floors need to be reinforced in order to support a shower and build a shower pan on them, but with a concrete slab floor, you're all set.
Video of the Day
Shower pans consist of several layers. The bottom layer is the slope fill, bordered by the curb. This gently sloped fill lets the waterproof membrane above funnel any water to the drain. Next is the waterproof vinyl or rubber pan liner. This is what creates the waterproof seal.
Next, a layer of galvanized metal lath may be necessary. Finally, more sloped mortar bed forms the last layer of the shower pan. Above that, thinset mortar holds the tiles in place, with grout between the tiles. Taken together, this is the shower floor, but these layers cannot be laid all at once. Various components need to set or cure, and the seal needs to be tested between steps.
Building the Shower Pan
Before beginning, stuff the drain with a rag to make sure no debris can enter during the building process. Then, measure the dimensions of your planned shower. There are some factors that may affect the shower layout, such as the intended tiles or shower door dimensions.
Once you've drawn the outline of the shower floor, you will need to build a curb. Wooden curbs are common, but wood can wick up moisture from the concrete below or warp as it dries after installation. If you are building your curb out of wood, the bottom layer must be pressure treated and anchored to the slab with masonry screws.
Preparing the Floor Surface
Once you've built your curb, prepare the shower floor surface for the sloped prefill. You can begin by mixing some thinset mortar with a little more water than the instructions dictate to create a loose mix that will help the mortar or the sloped prefill bond to the slab.
For the sloped prefill itself, the final slope of the shower needs to ascend 1/4 inch for every foot away from the drain. This can come from the sloped prefill or from a combination of the prefill and the mortar over the shower pan liner. Plan your slope and pour the prefill accordingly. Let the mortar cure for 24 hours.
Laying the Shower Liner
Once the sloped prefill has cured, lay the waterproof shower liner. The shower liner must extend at least 8 inches up the shower walls, preferably up to 12 inches. The shower liner must also cover the curb and must do this without being cut, only folded.
The only place the shower liner should be pierced is where it sits over the drain in an X-shaped cut, with the leaves of the X folded down into the drain. Make sure not to cut the drain hole too large. Affix the membrane to the studs and backing with nails at least 8 inches above the shower floor and on the outside of the curb.
Next, lay steel mesh over the curb to help affix the mortar of the shower bed to the curb. Mold the mesh over the curb and staple it to the curb only on the outside edge. The inside edge will be held in place by the mortar floor.
Waterproofing and Water Tests
Before you finish, you should perform a water test. Fill the shower pan with water and mark the level of the water. Leave it for 24 hours and see if the water level has lowered at all. If it is not successful, start with a fresh sheet of liner and try again.
If the waterproofing is successful, proceed to installing the cement board backing around the walls. This will be the substrate for the tiled walls. Finally, float the mortar bed itself. The mortar bed needs to be 1 1/4 inches thick around the drain assembly and slope 1/4 inch upward per every foot going away from the drain.
With the drain assembly, remember to leave room for the actual tiles. Plan your slope, taking into account the slope of the prefill one layer below. Mark the walls to the height the mortar will need to reach. Once the mortar has been shaped, let it cure. Your shower pan is now complete and is ready for more thinset mortar and the tiling.