
What to Do If Prepasted Wallpaper Border Won't Stick?

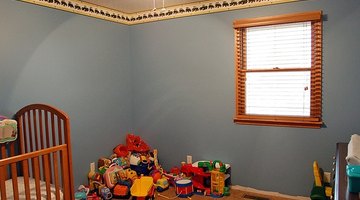
Wallpaper border is an easy way to add color or character to a room. Pre-pasted wallpaper border saves the time and mess of dealing with wallpaper paste, but, at times, the pre-pasted border doesn't seem to adhere well to the wall.
The problem is likely caused by a lack of wall preparation, improper wetting of the border or bad wallpaper paste. Sometimes the problem is a combination of two of the items.
Preparing the Wall
Walls with heavy texture, loose finish and slick surfaces often make it difficult for wallpaper border to adhere properly. For walls with heavy texture, sand some of the texture off the walls, and try to make the surface as smooth as possible. When the surface is relatively smooth, wipe the wall down with a damp cloth to remove loose drywall dust. Allow the walls to dry completely, then paint the hanging area with wallpaper primer. Primer will allow better adhesion between the walls and the border.
For walls with a fine, loose finish, wipe the walls with a damp sponge to remove all the loose finish possible. Allow the walls to dry completely, then paint the hanging area with a wallpaper primer. For walls with a slick texture such as vinyl wallpaper, a coat of primer should be enough to help the border adhere properly.
Wetting the Border
If you get the border too wet, the paste can lose effectiveness. A good way to ensure you don't use too much water on the border is to fill a large rectangular container half full of water, and place a set of rolled border on one side of the container. Unroll a bit of the border, and place the end in the tub of water. Use your fingers on one hand to keep the border submerged while using the other hand to pull the entire roll of border through the water. If you have a helper, the helper can pull and roll at the same time, or you can roll the border after you've finished. Wait a minute for the paste to set, then unroll the border on your prepared wall.
If a properly prepared border does not adhere to a primed wall, then the paste on the border may be old and ineffective. In this situation, you need to paint the back of the border with wallpaper paste rather than attempting to use the paste on the border. Use a paint brush or sponge brush to paint a thin coat of wallpaper paste on the back of the border. Take one end of the wallpaper border and match it with the other, allowing the back of the wallpaper to fold over and touch together. Allow the adhesive to sit for a minute, then unfold the border and hang it. (ref 1)
The Drip Cap
- Wallpaper border is an easy way to add color or character to a room.
- The problem is likely caused by a lack of wall preparation, improper wetting of the border or bad wallpaper paste.
- Allow the walls to dry completely, then paint the hanging area with wallpaper primer.
- A good way to ensure you don't use too much water on the border is to fill a large rectangular container half full of water, and place a set of rolled border on one side of the container.
- If a properly prepared border does not adhere to a primed wall, then the paste on the border may be old and ineffective.
Writer Bio
Kaye Morris has over four years of technical writing experience as a curriculum design specialist and is a published fiction author. She has over 20 years of real estate development experience and received her Bachelor of Science in accounting from McNeese State University along with minors in programming and English.
More Articles