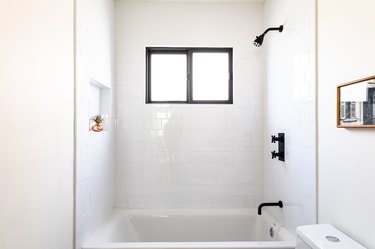
When your shower stall gets worn or badly cracked, you'll want to replace it. Fortunately, replacing a shower stall is a relatively easy chore. The hardest part is getting it through doorways. If you can get it in, then you should have no problem installing it. Don't despair if your doorways aren't wide enough, though. Shower stalls do come in multipanel kits, making it easy for you to build your shower from scratch. Although putting in a new shower stall is not difficult, you'll need someone to help you lift the stall onto the drain.
Here's how to replace a shower stall.
Video of the Day
Video of the Day
1. Remove the Shower Fixtures and Drain Assembly
Turn the water valve off in the access panel for the shower plumbing. Remove the shower fixtures and drain assembly. You'll need to remove the showerhead and disconnect any flex hose from the water knob(s). Then take off the knobs by unscrewing the set screw on the bottom and firmly pulling them off. Unscrew pipe stems and put them aside.
The drain assembly normally has a screw directly in the center of the screen, and you may need to use a utility knife to cut the plumber's putty around the outside. Then use a flat-head screwdriver to pry the mechanism up. Some mechanisms also screw out.
2. Remove the Old Shower Stall
Use a utility knife to cut through the silicone caulk all around the outside of the unit. Make sure you get all the way through, or it will get hung up when you're pulling it out and could possibly tear the drywall.
Pull the unit from the top and tilt it toward you before pulling it out. This will allow you to clear the drain pipe. Take the unit out and discard it.
Scrape the remaining silicone off the wall with a putty knife and sand the area to smooth it out. Wipe all the sanding dust off the walls so you don't have a problem with the new silicone sealant. Clean up all the water connections and drain area with a detergent and warm water.
3. Install the New Shower Stall
Lift the new unit in place and set it down so the drain opening and drain match up. Draw a line at the top and outside edge of the side where the showerhead and knobs will be. Take the unit back out. Measure from those lines to the showerhead pipe and the water knob(s) pipe. Transfer those measurements to the shower unit and cut the holes for the pipes using a hole saw.
Place the unit back in the opening, matching up with the drain again. Use plumber's tape on the threads of the stem pipes and screw them back in. Put plumber's putty around the drain assembly and reinstall it. Be generous with the putty and wipe off the excess when you're finished. It's easier to wipe some off than have to redo it because it leaks. Screw the screen back onto the drain assembly and install your showerhead and knobs.
4. Caulk Around the Shower Fixtures and Stall
Put a bead of silicone caulk around the outside of the knob trim and showerhead trim. Then use your finger and smooth it down. Run a bead of silicone caulk around the entire outside of the shower stall where it meets the wall and the floor. Wet your finger and smooth it down all the way around.