Things You'll Need
Screwdriver
Pliers
Wire stripper/cutter
Wire nuts
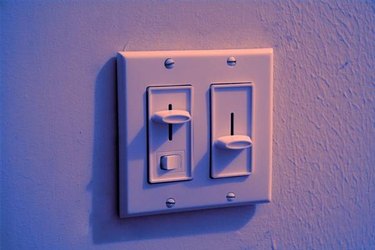
A dimmer switch gives you much more control over your lights than you'll get with a flip switch. They also save energy and extend the life of your light bulbs. Dimmer switches are only for use with incandescent lights. Don't use them with ceiling fans, appliances or fluorescent lights because you will destroy the dimmer and whatever it is connected to. Dimmer switches can replace either single-pole or three-way switches. Follow the steps below to learn how to replace both types.
Step 1
Turn off power to the light circuit. Remove the cover plate from the light switch and then remove the light switch from the electrical box.
Video of the Day
Step 2
Replace a single-pole switch with a single-pole dimmer. Loosen the two terminal screws on the switch and remove the connected wires. Splice those same two wires to the two wires from the dimmer. If both dimmer wires are black, it doesn't matter how you connect the wires. If one dimmer wire is black and the other red, you should splice the black wire to the wire that brings the electricity from the service panel and the red wire to the wire that runs to the light fixture. If your dimmer has a bare or green ground wire, splice that to the bare wire from the service panel. Cover all splices with wire nuts, push the wires into the box and screw the dimmer to the box.
Step 3
Replace a three-way switch with a three-way dimmer. The presence of a three-way switch (a switch with three screw terminals, not including the ground terminal) means that there is another three-way switch on that same circuit. Only replace one of these, it doesn't matter which. Do not install more than one dimmer on the same circuit.
Step 4
Remove the three-way switch from the electrical box and remove the wires from the terminals. Connect those wires to the identical locations on the dimmer switch, push the wires back into the electrical box and screw the dimmer to the box.
Step 5
Do not replace a four-way switch with a dimmer. You can recognize a four-way switch by the two screw terminals on each side. If you happen to have this type of switch, it means you also have at least two other switches controlling the same light or lights. The two switches on either end of the circuit are three-way switches. Replace one of those switches with the dimmer.
Tip
Always buy "heavy-duty" dimmers. When a light bulb burns out, there is a surge on the line, and this surge can destroy a weaker dimmer.
Video of the Day