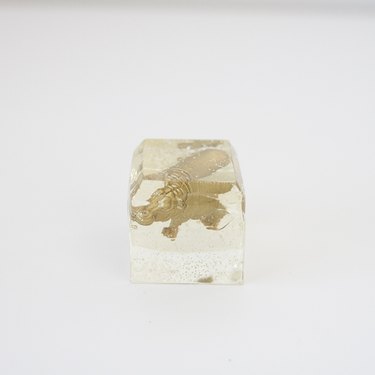
Spread a little cheer on your desk -- or the desk of a loved one -- with a homemade resin paperweight. Mastering this DIY takes more patience than skill.
Things You'll Need
Clear casting epoxy
Figurine or object to embed into mold
Food-grade silicone mold
4 disposable cups
Wooden stirrers
Measuring cup
Plastic gloves (optional)

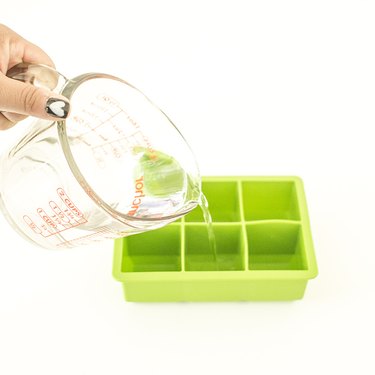
Step 1
Fill the mold with water to determine how much resin you'll need. (Fill only the cells that you plan to use for paperweights. This project made three paperweights.) Dry the mold completely before using. If your cells fill up with 1 cup of water, then you'll need 1/2 cup of resin and 1/2 cup of hardener.
Video of the Day
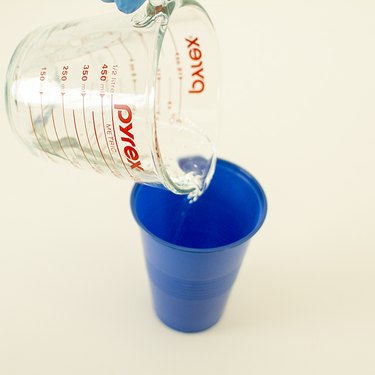
Step 2
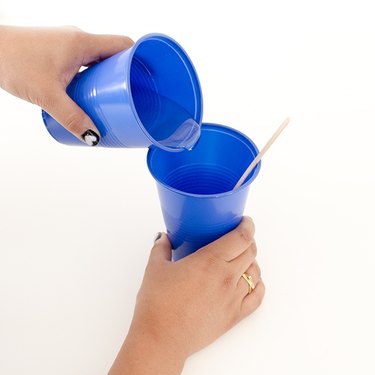
Fill one plastic cup with the needed quantity of resin and one plastic cup with hardener, equal amounts of each. Then pour your resin and hardener at the same time into an empty clean plastic cup. Stir them together for two minutes using a wooden stirrer.
Tip
Use the wooden stirrer to get any remains of the resin and hardener from the side of your plastic cup. Scrape the sides if necessary. You want the liquids to mix completely.
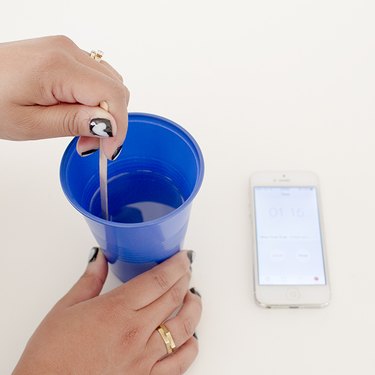
Step 3
Pour the stirred resin-hardener mixture into the last remaining clean cup. Stir with a clean wooden stirrer for one minute. It takes two pours to obtain the proper mixing and reaction. You will know the the resin and hardener are combined because the mixture changes color. The resin is clear and the hardener is clear with a yellowish tint. After they are combined the mixture becomes thicker and not as clear. It will dry clear, however. It will smell a bit. Do not inhale too much.

Step 4
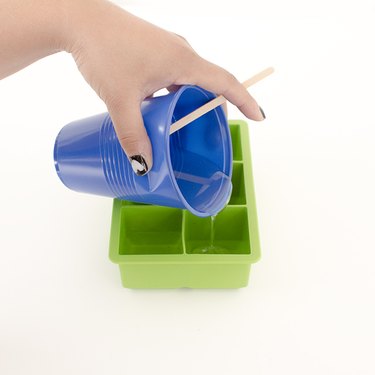
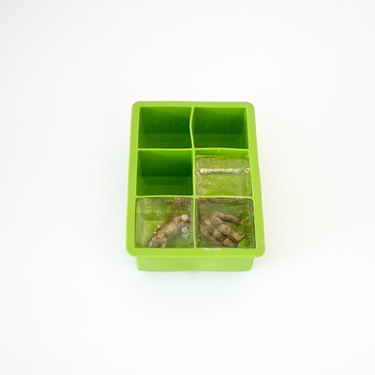
Pour the resin mixture into the mold and let it cure to a jelly-like state. This can take 15 to 60 minutes, depending on the cure. Temperature of the workspace can affect curing time. The object you embed will determine how much resin mixture to pour. This project, which made three paperweights, used about one-fourth of the mixture spread over three of the mold cubes.
Do not let the resin cure completely, and do not use it all.
Step 5
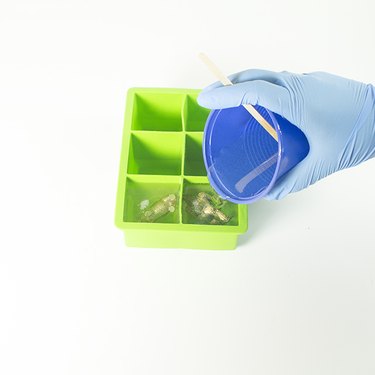
Pour a small amount of the resin mixture on top of previously poured resin. Then center the object in the mold cell, upside down, and fill the mold cell completely with the remaining mixture. The bottom of your mold is the top of the paperweight. Do not get the object too close to the mold edge, or it will not harden correctly.
Warning
The curing process will let off steam and can be hot to the touch. Be careful when handling and have the room well ventilated.
Step 6
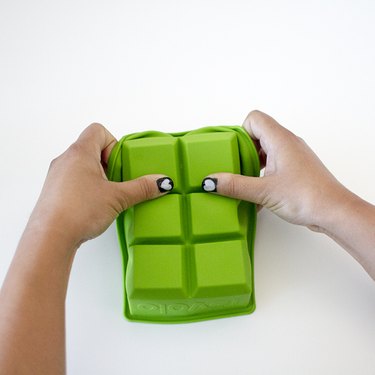
Let the mold set for 24 to 72 hours to cure completely before removing the paperweights from the mold. Placing the mold on a sunny windowsill will help it cure quicker.
Video of the Day