Vanilla beans grow on the vanilla orchid (Vanilla planifolia), a tall, flowering vine native to tropical Mexico. Vanilla orchids grow in U.S. Department of Agriculture plant hardiness zones 11 and 12, thriving in humid conditions and rich, moist soil. They do not survive temperatures below 55 degrees Fahrenheit, and they require much warmer temperatures to flower and fruit successfully, so they are typically grown in pots that you can shelter indoors during cold or dry weather. It can take three to five years for a vanilla orchid to produce beans, and the plant will require hand pollination to help them fruit successfully.
Step 1
Set the vanilla plant in a location that receives bright but indirect all-day sunlight and where temperatures remain between 80 and 95 degrees Fahrenheit to ensure the best growth. Insert the legs of a 6-foot tall pot trellis into the soil of the pot to provide a structure for the vine to climb.
Video of the Day
Step 2
Fill a spray bottle with warm water. Mist the foliage, stems and foliage with the water once or twice daily so they remain moist and so the soil doesn't dry out completely. Water the soil lightly so it remains moderately moist if it begins to dry out.
Step 3
Place a layer of small pebbles in the drip tray beneath the pot. Fill the tray with water to just beneath the top surface of the pebbles. The evaporating water provides humidity, and the pebbles also prevent the pot from sitting in any excess water that drains out.
Step 4
Mix 1 tablespoon of 30-10-10 fertilizer with 1 gallon of water. Water the vanilla orchid with the solution every three weeks until the excess just begins to drip from the bottom of the pot. Fertilize from spring through late summer when the plant is actively growing.
Step 5
Feel the soil and check the stem base weekly for symptoms of fungal rot, which develops in overly wet soil. Reduce watering and allow the soil to dry out slightly if the potting mixture feels wet or if the base of the stem feels soft and mushy. Vanilla orchids suffer from few pests or problems other than fungal rots in overly moist soil.
Step 6
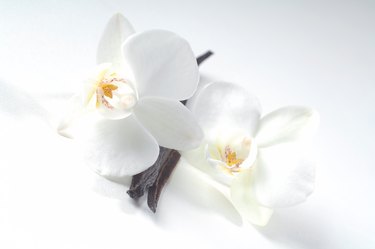
Fold back the rostellum, the small membrane inside the center of the vanilla flower, with a toothpick to reveal the pollen covered anther inside. Press the anther against the stigma inside the flower, which is the long structure just beneath the anther. Pollinate the flowers daily as they open from late spring through summer. Each flower only lives for one day, and not all pollination is successful, so daily hand pollination increases the chances of bean production.
Step 7
Pick the beans from the orchid when they begin to turn yellow, which takes eight to nine months from successful pollination. Snap off the stem holding the bean onto the orchid or cut through the stem with a small pair of scissors.
Step 8
Heat water to 190 degrees Fahrenheit in a large pot. Submerge the beans in the water for 20 seconds to scald them the same day they are harvested. Wrap the scalded beans in a wool towel and place them in a sealed plastic box to sweat them. Transfer the beans from the box to a preheated 120 degrees F oven for two hours the following day, and then return them to the box. Repeat the process of sweating and oven drying for seven days, and then set them outside to air-dry each day for up to three months to fully cure the beans.
Video of the Day