In the past, harnesses were only worn by search-and-rescue dogs or service dogs for disabled people. Today, however, pet parents are finding handy uses for harnesses on the family dog. Harnesses with integrated handles can help owners assist their dog after surgery, and make walking less injurious to a dog's neck. Products such as the Ruffwear harness can be used for three-legged dogs to help stabilize them so they aren't putting too much weight on their remaining front or rear leg after amputation.
Video of the Day
Proper fitting is important for your dog's comfort. You should be able to fit two fingers vertically underneath the harness straps. The straps should not restrict the dog's front legs or rub on their legs. A proper fit will prevent chafing, fur loss, or pain.
Video of the Day
Step 1: Research the best dog harness
Research the different styles of harnesses before you buy. There are many styles available which meet different needs for different dogs. Some harnesses have integrated handles and offer front and rear leg support, while others will just help one end of a dog. Others give under-belly support, which makes them better for larger dogs, and some harnesses are only useful when two people are handling the dog.
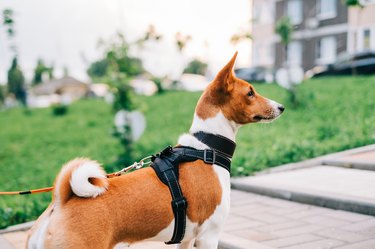
Some harnesses can be left on all day, while others need to be removed for urination and sleep.There are even harnesses that have a leash clasp on the front, at the chest, instead of on the dog's back, to help deter a dog from pulling. There are also plenty of colors and patterns to choose from. Do your homework and you'll find the best dog harness for you and your pup.
Step 2: How to measure correctly
Figure out the correct dog girth measurement, which is the widest point of your dog's chest and rib cage area. Harness size measurements are based on girth, which can vary according to breed. Some dogs, like boxers, are more deep-chested than others. Mixed breeds sometimes don't fit into a certain size suggested by manufacturers. Therefore, it's important to measure correctly — it's not recommended to buy online without measuring. While most harnesses provide fabric allowances for a customized fit, it is important to accurately measure your dog's girth for the best size possible.
Step 3: Double-check for accuracy
Before you start, make sure you have the right type of tape measure. A flexible tailor's tape measure is best for an accurate measurement. Retractable tape measures can also be used, but are not preferred.
To begin determining your dog's girth measurement, stand over your dog and place one end of the tape measure on his spine, just above the widest part of his rib cage.
With your other hand, wrap the tape measure behind his front legs and around his body, going underneath the widest part of his rib cage. Place this end next to the beginning of the tape. Put your thumb on the number that meets up with the beginning of the tape measure. The higher number is the dog girth measurement.
Step 4: Search online before buying
Locate the proper harness size for your dog by visiting a harness manufacturer's website, or studying the packaging while in a store. Most manufacturers make harnesses with adjustable sizing. For example, one style of harness says that a medium harness will fit dogs with a girth ranging from 32 inches (81 centimeters) to 48 inches (122 centimeters). If your dog's measurement falls between two different sizes, select the smaller size for the best fit. A well-made harness will have adjustable straps that allow for a more contoured fit.