

Mercury Marine is one of the most recognized nautical supply companies on the market today. Its outboard motors control a large market for small and mid-size recreational boats. At some point you'll need to know how to set or adjust the timing of a new Mercury motor. The timing settings on an outboard motor control the boat's power and acceleration and are an important part of your boat's health. Adjusting the timing on a Mercury outboard motor is relatively easy, as long as you have a timing light, dial indicator and spark plug gap tool.
Items you will need
Timing light Dial indicator Spark plug gap tool Owner's manual
Getting Started
All owner manuals will have instructions on timing adjustments. While these can be rather confusing, they will help you locate the different parts you will be using during the adjustment. Make note of the timing belt, throttle cable, flywheel, spark plugs and idle timing screw.
You must have a dial indicator and timing light to properly adjust the timing of your outboard motor. You will also be required to use some type of spark plug gap tool. See resources for boat maintenance tools.
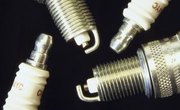
Locate the flywheel. Remove the cowling cover on the outboard motor's power head and detach the spark plugs.
Adjust the Timing Belt
Attach the dial indicator to the flywheel. Install the dial indicator into the top spark plug hole marked with a red dot or No. 1.
Lock the dial indicator in place by turning it to the 0 position at top dead center.
Adjust the timing. Turn the flywheel counterclockwise until the dial indicator is a quarter turn past the .464 mark. Now turn the flywheel clockwise until the dial indicator reads 464.
Adjust the Ignition Timing
Install your spark gap tool into the holes where the spark plugs usually go.
Detach the throttle cable from the power head and attach a timing light to the top spark club lead.
Adjust the ignition timing. Shift into neutral and start the engine while holding the throttle arm. Adjust the idle timing screw so that it is 2 degrees before top dead center. Turn off the engine. Start the engine again, following the same steps as in the beginning, making sure you're in neutral. Adjust the maximum timing screw or timing of throttle at wide open (WOT) so that it is 24 degrees before top dead center. Turn off the engine.
Remove the dial indicator and spark gap tool and replace the spark plugs. Securely place the cowling covering back on the power head.
Tips
- The suggested number settings above are not arbitrary marks. You should follow these number specifications exactly, unless your owner's manual or an experienced technician tells you otherwise.
Tips
- The suggested number settings above are not arbitrary marks. You should follow these number specifications exactly, unless your owner's manual or an experienced technician tells you otherwise.
Writer Bio
Based in New York, Jillian Downer has been writing travel, fashion, and active lifestyle articles since 2004. Her work has appeared in "Travel + Leisure," "Outside Magazine," "Women's Health," "Footwear News," and "US News & World Report." Downer holds a Master of Arts in comparative literature from New York University.