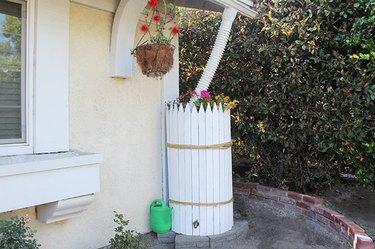
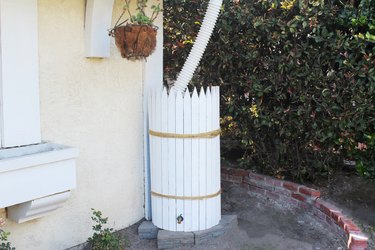
Save money and conserve precious rain water by constructing your own rain barrel, which you can use to water your plants and lawn. About 600 gallons of water can be collected from 1 inch of rain falling off a 1,000 square foot house. Decorative elements like wooden stakes can be used to make the barrel a standout feature rather than an eyesore in your yard.
Video of the Day
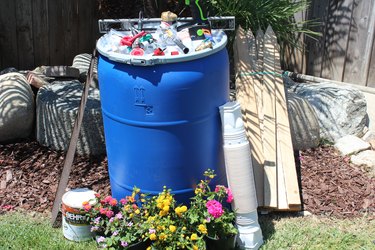
Things You'll Need
55-gallon food-grade plastic barrel with a screw-top lid
Power drill
1-inch drill bit
3/4-inch brass boiler drain
1 tube of clear silicone sealant
3/4-inch brass pipe hex nipple
3/4-inch plastic female adapters, 2
3/4-inch plastic female cap
3-inch hole-saw
1 foot of window screen
Scissors
5 retaining wall blocks
Level
3-foot wooden stakes, 30
1 gallon of exterior paint/primer combo
3-inch paint roller
450 feet of twine
24-inch bungee cords, 4
Flex-a-spout
Tip
- Be sure to choose a food-grade barrel to ensure your water isn't contaminated by any sort of toxic material.
- Purchasing a barrel with pour spouts already on the lid is recommended.
- Make sure you have a rain gutter already installed on your home, which you will connect to the rain barrel.
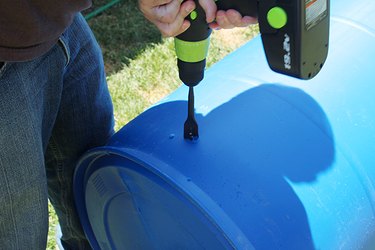
Step 1: Make a Drain Hole
Drill a hole in the barrel using the 1-inch drill bit about 5 inches up from the base. If there is a curve in the barrel, be sure to drill just above the curve. Remove any excess plastic.
Video of the Day
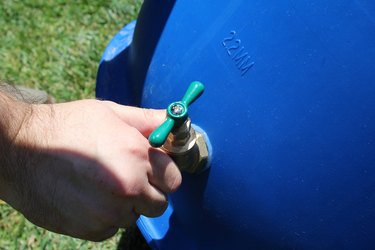
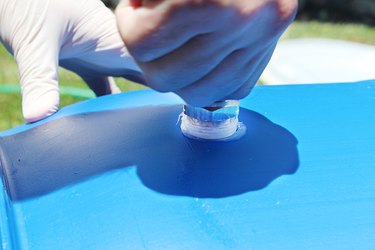
Step 2: Install the Drain
Apply some silicone sealant to the threading of the boiler drain and screw it into the hole you just drilled. You may need to use a little bit of force to make sure the threading catches on the barrel.
Step 3: Create an Overflow Hole
It's up to you where to place your overflow hole, but it is preferable to install it somewhere hidden in the back of the barrel. Wherever it ends up, be sure to place it about 3 inches from the top of the barrel. Use the 1-inch drill bit to create this hole, too. Then coat the threading on the hex nipple with silicone sealant and screw it into the hole. You could either just cap the overflow hole to prevent any bugs or debris from entering, or during a storm, you could also attach a hose to it and place the hose in a more desirable location.
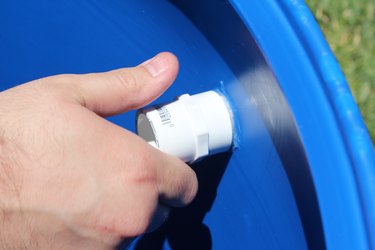
Step 4: Attach the Adapters
Coat the threading on the boiler drain on the inside of the barrel with more silicone sealant. Now attach one of the adapters, while having a helper hold the boiler drain from the outside of the barrel with a wrench. Do the same thing with the overflow hole as well.
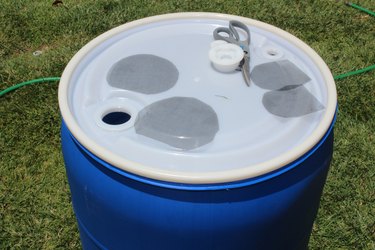
Step 5: Create Filter Holes
If the screw-top lid on your barrel came with pour spouts (which this barrel did), then you can skip this step, as the pour spouts will act as filter holes. To create filter holes on top of the barrel, draw three 3-inch holes on the lid of your barrel, preferably in the center. Now cut those holes out using the hole saw.
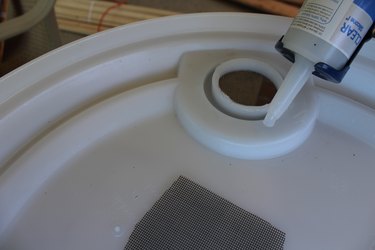
Step 6: Cover the Filter Holes
Cut out two screen pieces large enough to cover the filter holes on the underside of the barrel lid. Apply a liberal amount of the silicone sealant around the underside of the lid around the holes and place the screens over the holes. Repeat this step on the top side of the lid.
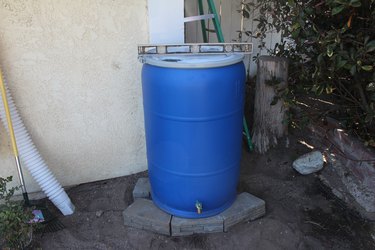
Step 7: Install the Rain Barrel
Situate the retaining wall blocks in an area that is underneath a rain gutter and place the rain barrel on top. Having the rain barrel on top of blocks makes it easier to get water out of the spout. Make sure all of blocks are level before placing the barrel on them. This will help to distribute the weight evenly since the barrel can weigh up to 450 pounds when full of water. You now have a fully functional rain barrel, but there are a few more steps to make it less of an eyesore around the yard.
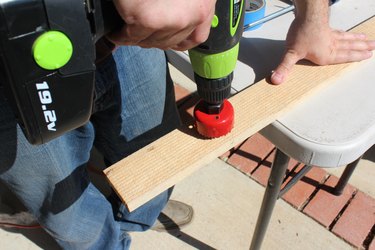
Step 8: Cut Drain & Overflow Holes on the Stakes
Line one of the wooden stakes up with the boiler drain and mark the area on the wooden stake. This is where you will cut a hole using the 3-inch hole saw. Be careful, as there isn't a lot of room for error when cutting out the hole. Now do the same with another wooden stake but this time for the overflow hole.
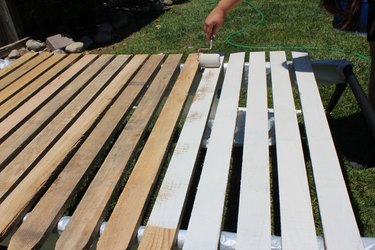
Step 9: Paint the Stakes
Paint all of the wooden stakes with the exterior paint/primer combo.
Step 10: Install Stakes Around the Barrel
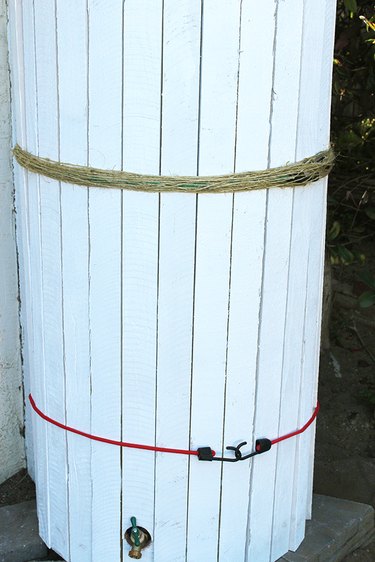
Once all of the paint is dry, it's time to wrap the stakes around the barrel. You might need a helper for this. Start with the stake meant to go over the boiler drain, carefully fitting the drain through the hole. Make sure the bottom of the stake is aligned with the bottom of the barrel. Continue with the remaining stakes, making sure to fit the pre-drilled stake over the overflow spout as well. Once the stakes are all in place, wrap two sets of bungee cords around them to keep them together. Place the bungee cords where you want your decorative twine to go.
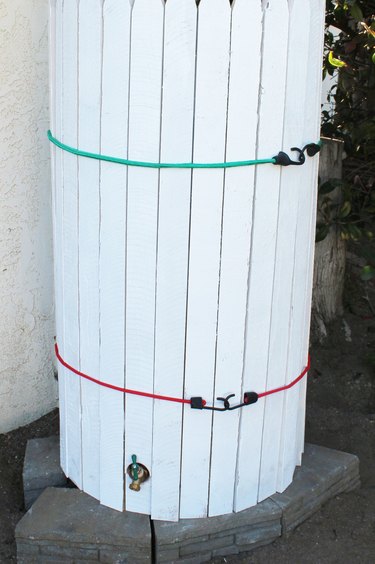
Step 11: Wrap the Stakes With Twine
Wrap twine around each bungee cord to hide them. Start by tying a knot around the bungee cord and start wrapping the twine around the cord until it's completely hidden. Secure the end with a tight knot and cut off excess twine. Keeping the bungee cord underneath the twine will help keep the wooden stakes securely in place.
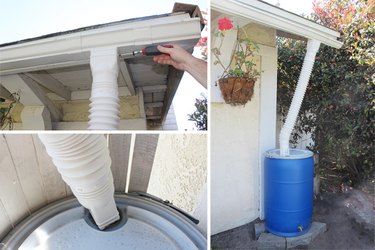
Step 12: Install the Flex-a-Spout
Attach the flex-a-spout to your rain gutter according to the manufacturer's instructions. Hover the other end of the spout over the filter holes. It does not need to be attached to the barrel itself.
Using the Rain Barrel
To use the fresh and nutrient-rich water in your rain barrel after it has rained, you can attach a hose to the boiler drain and use it to water your yard, or fill up a watering can to water plants. The filters should keep any mosquitoes out of the barrel and also keep most debris out as well. Be sure to remove any leaves that may block the filter holes. For colder areas, you may want to leave the boiler drain open to avoid any ice damage.
Warning
- Stored rain water is not meant for human or animal consumption.
- Keep the lid closed at all times to make sure animals and children do not drown or drink the water.
- Be sure to check your local and state laws since some areas do not allow rain barrels.