
How to Build a Large Wooden Barn Door

Because barn doors are so much larger than normal doors, you need to take weight and support into account more seriously. Barn doors that swing out need to be mounted on very large and strong hinges, and sliding barn doors need to be properly balanced and hung on high quality hardware in order to work properly.
Thicker wood will make the door better at keeping heat in, but will also make it heavier.
Things You Will Need
- 16 boards, 1 inch thick by 6 inches wide by 8 feet long
- 2 boards, 2 inches thick by 6 inches wide by 8 feet long
- 1 board, 2 inches thick by 6 inches wide by 10 feet long
- 100 screws, 2 inches long
- Drill
- Chalk line
- 2 C clamps
- Measuring tape
- Circular saw
Build A Swinging Barn Door
-
Lay the 1 inch thick boards out on a flat surface, pressed together tightly. Lay them on a bench or table so that the ends of the boards are hanging off the sides of the table with the undersides accessible.
-
Lay a 2x6 across the other boards, perpendicular to their direction and 1 foot down from what will be the top of the door.
-
Lay another 2x6 parallel to the first 2x6, and one foot up from what will be the bottom of the door.
-
Working from underneath the 1 inch boards, drive screws through them and into the 2 inch thick crosspieces. Drive 2 screws through each board and into the crosspiece.
-
Lay the 10 foot long 2x6 between the two crosspieces diagonally, so it extends from one end of the lower crosspiece to the opposite end of the upper crosspiece.
-
Mark a line on this diagonal piece along the edges of the 2 horizontal diagonal pieces.
-
Cut along these lines so that the diagonal brace will fit in between the horizontal crosspieces, in a way that the 3 pieces make a “Z” shape.
-
Clamp the diagonal piece onto the door and stand the door up.
-
Drive screws through the 1 inch thick boards that make the face of the door into the 2 inch thick diagonal brace.
-
Snap a chalk line across the ends of the 1 inch boards, very close to their ends. Cut along this line with a circular saw to make the top and bottom of the door square and even.
-
Attach three of the biggest hinges you can find to one side of the door.
Build A Sliding Barn Door
-
Build a sliding barn door in the same way as you would build a swinging barn door, with the following exception.
-
Attach the top 2x6 crosspiece right at the top end of the door. This will allow you to attach the wheels that run in the sliding door track to the crosspiece, rather than to the ends of the 1 inch boards. This will make the door much stronger.
-
Prime the wood and paint the door to extend its life.
The Drip Cap
- Because barn doors are so much larger than normal doors, you need to take weight and support into account more seriously.
- Barn doors that swing out need to be mounted on very large and strong hinges, and sliding barn doors need to be properly balanced and hung on high quality hardware in order to work properly.
- Thicker wood will make the door better at keeping heat in, but will also make it heavier.
- Lay a 2x6 across the other boards, perpendicular to their direction and 1 foot down from what will be the top of the door.
- Working from underneath the 1 inch boards, drive screws through them and into the 2 inch thick crosspieces.
References
Resources
Writer Bio
Jagg Xaxx has been writing since 1983. His primary areas of writing include surrealism, Buddhist iconography and environmental issues. Xaxx worked as a cabinetmaker for 12 years, as well as building and renovating several houses. Xaxx holds a Doctor of Philosophy in art history from the University of Manchester in the U.K.
Photo Credits
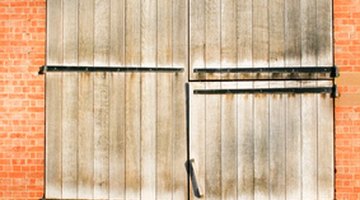
- barn door image by david hughes from Fotolia.com
- barn door image by david hughes from Fotolia.com
More Articles