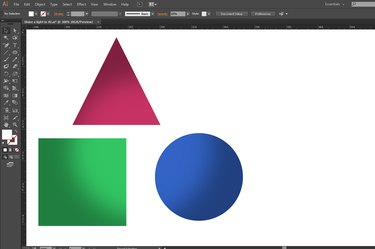
Whether you draw technical illustrations or expressive artwork in Adobe Illustrator, the influence of light and shade play a role in how you depict your subject matter. Along with applying blends, gradients and meshes to add dimensionality and realism, you can use the program's effects and blending modes to simulate the impact of bright light sources illuminating your work. Instead of building these effects directly into object fills, start with a basic geometric shape that models the beam from a searchlight, flashlight or lamp.
Step 1
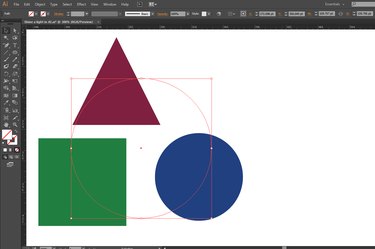
Draw an object above your artwork, either on the same or a different layer. Placing this object on its own layer gives you greater flexibility in how you adjust and review your work. Use the Pen tool to create a freeform shape, or the Rectangle or Ellipse tools to draw a geometric object.
Video of the Day
Step 2
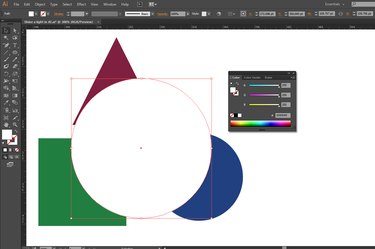
Set the fill color of the object to 255, 255, 255 in an RGB document or 0, 0, 0, 0 in a CMYK file. Use the Color or Control panel, or the foreground swatch in the Tools panel, to assign color. Alternatively, set the "Color" panel to "HSB" mode and set "B," for brightness, to 100 percent. Set the stroke color to "None."
Step 3
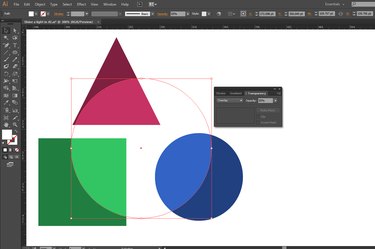
Press "Shift-Ctrl-F10" to open the "Transparency" panel if it isn't already visible. Set the object's blending mode to "Overlay" for a bright light or "Soft Light" for a dimmer appearance. To reduce the influence of the object, lower its opacity to 55 percent.
Step 4
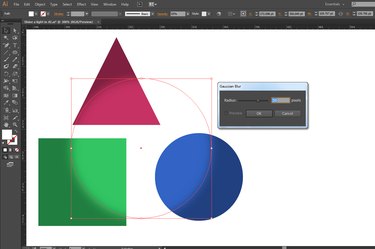
Open the "Effect" menu's "Blur" submenu and choose "Gaussian Blur." Increase the blur radius until the edges of the object soften enough to create the illusion of distance between the light source and the objects it illuminates. The greater the distance between the light and the object, the softer the edges of the light beam.
Video of the Day