Counting down to a specific date can add to the excitement. Particularly with long-awaited or significant events like retirement, a wedding or the birth of a baby. Using a countdown calendar gives you a daily or weekly dose of "getting closer." Advent calendars, used to help count down the 25 days of December leading to Christmas, are a classic example of a countdown calendar. Others involve using paper calendar pages, one for each month, and crossing off each day until a big event arrives; or using simple numbered blocks and changing the numbers each day to count down. Use your imagination and tailor yours to the event at hand.
Step 1

Mark the beginning and ending dates of your countdown period on a standard monthly calendar. For each day that passes, cross out that day on your calendar. For an extended countdown, such as waiting for the birth of a baby, you might mark the calendar by the week, rather than the day: At the beginning of each subsequent week, make notations such as "32 weeks to go," "31 weeks to go," and so on, until the baby's due date. Kids waiting for vacation or the end of school might enjoy adding a sticker each day as a way to mark off that day as they count down, or crossing out a full week at a time with a colored marker.
Video of the Day
Step 2

Count down to a holiday or vacation with an Advent-style calendar. Gather or make enough stickers, ornaments or other small tokens to have one for each day of your countdown. Hang a piece of poster board on the wall or stretch a colored cord across the mantel. As each day passes, hang one of the tokens on the cord or place a sticker on your poster. When the last item is added, you've reached the end of your countdown. Alternatively, use a muffin tin or other sectioned item and place a small token -- coins, tiny toys or candies -- in each section. Cover the sections with colored tape or paper and allow family members to take turns revealing the hidden treasures, one for each day of the countdown.
Step 3

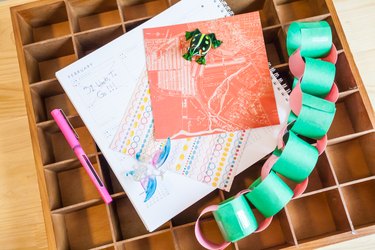
Make a kid-friendly countdown calendar using simple paper loops. This is especially effective for younger children who do not yet understand the concept of traditional weekly or monthly calendars, or who do not yet count well. Cut strips of colorful or holiday-themed paper and loop one through another -- using tape or glue to attach them -- to create a paper chain. Add as many loops as there are days in your countdown. Explain to the kids that they can remove one loop each day, and when the loops are all gone, it will be time for vacation, Halloween, or for a deployed parent to return home.
Video of the Day
- Parents: Countdown to Christmas: Best Advent Calendars
- The Crafty Crow: Advent and Countdown Calendars
- Fond-Farewell.com: Make Your Own Farewell or Retirement Countdown Calendar
- Fit Watch: How to Create A 12 Week Weight Loss Countdown Calendar to Burn That Fat
- Bridal Guide: Wedding Countdown Calendar