
Wall Framing Basics

Walls define features in homes and businesses, dividing rooms and creating halls and walkways. If you have some basic knowledge of carpentry tools, you can frame a wall. Follow these guidelines and techniques to make the job go smoothly.

Things You Will Need
- Dimensional lumber
- Circular saw
- Framing nail gun (with nails)
- Measuring tape
- Chalk box
- Carpenter’s level
- Leveling laser or plumb bob
Tip
Take proper safety precautions when using power saws and wear protective eyewear. You can use a hammer and framing nails, but a nail gun allows you to hold the lumber steady with one hand while shooting the nail in straight.
Warning
Match up your studs as explained in Step 4 to allow the space necessary to run plumbing and wiring in the walls, from one floor to the next.
-
Determine the height of your walls. The standard wall height in many homes is 8 feet; lumber yards sell dimensional lumber cut 92-5/8-inches long. These boards are “studs” and, when nailed to a bottom and a top plate, you will have a wall that is 8 feet high after drywall is hung.
-
Choose studs that are as straight as possible. Curved studs are slightly shorter and harder to use in framing. Look the studs over and reject those with large knots, which weaken the integrity of the wood.
-
Determine where your bottom wall plate will go and make a chalk line by holding the string directly on the floor and "popping" it. When popped, the chalk line transfers the chalk to the floor, leaving a pattern for future wall placement.
-
Mark the top and bottom plates where the studs will go. An effective technique for doing this is to layer one over the other exactly where the floor plate will rest. Make the marks on 16-inch centers but, instead of measuring from the edge of the wall, locate the studs beneath the sub-floor.
-
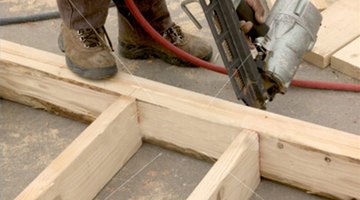
Separate the two plates and lay the studs in between, just as they will fit in the finished wall. You will assemble it on the floor before lifting the entire unit in one piece. Nail the studs into place from the outside of the plates, using two or three nails at the end of each stud.
-
Double the studs at the ends of the walls and around any doors or windows before standing up the framed wall. At this point, you will brace the wall while you stand up against the adjacent walls and square them up before nailing them together.
-
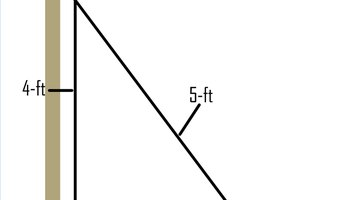
Use a carpenter’s trick to square the corner of your framed walls. The “3-4-5 Method” allows you to make sure your wall sits at a 90-degree angle. With your framed wall in place but not yet nailed down, measure 3 feet from the inside corner of the wall and make a mark on the floor plate. Next, measure 4 feet from the corner along the adjacent wall and make another mark. With an assistant holding the measure tape between the two marks, carefully adjust the new wall until the distance between the two marks is exactly 5 feet.
-
Level the walls vertically, using a laser level or a plumb bob before nailing them in place. It’s handy to have an assistant at this point so one of you can adjust the wall while the other monitors the laser or plumb bob.


The Drip Cap
- Walls define features in homes and businesses, dividing rooms and creating halls and walkways.
- Determine the height of your walls.
- Curved studs are slightly shorter and harder to use in framing.
- Separate the two plates and lay the studs in between, just as they will fit in the finished wall.
- With your framed wall in place but not yet nailed down, measure 3 feet from the inside corner of the wall and make a mark on the floor plate.
- It’s handy to have an assistant at this point so one of you can adjust the wall while the other monitors the laser or plumb bob.
Resources
Writer Bio
Glenda Taylor is a contractor and a full-time writer specializing in construction writing. She also enjoys writing business and finance, food and drink and pet-related articles. Her education includes marketing and a bachelor's degree in journalism from the University of Kansas.
Photo Credits
- Photo, curtesy of Stock.xchng
- Photo, curtesy of Stock.xchng
More Articles