
With its connected shapes and lines, a flow chart can help people visualize an algorithm, which is simply a sequence of tasks one undertakes to complete a process. A flow chart can explain everything from how to plan a party to how to launch a spacecraft. While flow charting software exists, you can create flow charts using pencil and paper.
List Your Tasks
Algorithms appear almost everywhere in life. For example, a store clerk uses an algorithm with tasks such as scanning items, bagging groceries and accepting your payment. Other algorithms, such as those that make up computer operating systems, are much more complex. Before you create a flow chart, brainstorm the process you want to perform and then identify and write down its tasks.
Begin the Process
One of the most important flow chart shapes is the rectangle -- it represents a task in your process. Draw a rectangle and, inside it, write the first task you must perform. For example, if the process is to switch to your favorite TV channel, the first task may be "Pick up the remote control."
Continue the Process
Draw a second rectangle to the right of the first one and write "Push the 'on' button" in that rectangle. Finally, draw a line that connects the first rectangle to the second one and add an arrow on the right end of the line. When you're done, the flow chart contains a logical representation of the first two tasks of the process. The line with the arrow represents the order in which tasks should be executed.
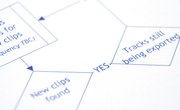
Create a Decision Point
Many tasks in life require people to make important decisions that affect the future. Imagine that your TV does not turn on when you press the remote's "on" button. Your flow chart needs to include tasks for that circumstance. Handle this scenario by drawing a diamond shape, which represents a decision point. Draw a line with an arrow from your second rectangle to the diamond's left side. That line connects the second task to the decision symbol.
Understand the Decision Symbol
The decision symbol enables you to take one of two possible logical paths, depending on the answer to the question you put inside the symbol. Write "TV comes on" in the symbol because that's a decision point after you press the "on" button on the remote.
Perform Logical Branching
Draw a line with an arrow that leaves the symbol's right edge and write "Yes" above the line. That line represents the path to take if the question's answer is "Yes" -- the TV comes on when you press the "on" button. Draw a similar line that leaves the symbol's bottom edge and then write "No" next to that line. This line indicates the path to take if the TV does not come on. You now have two tasks and a decision point that handles the possibility of the TV being on or off after you try to cut it on.
Complete the Flow Chart
At this point, a "Yes" line and a "No" line extend from the decision symbol. Draw another rectangle at the end of one of the lines and write the next step in the process. For example, if you drew a "No" line, the next task might be to "Check the TV's power cord." If you drew a "Yes" line, that task might instead be to "Press the desired station number on the remote."
Flowcharting Tips
The TV example is a simple one that only has a few tasks. As you work with more complex algorithms, your flow chart will contain many more process and decision point symbols. Other flow chart symbols exist, but the process and decision shapes are all you need to model simple processes. As you design a flow chart, you may discover some steps are missing from your original list. Whether you use pencil and paper or a flow charting program, it's simple to add new symbols, delete existing ones and rearrange them as the flowchart comes to life.
References
About the Author
After majoring in physics, Kevin Lee began writing professionally in 1989 when, as a software developer, he also created technical articles for the Johnson Space Center. Today this urban Texas cowboy continues to crank out high-quality software as well as non-technical articles covering a multitude of diverse topics ranging from gaming to current affairs.
Photo Credits
shironosov/iStock/Getty Images