Like fine wine, oak becomes more nuanced and attractive with age, and restoring an old piece of oak furniture is almost always preferable to throwing it away. There are few structural issues you can't repair, and few cosmetic ones you can't address with wood filler, stain and a fresh coat of finish. In some cases, you can bestow new life with no repairs at all -- just a good cleaning and a restorative finish coat.
Clean Off Dirt and Wax
Video of the Day
Whether or not repairs are necessary, you should always begin a restoration project by cleaning the piece of furniture. A mixture of dish soap and water is usually all you need for this procedure; wash off grime and scuff marks with a sponge, and then dry the wood with a rag. Check for wax by running your fingernail along the wood. If it comes up waxy, rub the wax off the wood with mineral spirits or naphtha. This step is vital if you plan to sand and refinish, because the wax will gum up your sandpaper and interfere with finish adhesion.
Video of the Day
Strip the Finish and Make Repairs
A peeling, cracking finish or one that's still dull after cleaning should come off, and there's no easier way to do this than stripping it with paint stripper. Whether you use a methylene chloride stripper or a safer soy-based product, you want to spread it liberally with a paintbrush and scrape it with a paint scraper and steel wool. Be sure to wear gloves and goggles. The best time to make repairs -- such as gluing loose joints and filling gouges and cracks with wood filler -- is after you've neutralized the stripper with water and the wood has dried. Once you've completed these repairs, it's time to sand the wood.
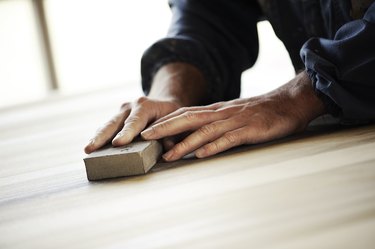
Sand With Medium and Medium-Fine Paper
The quality of your sanding job strongly influences the appearance of the finished furniture, so it pays to work carefully and use the right tools. You seldom need sandpaper coarser than 100-grit to remove the residue from stripping, and you'll probably want to use a palm sander. Be sure to sand again by hand using 120-grit paper, going with the grain of the wood. Make a third pass with 150-grit paper on tabletops and other smooth, flat surfaces. Use a rotary tool to sand crevices in turnings, spindles and carvings.
Seal and Stain
It's important to seal the wood soon after you sand, because the grain is open and vulnerable. If you want a clear oil finish, simply wipe on a coat of tung or linseed oil with a cloth; let it dry. Then sand lightly with 320-grit sandpaper and wipe on another coat. If you prefer to stain and clear-coat, it's a good idea to precede the stain with a clear wood conditioner, which helps the stain penetrate uniformly. Apply liquid stain with a brush or gel stain with a rag, and wipe off the excess with another clean cloth. Let the stain dry overnight.
Apply a Protective Finish
You may wish to wipe on an oil finish over stained oak for a natural, muted surface, or you may prefer the protection and gloss of a film coating. If you choose varnish, apply it with a clean brush; lacquer is a faster-drying, more subtle finish that should be sprayed using air spray equipment or aerosol cans. Two coats of varnish are usually enough, but if you use lacquer, plan to apply three or more. Sand each coat with 320-grit sandpaper after it dries and before applying the next. After the final coat has cured for several days, buff it up with paste wax or furniture polish for a lustrous sheen.