Christmas tree decorating is an exciting part of the holiday season, and it is the time you create the tree look that suits your decor and your family. If you are looking for some DIY Christmas tree stand ideas, consider stabilizing the tree in a bucket. A bucket as a Christmas tree base will make an artificial Christmas tree appear more realistic, and it serves the purpose of hydrating a live Christmas tree.
Of course, you can always shop for a stand on Amazon or at a local store, but this is a great opportunity to try a Christmas DIY project with this tutorial. The bucket must fit your tree, so you will need to take accurate measurements of the tree before purchasing a bucket to use as your stand.
Video of the Day
Video of the Day
The most important aspect of using a bucket Christmas tree stand is stabilizing the tree to ensure that it does not topple over. Once your tree stabilizes, you can decorate the bucket to suit your decor needs.
Things You'll Need
Measuring tape
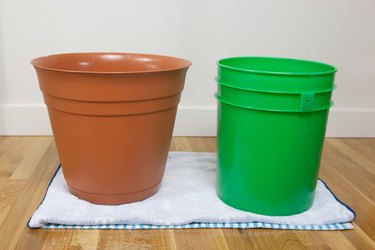
Bucket (sized according to the tree)
Mild soap
Saw
Bricks
Rocks
Moss
Christmas tree skirt
or decorative cloth
Spray paint
Ribbon
Tinsel
Bows
Take measurements of the tree and the bucket
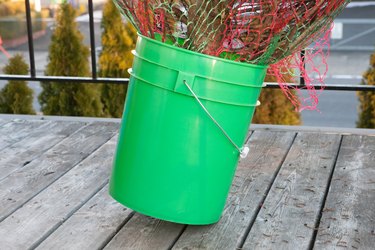
Measure the base of your Christmas tree with its stand. Choose a bucket that will hold your tree. The bucket will need to be sturdy and tall enough to hold the tree's weight. A small container will require you to support the weight of your tree with rocks and bricks. This will require experimentation to ensure that you stabilize the tree.
Tip
Make sure the tree will fit inside your house before bringing it home.
Prepare the Christmas tree
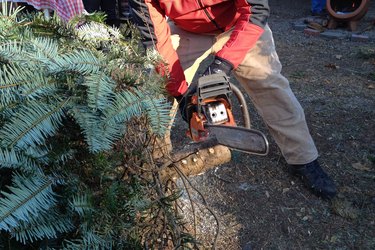
Clean the container with warm water and mild soap. If you're placing a real tree in the bucket, you will need to prepare the tree. Saw off 1 inch from the bottom of the trunk to create a fresh cut to allow water to absorb through the pores. Fill the container with 2 to 3 liters of water and do not allow the water level to drop below the tree's trunk.
Tip
Add 1 quart of water for every inch of the tree's diameter when adding water to a real tree.
Stabilize the tree in the Christmas tree stand
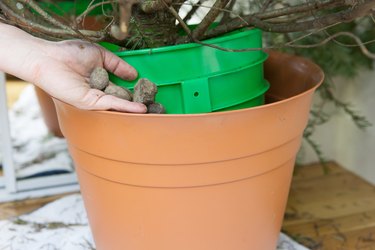
Ensure that the tree is secure. Use additional bricks or rocks inside your container or place them on top of the tree stand. You can use bricks and rocks at the bottom of the bucket to make your tree appear taller as well.
Warning
When setting up the bucket for a real Christmas tree, do not add soil or sand to the bucket because it will block the pores, which will prevent the tree from being able to drink water.
Decorate the bucket Christmas tree stand

Decorate the bucket. If the bucket holds an artificial tree, hide the base of the trunk with moss. You can mask a real Christmas tree's bucket by wrapping a Christmas tree skirt or a piece of decorative cloth around the top of the bucket. Secure the cloth with a ribbon.
If you opt to leave some or all of the pail uncovered, you can even spray paint it to match your other holiday decor and decorate the outside of the bucket with ribbons, tinsel and bows.
Add Christmas decorations to the tree

Add the final additions to the tree. Once you secure the tree inside the bucket, add all of your favorite ornaments and lights.
You can skip spending money on an expensive tree stand and create a stunning Christmas tree that fits your holiday decor and brings joy to your family using a simple bucket. Make sure to stabilize the tree in the bucket with common items, like rocks and bricks, before decorating the bucket or adding a tree skirt. This DIY project is sure to be a success this holiday season.