
Differences Between Curtains & Window Panels

Designers use the term "window treatment" to describe the act of covering the window without specifying what type of covering will be used. Window treatments make use of curtains, panels, drapes or other coverings to accentuate a room while providing various levels of functionality, such as insulation.
Many people use the terms "curtains" and "panels" interchangeably when planning a window treatment, but there are some key differences.
Curtains
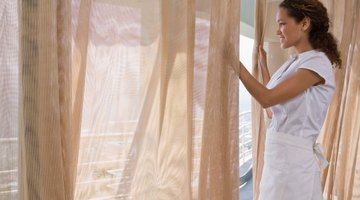
Curtains are a form of window treatment used to dampen sound and insulate against hot and cold weather. Blackout curtains are lined on the inside of the panel to limit or block exterior light. Some curtains are purely decorative, being made from thin fabrics, such as silk, and do little more than accentuate a room. What makes the window treatment a curtain is the layout of the elements. Curtains hang from rods with decorative accents, such as ties or ruffles. Decorators use floor-to-ceiling curtains to give the illusion of a taller window. Other curtains barely stretch from the top to the bottom of the frame.
Panels
A window panel, according to Rental Decorating Digest, is any four-sided window hanging. A bed sheet hung up with nails to cover a window can be considered a window panel. The term is used to indicate the main component of a window treatment. Panels are used in curtains, drapes and other types of window treatments. The difference is best explained by comparing a spoon to a table setting. The panel, like the spoon, can be used independently. A panel can be used alone to simply cover a window, as seen on many glass doors. However, combine a panel with other elements, such as sashes or liners, and it becomes a curtain, similar to the way a spoon combined with a knife and fork becomes a table setting.
Types of Curtains
The most common type of decorative curtain uses tied-back or held-back panels. The panels hang from a rod and are secured to the wall with a tie or sash, giving the window the appearance of a stage curtain. Cape Cod curtains are similar to the basic style. The style uses panels with ruffled edges loosely hanging from a rod and tied off to the side of the window to remain open. Cape Cod curtains usually complement a cottage-style house.Other decorative types of curtains include the bishop's sleeve, in which the curtains are pulled up at different points, creating the appearance of a fluffy shirt sleeve. Tab-top curtains are common in most homes. Tab-top curtains use panels with rungs or tabs on the top that hook over a bar stretching across the top of the window. Tab-top curtains slide open and close without the use of mechanical rods.
References
Photo Credits
- Jupiterimages/Comstock/Getty Images
- Jupiterimages/Comstock/Getty Images
More Articles