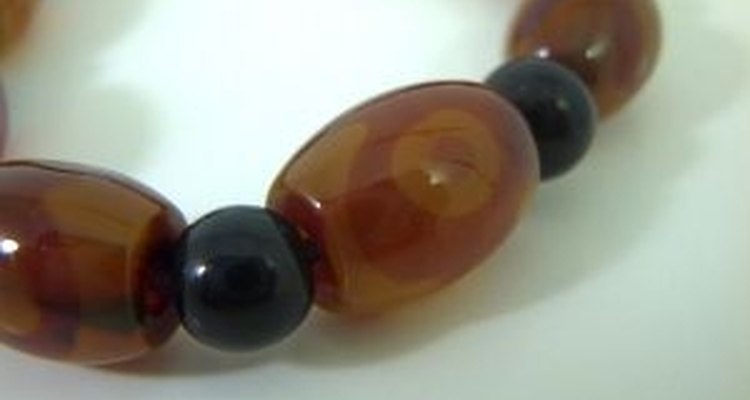
Agate is a beautiful and versatile gem that can be used to make nearly any type of jewelry. Choices are nearly endless, from bold bands to shimmering crystals, and the soft patterns of moss agate to the bright colors of dyed blue, pink and purple agate. Here's how to make agate jewelry. These instructions are for an agate beaded necklace, but the same techniques can be used to create agate bracelets, anklets, and just about any other type of beaded jewelry you can dream up.
Prepare your work area.Lay out the small towel or cloth in front of you. The towel will give you a place to set beads while you work without them rolling away. Set all of the items you will be using within easy reach. It is easy to lose pieces or ruin a beading project if you have to keep getting up and down to get supplies. Set the beading board or additional small towel within easy reach of your dominant hand. This is where you will place the beads you will use in your necklace.
Choose a pattern for your agate necklace.You can just grab random beads and have an entirely random pattern if you like, but most necklaces are made based on a predetermined pattern. Even if you use a random pattern, your necklace will look more professional and finished if you place small spacer or seed beads between the agate beads.One common and simple pattern is: three agate beads, one accent bead, three agate beads, repeated throughout the whole necklace, with small spacer beads between every agate and accent bead. For more patterns, try visiting FireMountainGems.com and click ing on the "Gallery of Designs" link. You can use the patterns they offer, or use them as a guide for coming up with your own. One wonderful thing about agate beads is that the patterns are only limited by your imagination. Lay the beads out on the bead board or on the extra towel in the pattern you have chosen.
Tie on the clasp.Using a double knot, tie one side of the clasp on to the end of the beading thread furthest away from the needle. You may tie a second double knot to strengthen the necklace if you so choose, but it is possible that a second knot would be slightly visible. Leave the small "tail" or end of the thread that is hanging from the knot. If you are having difficulty pulling your knots tight, you may want to grasp the tail with needlenose pliers and use them to firmly tighten the knot.Place a small drop of clear fingernail polish or jewelry glue on the knot.
Thread the beads.One by one, thread the beads on to the necklace, following the pattern you chose in Step 2. If you make a mistake and put beads in the wrong order, simply slip them back off of the thread and try again.
Tie on the other half of the clasp.Take your time on this step. The knot must eliminate any slack in the thread between the beads and the clasp or you will end up with an unsightly space between the last bead and the clasp. Slide the clasp onto the necklace. Hold the necklace in the air with the clasp end you already tied on at the bottom and the loose clasp end at the top so that the beads naturally fall against each other and eliminate any gaps. If the beads have very small holes, you may need to gently push some of the beads down the thread until they are all touching each other. Tie a loose knot fairly close to the clasp. Don't tighten the knot yet. Put the corsage pin through the center of the knot, and keeping it loose, slide the knot down against the clasp. Make sure there are no gaps between beads, and then tighten the knot with the corsage pin still in place. Use the pin to keep the thread tight so that there is no space between the knot and the clasp end. Carefully slide the pin out of the center of the knot and give a small tug to make sure the knot is tight. Pearls.com has good pictures of this technique at http://www.pearls.com/education/traditional_knotting.htm.Tie a second knot on top of the knot you just made so that you have a double knot. Place a small drop of clear fingernail polish or jewelry glue on the knot.
Snip off the "tails" or ends of the thread.Allow the nail polish or glue on the knots to dry thoroughly. Then pull the tail tight and carefully cut off the excess thread as close to the knot as possible on each end of the thread. If you don't have beading scissors, use nail clippers to get close to the knot. Place another small dab of nail polish or glue on the knot where you clipped the thread.
Clean your agate necklace..Once your agate jewelry is finished, you may notice fingerprints on the agate beads. These can easily be cleaned using some glass cleaner and a paper towel. In fact, you can treat the surface of agate pretty much like you would a glass window. Clean it gently and be careful not to scratch it.
Related Articles
How to Repair a Bead Necklace

How to Make a Friendship Bracelet

How to Remove Glue From Jewelry
How to Make a Paper Bouquet Holder
What Is a Pendant Enhancer for Jewelry?
How to Make Indian Wedding Garlands
How to Put in a Captive Bead Lip Ring
How to Make Large Decorative Bows
How to Get Kinks Out of Gold Chains

How to Make Artificial Bouquets

Turning a Ring Into a Necklace

How to Attach a Wedding Veil to the ...

How to Make Wire and Beaded Jewelry

How to Make a Tent Out of Sheets

How to Decorate for a Very Small Indoor ...
How to Get Rust off a Faux Gold Necklace

How to Take Off a Claire's Glue-On Nail ...
How to Remove Pierced Earrings From ...

How to Shorten Bracelet Chains
How to Monogram Shirt Cuffs