Shinky Dinks is the name of a type of shrink plastic. When heated, shrink plastic reduces in size. Designs drawn or printed on shrink plastic reduce too. Some polystyrene items, such as number 6 plastic, can be used like shrink plastic. These substitutes don't reduce evenly like artist-quality shrink plastic, behaving differently depending on how the plastic was treated and pre-formed. They can be interesting to work with despite -- or even because of -- these variations.
Plastics That Shrink
Video of the Day
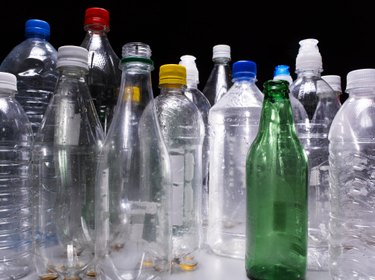
Plastic items suitable for shrinking are made from hard polystyrene. This plastic is coded as plastic six for recycling purposes and will have the numeral 6 embossed or marked on the item. Possible sources include two-liter soda bottles, hard plastic food containers and some disposable cups. It's important that the number six mark appears on the plastic, as other plastics may not shrink and can give off noxious fumes when heated.
Video of the Day
Preparing Plastic Items for Shrinking
Unlike the sheets of shrink plastic sold for crafting, containers have been pressed and stretched into different shapes. This means that they will shrink unevenly. Cups, for example, have been stretched vertically, and plastic from the walls will shrink mostly in the vertical direction. It's advisable to experiment before any detailed work, as uneven shrinkage can ruin a design. Whole items or sections of plastic can be tested by heating.
Colors and Designs
When shrunk, colored plastics can sometimes become more intense and vibrant. Soda and other beverages sometimes come in colored bottles. Plastic cups and plates are often highly colored. Shrink plastic can be decorated with alcohol inks and stamps, permanent markers or acrylics. If the plastic surfaced is roughened a little with fine sandpaper, colored pencils can also be used.
Cutting and Shaping
Shrink plastic can be cut using scissors. It's best to do any cutting before the plastic is shrunk as it becomes thicker and tougher, although it can still be carved with a hobby knife. Splinters should be trimmed as they can become hard and sharp. A standard hole punch can be used for holes; a quarter-inch hole will reduce down to an eighth of an inch and an eighth-inch hole will shrink to one-sixteenth of an inch.
Possible Projects
Shrink plastic can be used to make charms and beads for jewelry, as well as embellishments for greetings cards and scrapbooking. Shrunken items made from colored plastic can be made into sun-catchers. Pieces of colored shrunken plastic can be turned into tesserae for mosaics.