

Covered wagons are an enduring symbol of America's westward expansion in the 19th century. The most common kind was the Conestoga wagon. Usually pulled by teams of mules or oxen, these wagons transported pioneers and their families and goods across the plains and mountains as the western regions of North America were settled.
Items you will need
Wooden planks
Wooden beams
Bolts
Nails
2 axles
Iron braces
Wagon wheels
Wooden lathes
Canvas
Wooden pole
Step 1
Begin with the wagon box. The box of a Conestoga wagon is also called a Yankee bed. The Yankee bed consists of an open-topped arrangement of wooden planks or boards. Set up a large board for the bottom, about 10 to 12 feet in length and around 4 feet wide. A true Conestoga would be about twice this size. The smaller version is known as a prairie schooner. Bolt another two 10- to 12-foot planks to the long sides of the bottom plank. These sideboards should be about 2 or 3 feet high. Fill any gaps in the boards with tar or caulking.
Step 2
Select a narrow beam about the same length as your Yankee bed. This will be the support for the wheels. It must also be strong enough to support the weight of the Yankee box and cover as well as all your passengers and freight. Select two 4-foot beams and bolt them to the underside of each end of the long main beam. They should be perpendicular to the main beam. Attach a brace to the underside of each end of these 4-foot beams. Your brace can be iron, or it can be a triangle made of wooden beams. It must be the right size for an axle. The axle must fit through it and be able to move freely. If you make a wooden triangle, make sure it points downward.
Step 3
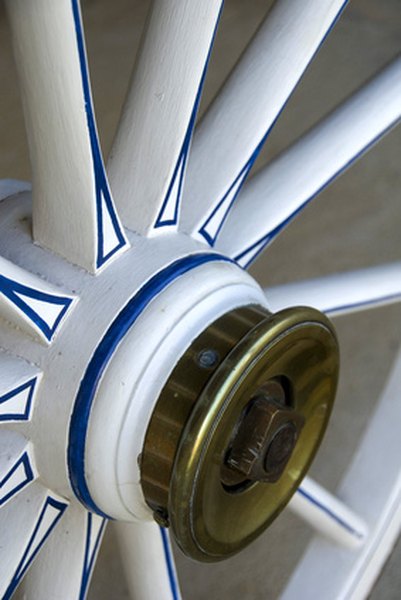
Thrust an axle through each pair of braces. Attach a wagon wheel to the end of each axle. A traditional wagon wheel has wooden spokes and a wooden rim. The wooden rim is enclosed by an iron tire. Wagon wheels are complicated to build; your best option is to buy them. Next, attach two more short beams to the top of the long main beam that is your wheel base. These two beams can about the same dimensions as the beams supporting the axles. Attach them a little in from the axle beams. Bolt them up on their long sides so you get some height above the wheel base. Next, attach the Yankee bed to these beams and bolt it into place.
Step 4
Use some thin beams to make your bows. The bows are the arched pieces of wood that go on top of the Yankee bed to support the canvas cover. Make the bows by soaking or steaming the thin beams and slowly bending them to the right shape. Attach these bows to the sides of the Yankee bed. You'll will need four or five bows. Space them evenly along the Yankee bed. Finally, get a large piece of canvas and stretch it over the bows. This is your bonnet, or cover.
Step 5
Build the tongue for the covered wagon. The tongue is a long, wooden pole that attaches to the front of the wheel base. Traditional wagons use an arrangement of wooden singletree and doubletree to hold the tongue in place and permit it to move up and down. About as long as the axles, the singletree sits below the tongue. The doubletree is about the length of the crosspieces above the wheels. It sits on top of the tongue. To make the yoke, attach a short pole perpendicular to the top front end of the long tongue. The harness is attached to this yoke.
Tips
- Wagon wheels are different sizes in the front and the back. This allows for easier maneuvering. The front wheels were usually around 44 inches in diameter, and the back ones are about 50 inches.
Tips
- Wagon wheels are different sizes in the front and the back. This allows for easier maneuvering. The front wheels were usually around 44 inches in diameter, and the back ones are about 50 inches.
Writer Bio
Brian Adler has been writing articles on history, politics, religion, art, architecture and antiques since 2002. His writing has been published with Demand Studios, as well as in an online magazine. He holds a Bachelor of Arts degree in history from Columbia University.