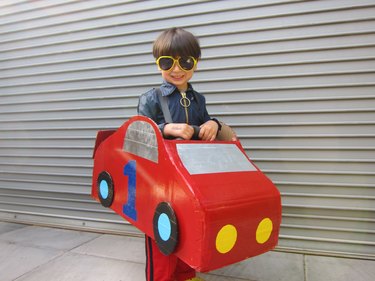
Want a retro costume -- how 'bout a good old-fashioned red sports car burning rubber and taking names at every party in town? You'll be on cruise control in this classic, so get off your cloud and DIY car costume. (Word to the wise: Shades never go out of style.) Vroom to the vroom.
Video of the Day
Things You'll Need
1 large cardboard box
1 smaller rectangular cardboard box, 12 by 9 by 5 inches
Pencil
Cutting mat
Box cutter
Hot glue gun
Masking tape
1 pint red glossy oil-based paint
6-inch mini paint roller
Black duct tape
Light blue duct tape
Parchment paper
Yellow duct tape
Royal blue duct tape
Silver duct tape
Black 1-inch gaffer's tape or electrical tape
Sporty jacket
Sunglasses
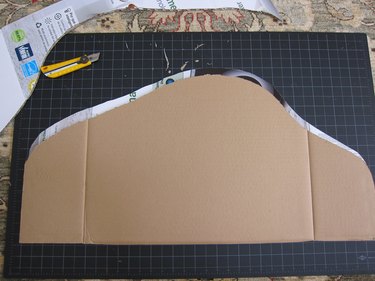
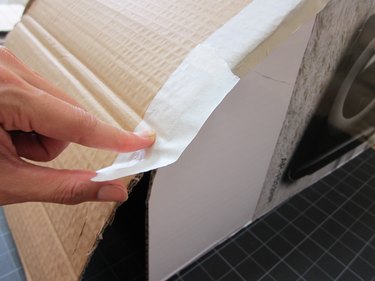
Step 1: Cut Out the Silhouette
Cut the box open and into two pieces. Folds are OK. They can be flattened and reinforced flat with a piece of cardboard glued behind them. Draw a profile of a car on one side of the cardboard, and cut the shape out with a box cutter.
Video of the Day

Step 2: Cut a Second Silhouette
Lay the second piece of cardboard behind the first piece, trace the shape, and cut out the second piece. If there is a bend in the cardboard, glue a piece of cardboard behind the bend to straighten it out from the back.
Tip
If one side of the box has a design on it, you might want to use the unmarked side; however, the design can be easily covered with an extra coat of paint or two.
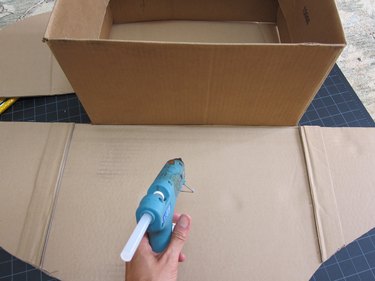
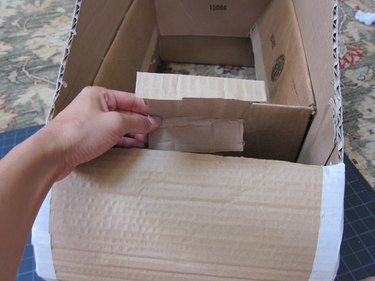
Step 3: Secure Flaps Inside the Box
Fold your smaller rectangular box flaps in and glue them to the sides of the box to create a strong inner frame for your car. Attach a cardboard car silhouette to each side of the smaller box with masking tape.
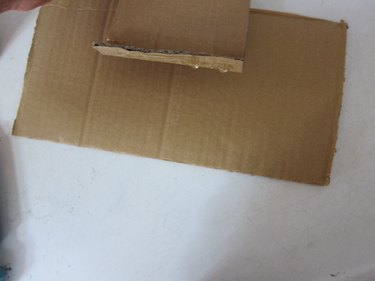
Step 4: Create a Hood and Trunk
Cut a piece of cardboard that is the same width of the car. Tape it with masking tape to the front of the car, rolling it down the front to create the hood of the car. Reinforce the underside with additional tape. Do the same to the back of the car to create the trunk.
Step 5: Make a Spoiler
Create a spoiler with another piece of rectangular cardboard and another little piece of cardboard bent in two places. Attach one bent part with hot glue to the car and the other bent section of the cardboard to the flat piece of cardboard.
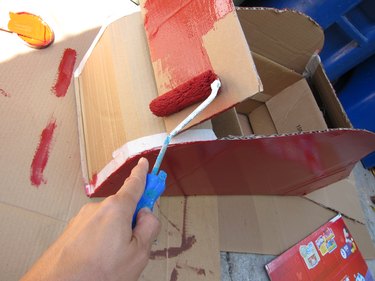
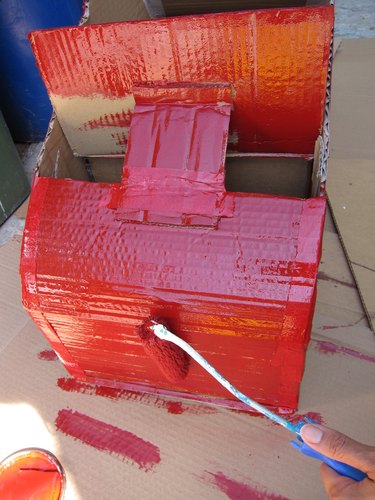
Step 6: Paint Your Cardboard Car Red
Using your red paint and a paint roller, paint the whole car red. Use a really thick oil-based, ultra shiny paint to give it a high-gloss car look. Allow the first coat to dry, and then paint a second coat.
Tip
Paint outside or in a well-ventilated area.
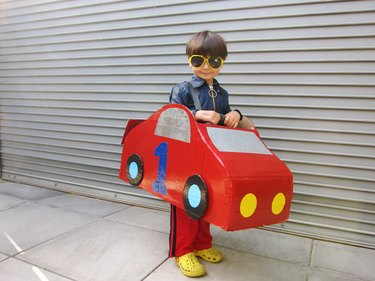
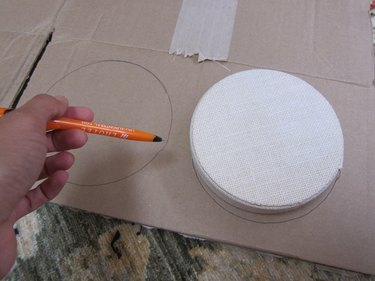
Step 7: Make the Wheels
Trace four 7-inch circles onto cardboard for the wheels. The top of a storage box works well for this. Cut them out with scissors. Overlap black duct tape onto the cardboard wheels or paint them black. Score and wrap the ends of the tape around the back of the wheels.
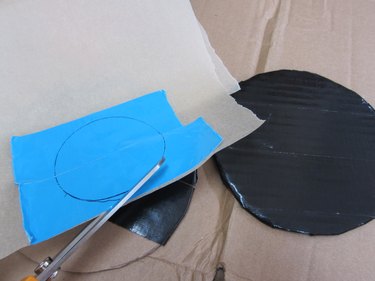
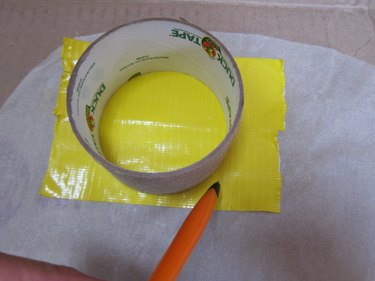
Step 8: Create Wheel Rims
Overlap light blue duct tape onto either side of a sheet of parchment paper. Trace a 3-inch circle for the inside of the wheel using your duct tape roll as a template. Cut out four blue circles with scissors, peel off the backing and tape them to the center of each wheel. Tape all four wheels to the sides of the car.
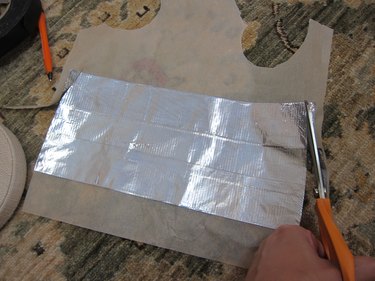
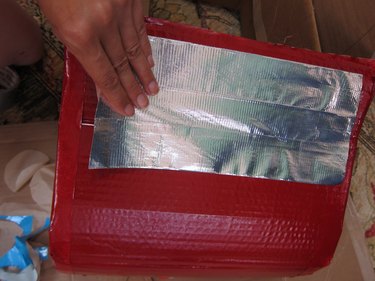
Step 9: Make Car Windows
Overlap strips of silver duct tape on parchment paper to create a large sheet of duct tape a couple inches smaller than the width of the front of your vehicle, and then cut out a windshield shape. Make two more sheets and cut out side windows a little smaller than the sides of your car. Tape the windshield and side windows to the car.
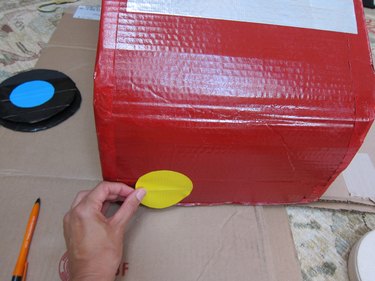
Step 10: Make Car Headlights
Overlap pieces of yellow duct tape onto parchment paper and cut out two yellow circles using the same size circle as the inside of the wheel. Tape these to the front of your car where the headlights would be.
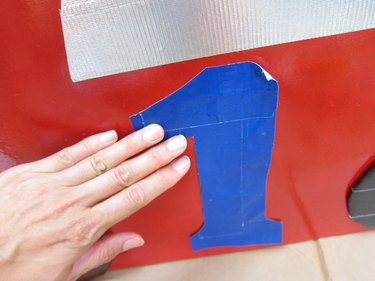
Step 11: Number Your Cardboard Car
Use blue duct tape to make a large blue area on parchment paper and trace a number onto it. Cut this out and stick it onto the side of the car. Repeat for the other side.
Step 12: Add Straps to the Cardboard Car
Use the 1-inch tape and loop it around the inside box, and then run it upwards to the other side of the box where it will fall on the shoulders of the costume wearer. Double the back of the tape to reinforce it and cover up the stickiness. Tape it together at the back to keep the straps narrow on the shoulders.

Tip
Wear clothes that coordinate with your DIY car costume to ensure maximum stylishness.
Now step into your car and zoom off to Candy Land!