
How to Tile a Bathroom

Table of Contents
A typical bathroom tiling job has four stages: preparing the substrate, laying out the tiles, gluing the tiles and, finally, grouting them.
Ceramic and porcelain tiles are attractive, waterproof and easy to clean. These are three good reasons why they are a favorite choice for bathroom walls and floors. Despite what you might think, tile setting is less challenging than many other home improvement projects, and as long as you have an eye for detail and the right tools, you can do a great job of installing the tile yourself. To get results that you'll enjoy for years to come, it's key to prepare a stable, flat and level surface before you get to the fun part: laying and grouting the tiles.
Preparing the Substrate
-
Remove the existing flooring and/or wall covering. If you're removing old tiles, chip off as much of the old adhesive as you can, and then use a belt sander to remove the rest.
-
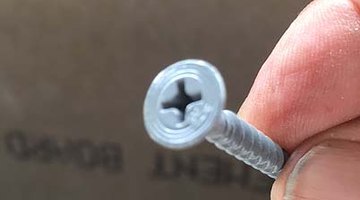
Cover the plywood subfloor with 1/2-inch cement backer board fastened with corrosion-resistant screws that are countersunk flush with the board. Never lay tiles directly on plywood, or you'll have problems with cracking and lifting.
-
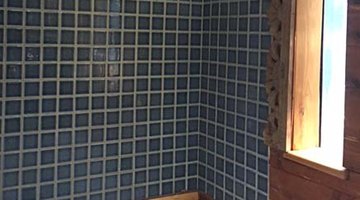
Hang cement board or drywall prior to tiling the walls. Cement backer board is the preferred substrate for wall tiles, but in areas of the bathroom that are out of direct water contact, you can also use water-resistant drywall. This product used to have green paper, prompting builders to refer to it as "greenrock." Nowadays, it has the same color paper as regular drywall.
-
Tape and mud the seams, whether you use cement board or greenrock. Use fiberglass tape and conventional joint compound for greenrock. When taping cement board, use thin-set mortar instead of joint compound.
Laying Out the Tiles
Unless you have some experience, it's best to stick with a horizontal or vertical layout, rather than trying to a lay a diagonal design or more complex pattern.
-
Start the floor layout by finding the center of the main part of the floor, ignoring alcoves for the toilet or closets, and obstructions such as the sink cabinet. Find the midpoints of two opposite walls, then snap a chalk line between these points. Repeat with the other two walls. The intersection of the two chalk lines is your starting point. When you set the wall tiles, you'll use the same technique to determine the starting point on each wall.
-
Set four tiles on the intersection of the two chalk lines so each has a corner pointing toward the center.
-
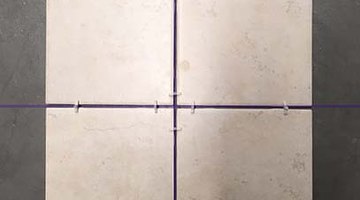
Put tile spacers between the tiles to ensure they are equidistant from each other; then lay out the rest of the tiles the same way.
-
Cut tiles, as needed, to fit when you get to the edges of the surface on which you're working.
Cutting the Tiles
The best way to cut tiles is to use a wet saw, which is like a miniature table saw with a water trough. The diamond blade passes through the water as it turns, creating a stream that keeps the tile wet and prevents it from cracking while you cut it. Keep the saw outside or in the basement or garage--it can be very messy--to prevent the clay-filled spray from ruining your tiles. Use the saw just like a table saw, pushing the tile through slowly to make straight or diagonal cuts and notches. Be sure to wear goggles, work gloves and old clothes when using it.
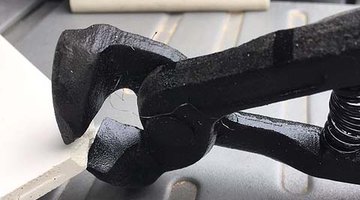
When you need to nip off the edge of a tile to get it to fit next to a pipe or in a corner of the room, use a tile nipper. This tool looks like a pair of pliers, but it has two carbide blades that come together to nip or nibble the edge of the tile. You probably won't need it often, but when you do, you'll be glad you have one. You can also cut tile with a conventional angle grinder, which is a good way to cut tiles to fit against curved walls.
Tip
In a pinch, you can cut tiles with a glass cutter. Score a line, then secure the tile on top of a wire coat hanger with the score line directly over the wire. Press down firmly, and the tile will break on the score line.
Gluing Down the Tiles
The conventional adhesive for floor tiles is thin-set mortar, and this also works for smaller wall tiles, but to stick larger tiles to the wall, you need a tile-setting mastic with more holding power. You can find both at any home improvement supply store.
-
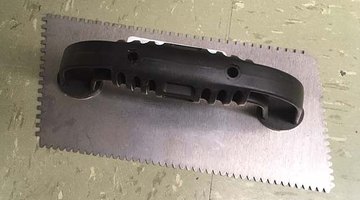
Apply mortar or mastic to the surface using a the proper size notched trowel. A 1/4-inch square-notched trowel is suitable for 4- to 8-inch tiles. For smaller tiles, use a 1/4-inch V-notched trowel. The notches create ridges that flatten out when you press the tiles into place, thus minimizing the amount of material that oozes out from the edges.
-
Set the first tile into the adhesive; press on it to seat it in the adhesive. Place one or two spacers on each side of the tile, depending on its size.
-
Continue setting tile, pushing each tightly against the spacers and pressing it into the adhesive. Wipe away any adhesive that does ooze out immediately, using a damp rag.
-
Leave the spacers in place after you've set all the tiles. Let the adhesive cure for 24 to 48 hours before removing the spacers prior to grouting the joints.
Grouting the Joints
No tiling job is complete until you grout the joints. Most grouts are Portland cement products that come as powders that you mix with water. Use sanded grout for joints wider than 1/8 inch and unsanded grout for joints closer than this. Grout has a limited pot life, so mix only what you can use in about an hour. Because grout can stain unglazed ceramic tiles, it's important to seal these with a penetrating polyurethane or acrylic sealer before you apply the grout. Glazed ceramic and porcelain tiles usually don't need to be sealed prior to grouting.
-
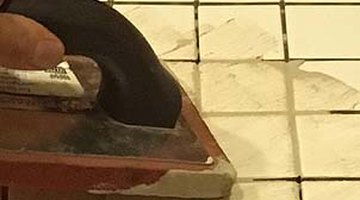
Apply the grout with a rubber grouting float, using diagonal strokes across each joint to force material into the joints, then parallel strokes to remove the excess.
-
Let the grout harden for one to two hours, and then wipe off the haze from the tiles using a sponge soaked in clear water. It's a great idea to have two buckets filled with clean water on hand when you do this. Use one bucket to rinse off the sponge and the other bucket to soak it prior to the next round of cleaning. You may have to clean the tiles with water more than once to remove all the haze.
-
Wipe off the small amount of haze that remains after cleaning using a dry piece of cheesecloth. The grout should be hard when you get to this stage of the job, so apply all the pressure you need to remove the haze.
-
Wait about 48 hours for the grout to cure. Then apply a grout sealer according to the instructions supplied with the product you choose. The most common way to apply it is to spread it with a small paintbrush, wiping the excess from the tiles with a rag as you go.


Check out this related video.
Writer Bio
Chris Deziel has a bachelor's degree in physics and a master's degree in humanities. Besides having an abiding interest in popular science, Deziel has been active in the building and home design trades since 1975. As a landscape builder, he helped establish two gardening companies.
More Articles