
How to Replace a Dryer Bearing on a Stacked Unit

Replacing a dryer bearing on a stacked washer/dryer requires a few additional steps to reach the higher placed dryer unit. While the replacement is similar to stand-alone machines, you will need a stepladder to reach the access panel.
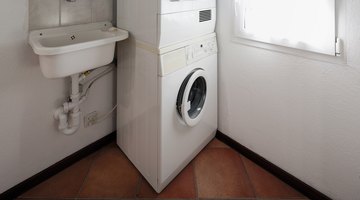
A stacked combination washer and dryer unit is designed typically for use in small areas where a traditional washer and dryer would not fit. Although the unit comes with the dryer built on top of the washer, the way the unit operates is fairly similar to traditional machines. Repairs to the unit also are similar to those of its larger cousins. The only difference when replacing the dryer bearing on the stacked unit is that a stepladder is required to reach the top.
Things You Will Need
- Bucket
- Stepladder
- Screwdriver
- Assorted nut drivers
- Rear drum bearing assembly kit
-
Unplug your stacked unit from the wall outlet. Turn off the water supply valves on the wall. Disconnect the washer’s water supply hoses from the supply lines. Place the ends of the hoses in a bucket to catch any excess water. Disconnect or secure the dryer vent so it is not damaged or pulled when moving the unit. Pull the stacked unit from the wall to access the rear.
-
Remove the screws holding the dryer belt access panel to the back of the stacked unit. Remove the panel to access the idler and motor pulleys. Push the idler pulley away from the motor pulley to release the dryer belt tension. Pull the belt off both pulleys.
-
Remove all the screws from the panel on top of the dryer. Pull the panel off the dryer and set it aside.
-
Locate the two screws directly beneath the control panel holding the front access panel to the unit between the top of the washer and the bottom of the dryer. Remove these screws to lower the panel and expose the four screws holding the control panel to the stacked unit.
-
Remove the four screws along the bottom of the control panel. Pull down on the control panel while pulling out to release the control panel from the unit. Lay the stacked unit control panel carefully on top of the washer.
-
Remove the two screws beneath the dryer door. Remove the four screws from the front top of the dryer to release the front dryer door panel.
-
Pull the door panel away from the stacked unit to access the door switch wires. Pull the two ends of the door switch wiring harness apart and set the front door panel aside.
-
Grab the top front of the drum with one hand and grab the belt with the other hand. Lift up on the belt and drum to pull the drum shaft attached to the back of the drum out of the rear dryer bearing. Pull the drum from the front of the stacked unit and sit it on the floor.
-
Locate the rear drum bearing bracket on the back inside wall of the dryer cabinet. Remove only the left screw from the bracket with a nut driver. Pry the left side of the white plastic bearing from the metal bracket. Replace the screw in the bracket to hold it in place.
-
Remove the right screw from the bracket and pry the entire white plastic bearing from the bracket. Do not lose the small ball bearing in the back of the plastic bearing. Take the ball bearing from the hole in the plastic bearing and set it aside.
-
Fill the small hole in the back of the dryer wall just above the metal bracket with high-temperature grease supplied with the rear drum bearing assembly kit. Fill the bearing hole on the back of the plastic replacement bearing with additional grease. Insert the ball bearing into the hole in the plastic bearing.
-
Insert the right side of the plastic bearing into the bearing bracket. Line up the holes in the bracket, bearing and back wall of the dryer. Replace the screw to hold the right side of the bearing in place.
-
Remove the screw from the left side of the bracket. Push the plastic bearing into the left side of the bracket. Install the screw into the left side of the bracket to secure the bracket and bearing. Fill the plastic bearing with the remainder of the high-temperature grease.
-
Locate the three screws inside the dryer drum that hold the drum shaft to the back of the drum. Remove the three screws to release the old shaft and install the new shaft in its place with the three screws from the original shaft.
-
Lift the dryer drum into the dryer cabinet. Insert the new shaft on the rear of the drum into the new bearing on the back wall of the dryer.
-
Reinstall the dryer drum belt around the idler and motor pulleys in the rear of the dryer. Turn the drum clockwise by hand to center the belt on the drum.
-
Reassemble the stack unit by reversing the steps used to disassemble it.
Unplug and Turn off Water Supply
Remove Panel Lid
Remove All Screws
Access Control Panel
Release Control Panel
Remove Front Dryer Door Panel
Access Door Switch Wires
Carefully Remove Drum
Remove Left Bearing Screws
Remove Right Bearing Screws
Fill Bearing Hole With Grease
Insert and Align Right Side
Insert and Align Left Side
Install New Shaft
Reattach Dryer Drum
Reattach Drum Belt
Reattach All Additional Unit Parts
References
Writer Bio
Cecilia Harsch has been writing professionally since 2009. She writes mainly home improvement, health and travel articles for various online publications. She has several years of experience in the home-improvement industry, focusing on gardening, and a background in group exercise instruction. Harsch received her Certified Nurses Assistant license in 2004. She attended Tarrant County College and studied English composition.
More Articles
- How to Change a Thermistor on a Whirlpool Dryer
- How to Replace the Evaporator Fan on a KitchenAid Refrigerator
- How to Replace a Heating Element in a Whirlpool Duet Electric Dryer
- How to Replace the Sensor in a GE Dryer
- How to Disassemble a GE Profile Dryer
- How to Remove the Back of an LG Tromm Dryer