The insulation on an electric cable is just as important as the conducting wires it protects. The wires are designed to conduct current, so they should have low resistance. However, the insulation is designed to do the exact opposite, which is to block the current and keep it confined to the wires, so it has to have a high resistance to current flow.
You use an ammeter to measure current flow in the wires and an ohmmeter to measure resistance. However, a regular ohmmeter is an approximate tool for measuring insulation resistance and doesn't allow you to measure subtle variations, which are signs of insulation deterioration. The tool to use for measuring cable insulation is a device that measures resistance in the megohm scale. It's called a "megger," which also happens to be the brand name of one of the companies that manufactures them.
Video of the Day
Video of the Day
What Is a Megger?
"Megger" is a term derived from megohm because it's designed to measure resistance of a million ohms or higher. A megger is also known simply as an insulation tester. It's basically an ohmmeter, but it's one that generates its own electricity under high DC voltages, such as 500 and 1,000 volts, and transmits it in small currents through the cable to be tested. The voltages are high, but the currents are small enough to be safe. However, if you short the megger probes by touching them, you can still get a shock equivalent to the one you would get if you touched an electric fence.
Like an ohmmeter, a megger has two probes – one of which usually has an alligator clip – and an analog or digital meter. It usually also has a test button that you need to press to generate the test current.
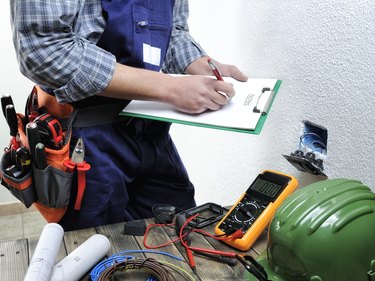
How to Test Cable Insulation
A cable insulation test is basically a continuity test, so the power to the circuit must be off. Either turn off the breaker or, if you're testing the wiring in a piece of equipment, unplug it. Locate the connection point of the wire or cable you want to test so you have access to the exposed conductors. Clamp the alligator clip on one of the megger probes to the wire or cable, touch the other probe to the exposed conductor and press the test button. The megger will generate a current between the probes, and the meter will record the resistance of the jacket to the flow of the current. Maintain contact for 30 to 60 seconds to get a reliable reading.
Look for a resistance reading between 35 and 100 megohms. Acceptable insulation resistance values for electrical cables is 1 megohm per 1,000 volts of electricity.
To keep track of the insulation performance over time, you can take periodic readings with a megger and plot them on a graph. A downward line or curve indicates deterioration, and the slope of the line or curve gives you an idea of how long the insulation will last. Plotting gradual deterioration in this way is a more useful diagnostic tool than spot testing.
Do Homeowners Need a Megger?
Most homeowners will never need a megger. The insulation of residential electrical cables deteriorates very slowly and will probably outlast the house. However, handy homeowners and appliance technicians may find a megger to be a useful tool for diagnosing faulty heat-generating elements, such as those in stoves and water heaters. If you unplug the appliance and connect the alligator probe of the megger to the metal body of the element and the other probe to the conductor terminal, you should get a high resistance reading. A reading below 2 megohms means the element has failed.